lottery
🎉🌟✨🎈年会抽奖程序,基于 Express + Three.js的 3D 球体抽奖程序,奖品🧧🎁,文字,图片,抽奖规则均可配置,😜抽奖人员信息Excel一键导入😍,抽奖结果Excel导出😎,给你的抽奖活动带来全新酷炫体验🚀🚀🚀
JavaScript★ 4.6k
UniFi Voucher Site is a web-based platform for generating and managing UniFi network guest vouchers
 glenndehaan
git clone https://github.com/glenndehaan/unifi-voucher-site.gitglenndehaan/unifi-voucher-siteUniFi Voucher Site is a web-based platform for generating and managing UniFi network guest vouchers
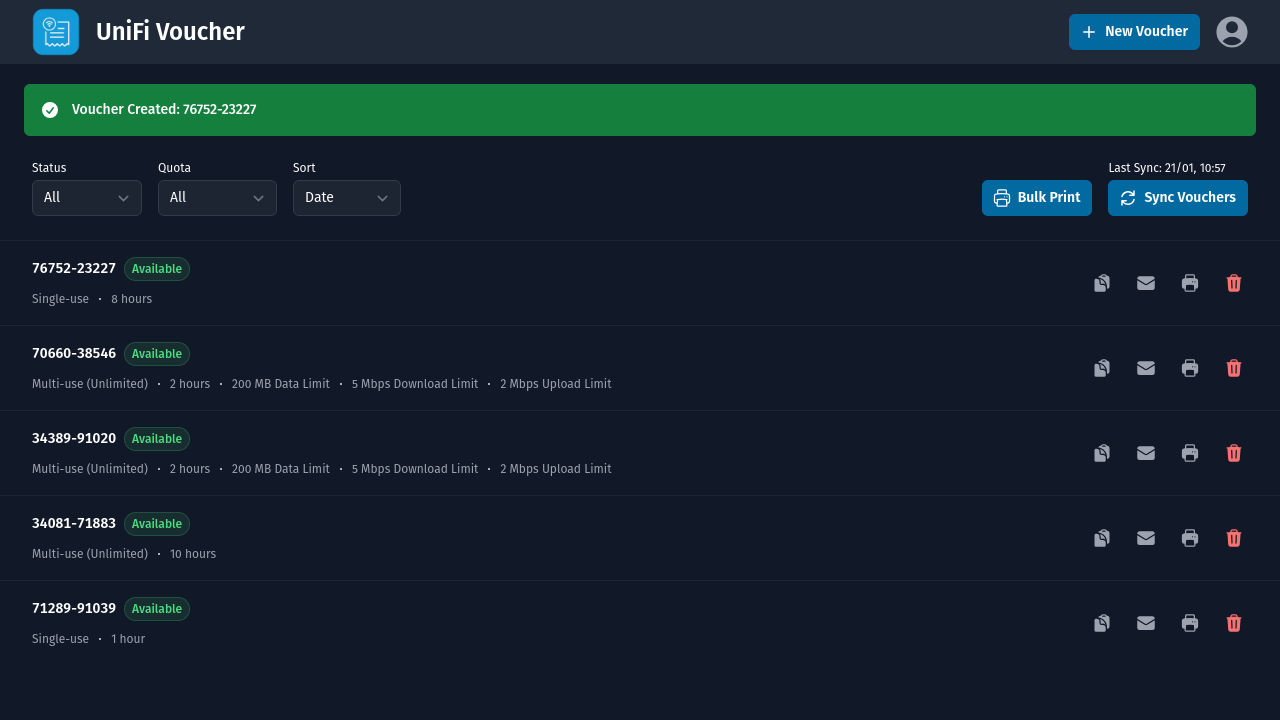
Upgrading from 7.x to 8.x? Please take a look at the migration guide
| UniFi Voucher Site | Cloud Gateways | Cloud Key | UniFi Network Server | UniFi OS Server | UniFi OS | UniFi Network |
|---|---|---|---|---|---|---|
| ≥ 8.x | ✔️ | ✔️ | ✖️ | ✔️ | v4.2.8+ | v9.1.119+ |
| ≤ 7.x | ✔️ | ✔️ | ✔️ | ✔️ | - | v5.4.9+ |
Note: Running the Legacy UniFi Network Server but want to upgrade to 8.x? Follow the official guide to migrate to UniFi OS Server: https://help.ui.com/hc/en-us/articles/34210126298775-Self-Hosting-UniFi
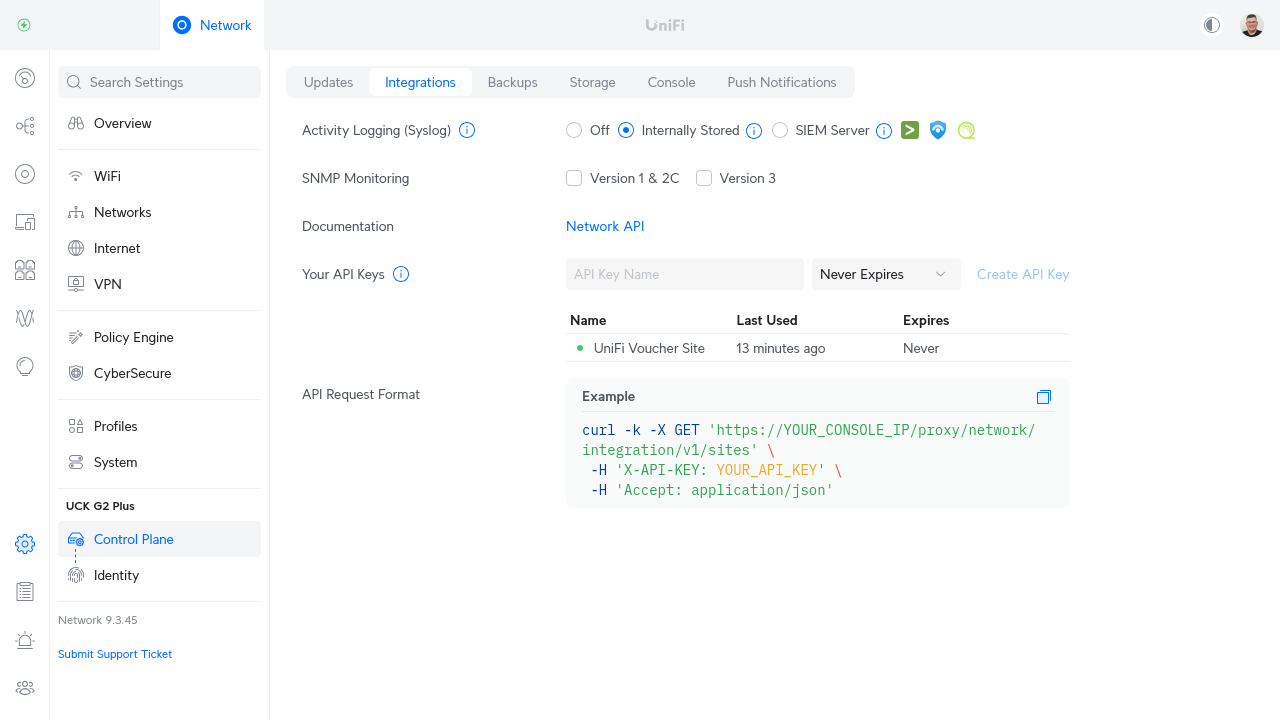
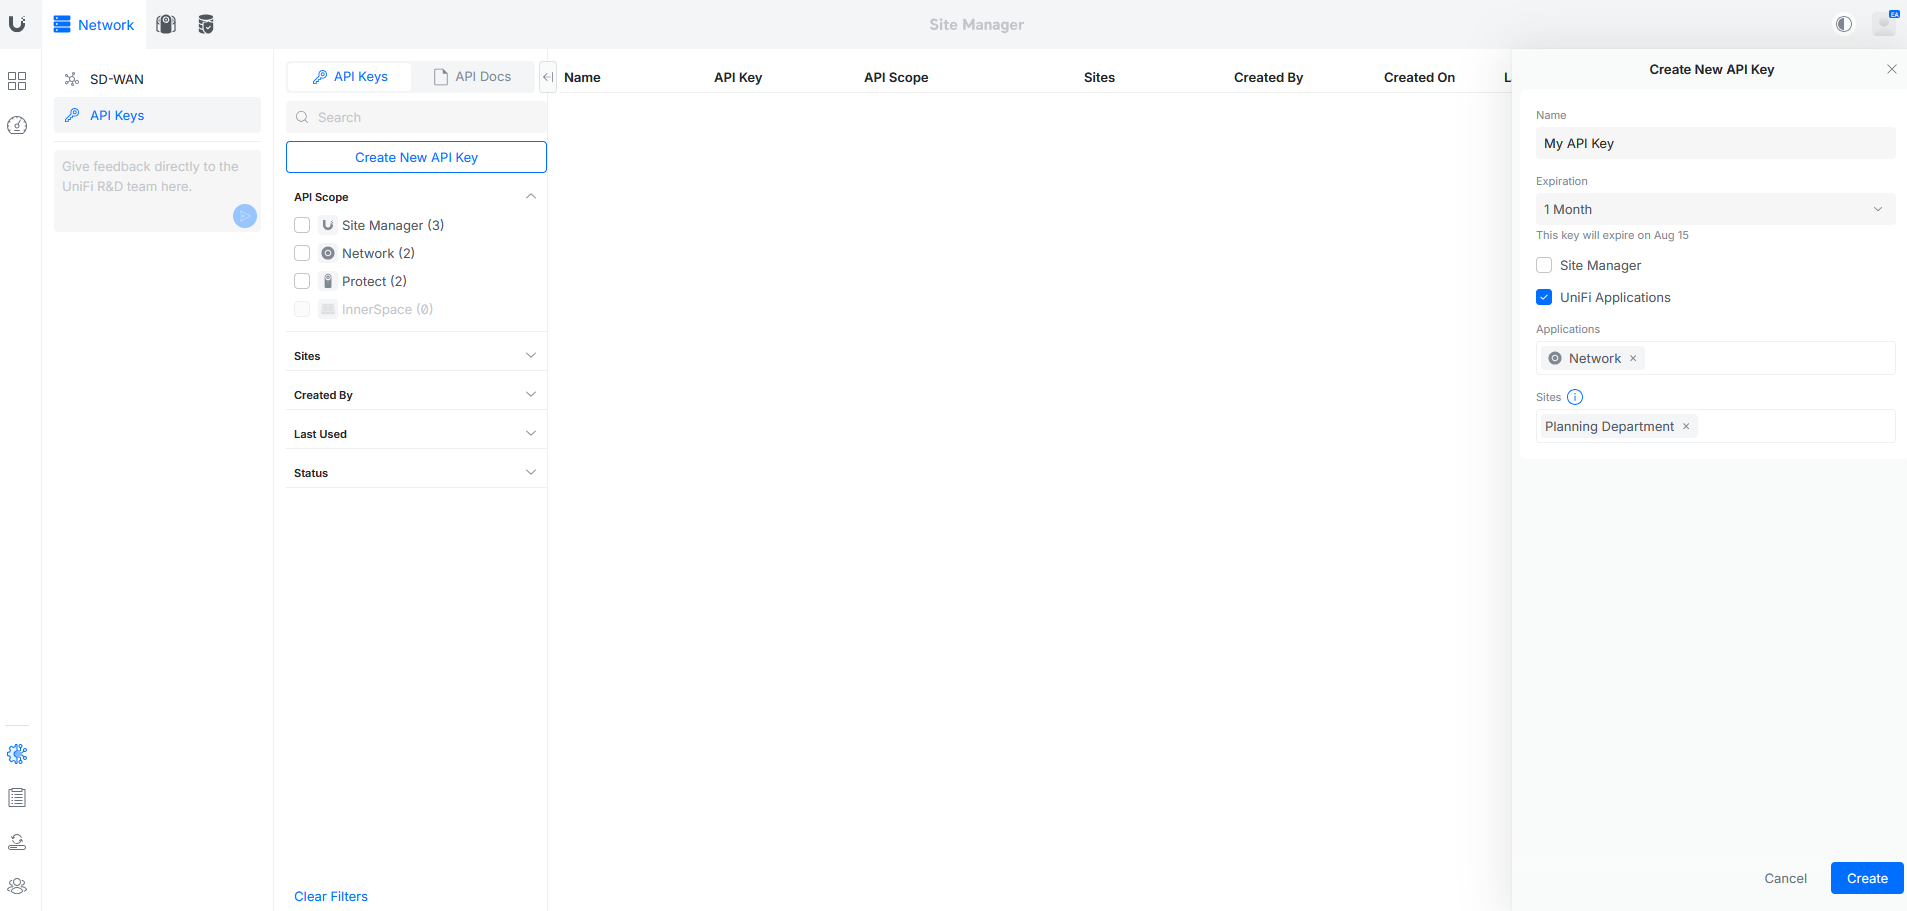
Note: These API Keys are not interchangeable. A Site Manager API Key cannot be used for the Local Network API and vice versa. The minimum required permissions for the Site Manager API Key is the 'UniFi Applications' and 'Network Application' permission along with the specific site as shown in the 2nd picture below.
Local Network API Key Creation:
Site Manager API Key Creation:
Follow this guide to set up the Hotspot Portal, then continue with the installation below
Ensure voucher authentication is enabled within the Hotspot Portal
You can easily run UniFi Voucher Site using Docker. We provide two release tracks to ensure you have flexibility in how you manage your deployments:
latest Docker tag is always built from the master branch. This tag contains the most recent changes, but may also include experimental or less stable features.latest with the desired version number.Below is an example docker-compose.yml file that can help you get started:
services:
  unifi-voucher-site:
    image: glenndehaan/unifi-voucher-site:latest
    ports:
      - "3000:3000"
    environment:
      # The IP address to your UniFi OS Console
      UNIFI_IP: '192.168.1.1'
      # The port of your UniFi OS Console, this could be 443 or 8443
      UNIFI_PORT: 443
      # The API Key created on the integrations tab within UniFi OS
      UNIFI_TOKEN: ''
      # The UniFi Site ID
      UNIFI_SITE_ID: 'default'
      # Set to true if using UniFi's Site Manager instead of local IP
      UNIFI_SITE_MANAGER: 'false'
      # The console id of the site if using Unifi's Site Manager instead of local IP
      UNIFI_SITE_MANAGER_CONSOLE_ID: ''
      # The UniFi SSID where guests need to connect to (Used within templating and 'Scan to Connect')
      UNIFI_SSID: ''
      # The UniFi SSID WPA/WPA2/WPA3 Password (Can be ignored for 'Open' networks) (Used within templating and 'Scan to Connect')
      UNIFI_SSID_PASSWORD: ''
      # Toggle to enable/disable internal authentication
      AUTH_INTERNAL_ENABLED: 'true'
      # The password used to log in to the voucher portal Web UI
      AUTH_INTERNAL_PASSWORD: '0000'
      # The Bearer token used for the API
      AUTH_INTERNAL_BEARER_TOKEN: '00000000-0000-0000-0000-000000000000'
      # Toggle to enable/disable OIDC authentication
      AUTH_OIDC_ENABLED: 'false'
      # OIDC issuer base url provided by oauth provider. Example: https://auth.example.com/.well-known/openid-configuration
      AUTH_OIDC_ISSUER_BASE_URL: ''
      # OIDC UniFi Voucher base url (This application). Example: https://voucher.example.com
      AUTH_OIDC_APP_BASE_URL: ''
      # OIDC client id provided by oauth provider
      AUTH_OIDC_CLIENT_ID: ''
      # OIDC client secret provided by oauth provider
      AUTH_OIDC_CLIENT_SECRET: ''
      # Skips the internal login page, and redirects to the OIDC auth flow
      AUTH_OIDC_REDIRECT_LOGIN: 'false'
      # In environments with multiple organizations sharing a single UniFi Controller instance, it may be desirable to limit users to only manage vouchers associated with their own organization.
      # This restriction is based on the domain (including subdomains and TLDs) of the users email address.
      AUTH_OIDC_RESTRICT_VISIBILITY: 'false'
      # Disables the login/authentication for the portal and API
      AUTH_DISABLE: 'false'
      # Voucher Types, format: expiration in minutes (required),single-use or multi-use vouchers value - '0' is for multi-use (unlimited) - '1' is for single-use - 'N' is for multi-use (Nx) (optional),upload speed limit in kbps (optional),download speed limit in kbps (optional),data transfer limit in MB (optional)
      # To skip a parameter just but nothing in between the comma's
      # After a voucher type add a semicolon, after the semicolon you can start a new voucher type
      VOUCHER_TYPES: '480,1,,,;'
      # Allow users to create custom vouchers types within the UI
      VOUCHER_CUSTOM: 'true'
      # Force users to provide a note within the UI
      VOUCHER_NOTE_REQUIRED: 'false'
      # Enable/disable the Web UI
      SERVICE_WEB: 'true'
      # Enable/disable the API
      SERVICE_API: 'false'
      # Enable/disable the printers and setup available printers, currently supported: pdf,escpos ip (Example: pdf,192.168.1.10)
      PRINTERS: ''
      # Set the layout to print (full, slim_qr, slim)
      PRINTERS_LAYOUT: 'full'
      # SMTP Mail from email address (optional)
      SMTP_FROM: ''
      # SMTP Mail server hostname/ip (optional)
      SMTP_HOST: ''
      # SMTP Mail server port (optional)
      SMTP_PORT: ''
      # SMTP Mail use TLS? (optional)
      SMTP_SECURE: 'false'
      # SMTP Mail username (optional)
      SMTP_USERNAME: ''
      # SMTP Mail password (optional)
      SMTP_PASSWORD: ''
      # Enable/disable the kiosk page on /kiosk
      KIOSK_ENABLED: 'false'
      # Kiosk Voucher Types, format: expiration in minutes (required),single-use or multi-use vouchers value - '0' is for multi-use (unlimited) - '1' is for single-use - 'N' is for multi-use (Nx) (optional),upload speed limit in kbps (optional),download speed limit in kbps (optional),data transfer limit in MB (optional)
      # To skip a parameter just but nothing in between the comma's
      # After a voucher type add a semicolon, after the semicolon you can start a new voucher type
      KIOSK_VOUCHER_TYPES: '480,1,,,;'
      # Enable/disable the requirement for a guest to enter their name before generating a voucher
      KIOSK_NAME_REQUIRED: 'false'
      # Sets the Kiosk timeout in seconds (Returns the user back to the starting page after inactivity)
      KIOSK_TIMEOUT: '60'
      # Enable/disable an override to redirect to the Kiosk on the / url (Also enables a link from the Kiosk back to the Admin UI)
      KIOSK_HOMEPAGE: 'false'
      # Enable/disable the email voucher button (Requires SMTP to be setup)
      KIOSK_EMAIL: 'false'
      # Enable/disable a printer for Kiosk Vouchers (this automatically prints vouchers), currently supported: escpos ip (Example: 192.168.1.10)
      KIOSK_PRINTER: ''
      # Specifies the IP address to bind to (such as :: in IPv6 environments)
      BIND_ADDRESS: '0.0.0.0'
      # Sets the application Log Level (Valid Options: error|warn|info|debug|trace)
      LOG_LEVEL: 'info'
      # Sets the default translation for dropdowns
      TRANSLATION_DEFAULT: 'en'
      # Hides languages from the UI, example: en,nl,de
      TRANSLATION_HIDDEN_LANGUAGES: ''
      # Enables/disables translation debugging, when enabled only translation keys are shown
      TRANSLATION_DEBUG: 'false'
      # Enables/disables an automated task to clean up expired vouchers from UniFi
      TASK_CLEANUP_EXPIRED: 'false'
      # Enables/disables an automated task to clean up unused vouchers from UniFi
      TASK_CLEANUP_UNUSED: 'false'
      # Specifies the amount of days to wait before removing the unused vouchers
      TASK_CLEANUP_UNUSED_DAYS: '1'
    # Optional volume mapping to override assets
    volumes:
      - ./branding:/kiosk
Configuration Options
By default, UniFi Voucher Site is configured using environment variables. However, you can optionally provide a configuration file named options.json instead. When using a config file, it will override environment variable settings.
To use a config file, mount it into the container at:
/data/options.json
The structure of the file should use lowercase versions of the environment variable names.
Example options.json:
{
  "unifi_ip": "192.168.1.1",
  "unifi_port": 443,
  "unifi_token": "",
  "unifi_site_id": "default",
  "unifi_site_manager": false,
  "unifi_site_manager_console_id": "",
  "unifi_ssid": "",
  "unifi_ssid_password": "",
  "auth_internal_enabled": true,
  "auth_internal_password": "0000",
  "auth_internal_bearer_token": "00000000-0000-0000-0000-000000000000",
  "auth_oidc_enabled": false,
  "auth_oidc_issuer_base_url": "",
  "auth_oidc_app_base_url": "",
  "auth_oidc_client_id": "",
  "auth_oidc_client_secret": "",
  "auth_oidc_redirect_login": false,
  "auth_oidc_restrict_visibility": false,
  "auth_disable": false,
  "voucher_types": "480,1,,,;",
  "voucher_custom": true,
  "voucher_note_required": false,
  "service_web": true,
  "service_api": false,
  "printers": "",
  "printers_layout": "full",
  "smtp_from": "",
  "smtp_host": "",
  "smtp_port": "",
  "smtp_secure": false,
  "smtp_username": "",
  "smtp_password": "",
  "kiosk_enabled": false,
  "kiosk_voucher_types": "480,1,,,;",
  "kiosk_name_required": false,
  "kiosk_timeout": 60,
  "kiosk_homepage": false,
  "kiosk_email": false,
  "kiosk_printer": "",
  "bind_address": "0.0.0.0",
  "log_level": "info",
  "translation_default": "en",
  "translation_hidden_languages": "",
  "translation_debug": false,
  "task_cleanup_expired": false,
  "task_cleanup_unused": false,
  "task_cleanup_unused_days": 1
}
Note: Booleans (
true/false) and numbers should be actual JSON types, not strings.
Below is an example docker-compose.yml file that can help you get started:
services:
  unifi-voucher-site:
    image: glenndehaan/unifi-voucher-site:latest
    ports:
      - "3000:3000"
    volumes:
      - ./branding:/kiosk
      - ./options.json:/data/options.json
If both environment variables and
options.jsonare provided, values fromoptions.jsonwill take precedence.
For users of Home Assistant, we provide a dedicated app to seamlessly integrate the UniFi Voucher Site with your Home Assistant instance. This app simplifies the setup process and allows you to manage UniFi vouchers directly from your Home Assistant dashboard.
To install the UniFi Voucher Site app for Home Assistant, follow these steps:
https://github.com/glenndehaan/ha-addons.npm ci in the root foldernpm start & npm run tailwind in the root folderThen open up your favorite browser and go to http://localhost:3000/
The project consists of two main services: Web and API.
The Web service is a user interface accessible through a web browser. It provides functionality for generating, viewing, and managing vouchers within the UniFi system.
The API service allows programmatic access to voucher-related functionalities. It is designed for developers who wish to integrate voucher management into their applications or automate voucher generation processes. Below are the details of the different endpoints available in the API:
/api
{
  "error": null,
  "data": {
    "message": "OK",
    "endpoints": [
      {
        "method": "GET",
        "endpoint": "/api"
      },
      {
        "method": "GET",
        "endpoint": "/api/types"
      },
      {
        "method": "GET",
        "endpoint": "/api/languages"
      },
      {
        "method": "GET",
        "endpoint": "/api/vouchers"
      },
      {
        "method": "POST",
        "endpoint": "/api/voucher"
      }
    ]
  }
}
/api/types
{
  "error": null,
  "data": {
    "message": "OK",
    "types": [
      {
        "expiration": "480",
        "usage": "0",
        "raw": "480,0,,,"
      }
    ]
  }
}
/api/languages
{
  "error": null,
  "data": {
    "message": "OK",
    "languages": [
      {
        "code": "en",
        "name": "English"
      },
      {
        "code": "de",
        "name": "German"
      },
      {
        "code": "nl",
        "name": "Dutch"
      },
      {
        "code": "pl",
        "name": "Polish"
      }
    ]
  }
}
/api/vouchers
{
  "error": null,
  "data": {
    "message": "OK",
    "vouchers": [
      {
        "id": "67bded6766f89f2a7ba6731f",
        "code": "15695-53133",
        "note": "Test",
        "type": "multi",
        "duration": 60,
        "data_limit": "200",
        "download_limit": "5000",
        "upload_limit": "2000"
      },
      {
        "id": "67bdecd166f89f2a7ba67317",
        "code": "03004-59449",
        "note": null,
        "type": "single",
        "duration": 480,
        "data_limit": null,
        "download_limit": null,
        "upload_limit": null
      }
    ],
    "updated": 1712934667937
  }
}
This endpoint is protected by a security mechanism. To access it, users need to include a bearer token in the request authorization header. The token must match the value of the
AUTH_INTERNAL_BEARER_TOKENenvironment variable. Without this token, access to the endpoint will be denied.
/api/voucher
Method: POST
Description: Generates a voucher of the specified type. Optionally sends an email.
Response Format: JSON
Access: Protected by Bearer Token
Body:
Generate Voucher:
{
  "type": "480,0,,,"
}
Generate Voucher and Provide note:
{
  "type": "480,0,,,",
  "note": "This is a note"
}
Generate Voucher and Send Email (Warning: Email module needs to be setup!):
{
  "type": "480,0,,,",
  "email": {
    "language": "en",
    "address": "user@example.com"
  }
}
Response Example:
{
  "error": null,
  "data": {
    "message": "OK",
    "voucher": {
      "id": "67bdf77b66f89f2a7ba678f7",
      "code": "02791-97992"
    },
    "email": {
      "status": "SENT",
      "address": "user@example.com"
    }
  }
}
This endpoint is protected by a security mechanism. To access it, users need to include a bearer token in the request authorization header. The token must match the value of the
AUTH_INTERNAL_BEARER_TOKENenvironment variable. Without this token, access to the endpoint will be denied.
The UniFi Voucher Site provides three options for authenticating access to the web service.
Note that these options only affect the web service; the API service uses a different authentication method, which is explained above.
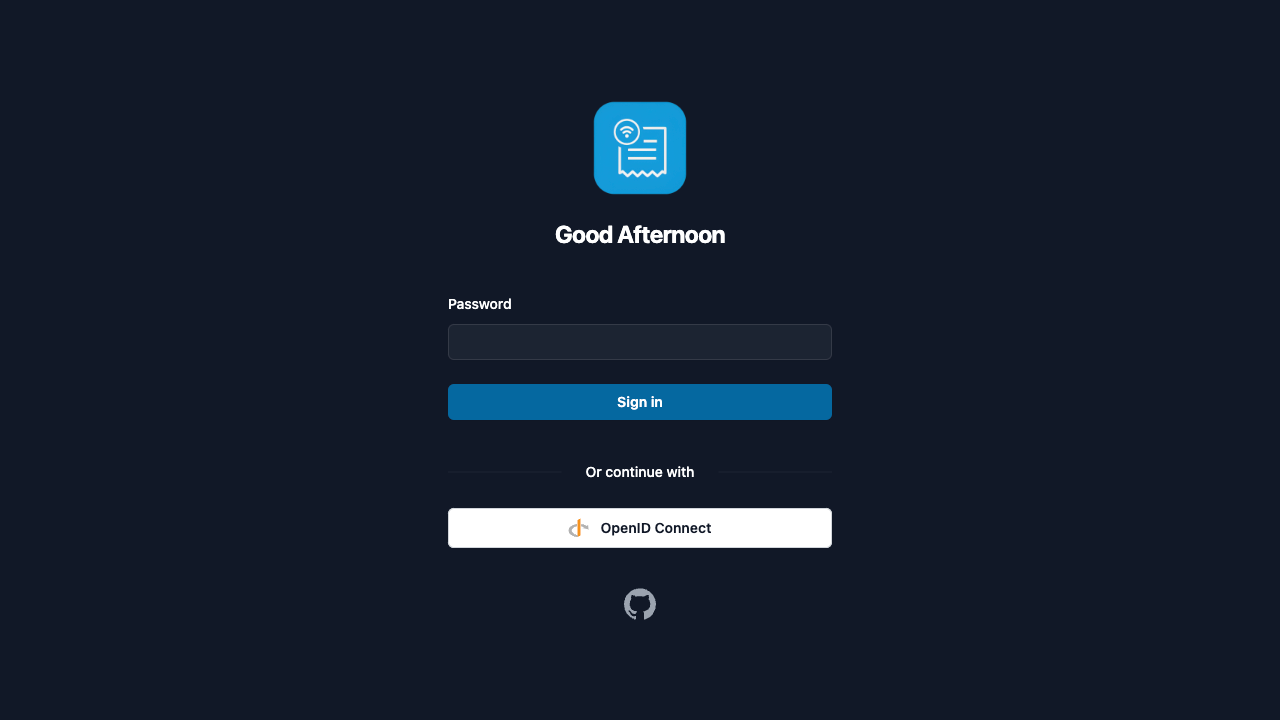
By default, the UniFi Voucher Site uses an internal authentication method. You can set the password for this internal authentication using the AUTH_INTERNAL_PASSWORD environment variable.
AUTH_INTERNAL_PASSWORD: '0000'
To enable/disable internal authentication use the
AUTH_INTERNAL_ENABLEDenvironment variable
The UniFi Voucher Site allows seamless integration with OpenID Connect (OIDC), enabling users to authenticate through their preferred identity provider (IdP). Configuration is easy using environment variables to align with your existing OIDC provider.
To enable OIDC authentication, set the following environment variables in your application’s environment:
AUTH_OIDC_ENABLED:
Toggle to enable/disable OIDC authentication. Set this value to true to enable OIDC authentication. (Default: false)
AUTH_OIDC_ISSUER_BASE_URL:
The base URL of your OIDC provider. This is typically the URL where the well-known OIDC configuration is hosted (e.g., https://auth.example.com/.well-known/openid-configuration).
AUTH_OIDC_APP_BASE_URL:
The base URL of your UniFi Voucher Site application. This should be the public URL where the site is accessible to users (e.g., https://voucher.example.com).
AUTH_OIDC_CLIENT_ID:
The client ID registered with your OIDC provider. This value is specific to the OIDC client created for the UniFi Voucher Site.
AUTH_OIDC_CLIENT_SECRET:
The client secret associated with your OIDC provider. This value is specific to the OIDC client created for the UniFi Voucher Site.
Ensure your idP supports Confidential Clients with the Authorization Code Flow
AUTH_OIDC_REDIRECT_LOGIN:
When enabled (true), the built-in login page is skipped entirely, and users are redirected to the OIDC auth flow.
Default: false
AUTH_OIDC_RESTRICT_VISIBILITY:
Restricts user access to only vouchers created within their own organization.
When enabled (true), users can only manage vouchers tied to their organization's domain, determined by the domain of their email address (including subdomains and top-level domains).
This is useful in environments where multiple organizations share a single UniFi Controller instance.
Default: false
To identify which client types your OpenID Connect (OIDC) provider supports, you can check the .well-known/openid-configuration endpoint. This endpoint contains metadata about the OIDC provider, including the supported flows and grant types.
Access the .well-known/openid-configuration URL:
The URL is typically structured like this:
https://auth.example.com/.well-known/openid-configuration
Look for the grant_types_supported Field:
In the returned JSON, the grant_types_supported field will indicate the flows your provider supports: Check if your response contains authorization_code.
Example snippet:
{
  "grant_types_supported": [
    "authorization_code",
    "implicit",
    "refresh_token",
    "client_credentials"
  ]
}
This section provides integration guides for configuring the UniFi Voucher Site with various OIDC (OpenID Connect) Identity Providers (IdPs). These guides cover the necessary steps for setting up the IdP, configuring client credentials, and integrating the IdP with the UniFi Voucher Site.
Below is a list of tested Identity Providers (IdPs) with detailed integration instructions:
Integrated with an IdP that is not on the list? Feel free to create a guide for others and contribute it to the project
If you prefer not to use any authentication for the web and api service, you can disable it entirely by setting the AUTH_DISABLE environment variable.
AUTH_DISABLE: 'true'
Note: This disables the token based authentication on the API
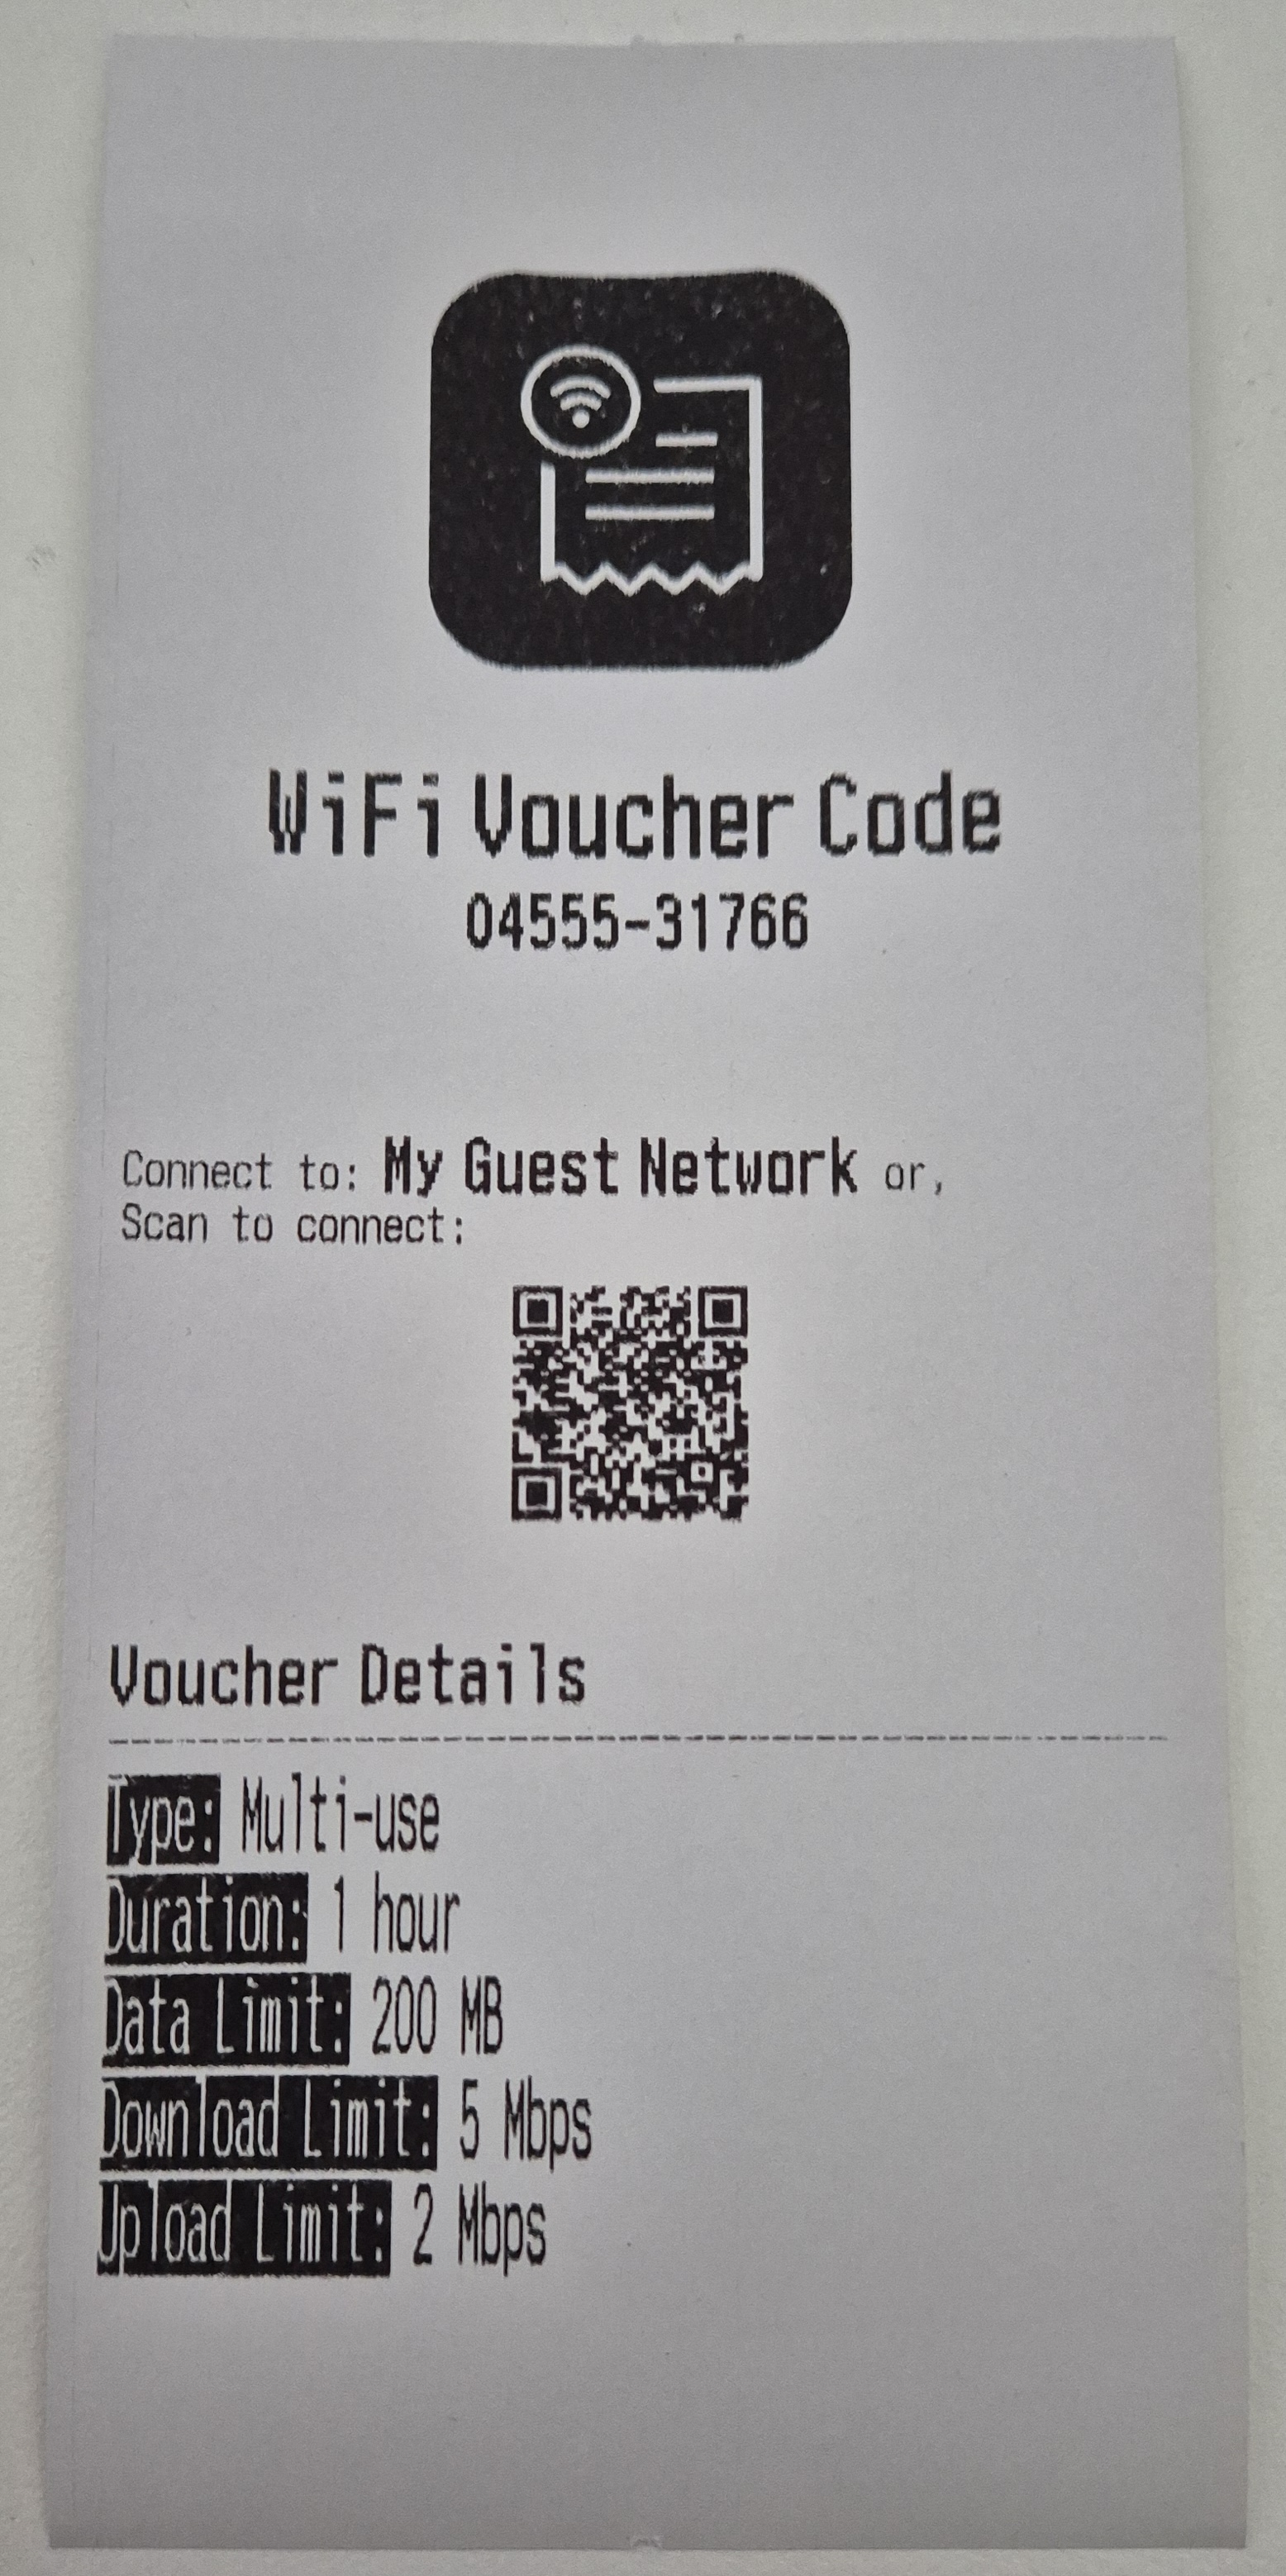
The UniFi Voucher Site application includes built-in support for printing vouchers using 80mm receipt printers, offering a convenient way to distribute vouchers in physical format.
The print functionality is compatible with most 80mm thermal receipt printers commonly used in various industries. These printers typically use thermal printing technology, eliminating the need for ink cartridges and ensuring efficient and cost-effective voucher printing.
To enable the print feature, you need to set the following environment variables:
PRINTERS: ''
PRINTERS_LAYOUT: 'full'
Here’s what each variable represents:
PRINTERS: Sets the printer type used by UniFi Voucher Site. Supported options:
pdf: For generating PDF files formatted for 80mm paper width.escpos: For printing directly to network-enabled ESC/POS compatible printers. Specify the IP address of the network-enabled ESC/POS printerYou can have multiple printers available at the same time. Let's say you have 2 ESC/POS network printers and want to print via pdf, then define:
PRINTERS: 'pdf,192.168.1.10,192.168.1.11'
PRINTERS_LAYOUT: Defines the layout format used when printing vouchers. This applies to both PDF generation and ESC/POS printers. Supported options:
full: A detailed layout including all voucher information (e.g. name, code, expiration, and QR code). Best for customer-facing prints.slim_qr: A compact layout that focuses on the QR code with minimal additional text and without logo. Ideal for quick scans.slim: A minimal text-based layout without a QR code or logo, suitable for very fast printing or low-paper usage scenarios.You can customize the appearance of the pdf and ESC/POS print layout by providing your own branding assets, including:
logo.png — Logo used in the print headerTo do this, use Docker volume mappings to mount your custom assets into the /print directory inside the container.
The application will use these files (if present) instead of the default ones.
If you provide custom branding for printed vouchers, make sure your logo closely match the original application logo’s size, aspect ratio, and color space. This helps ensure the layout prints correctly and avoids color shifts or misalignment in the final output.
Suppose you have your custom images in a local directory called branding/:
branding/
└── logo.png
You can configure this using Docker Compose:
services:
  unifi-voucher-site:
    image: glenndehaan/unifi-voucher-site:latest
    ports:
      - "3000:3000"
    environment:
      KIOSK_ENABLED: 'true'
      KIOSK_VOUCHER_TYPES: '480,1,,,;'
    volumes:
      - ./branding:/print
If you're using the PDF option, once your 80mm receipt printer is configured and connected to your local client, you can easily export vouchers to pdf from the UniFi Voucher Site application. Simply navigate to the voucher within the interface and click on the "Print" button.
The application will automatically format the voucher for 80mm paper width, ensuring optimal printing results. Depending on your printer settings and preferences, you may adjust print quality, paper type, and other printing parameters to suit your needs.
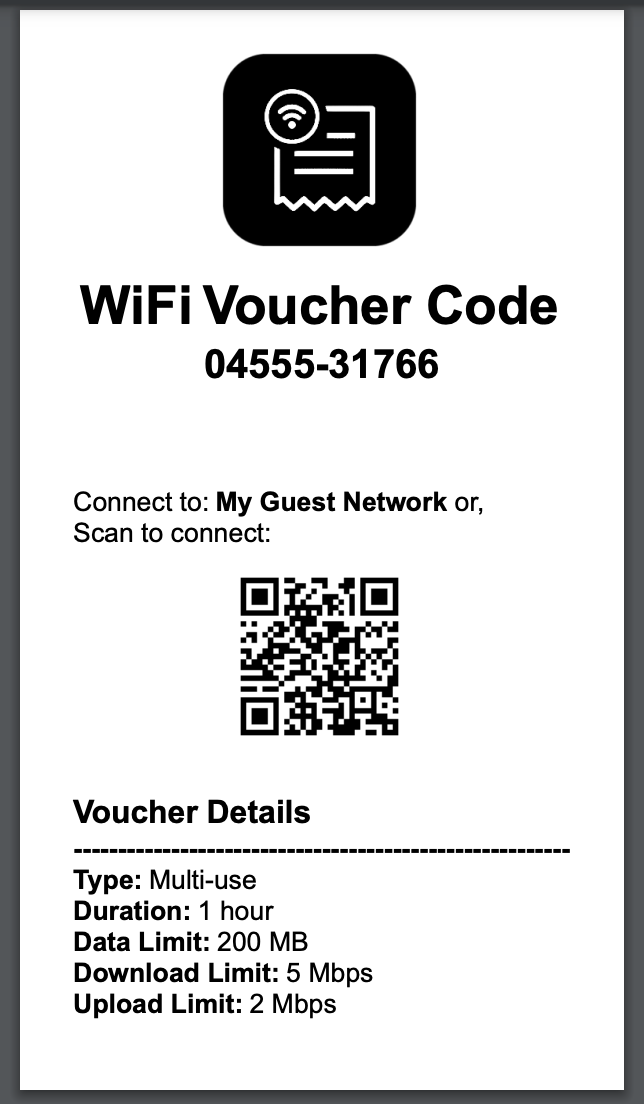
For network-enabled ESC/POS compatible printers, provide the printer's IP address in the PRINTERS variable. Once configured, you can print vouchers directly to your network printer from the UniFi Voucher Site application.
Just like with PDF printing, navigate to the voucher and click on the "Print" button. The application will send the print job directly to the ESC/POS printer over the network, ensuring quick and seamless voucher printing. Make sure your printer supports ESC/POS commands and is correctly configured to accept print jobs over the network.
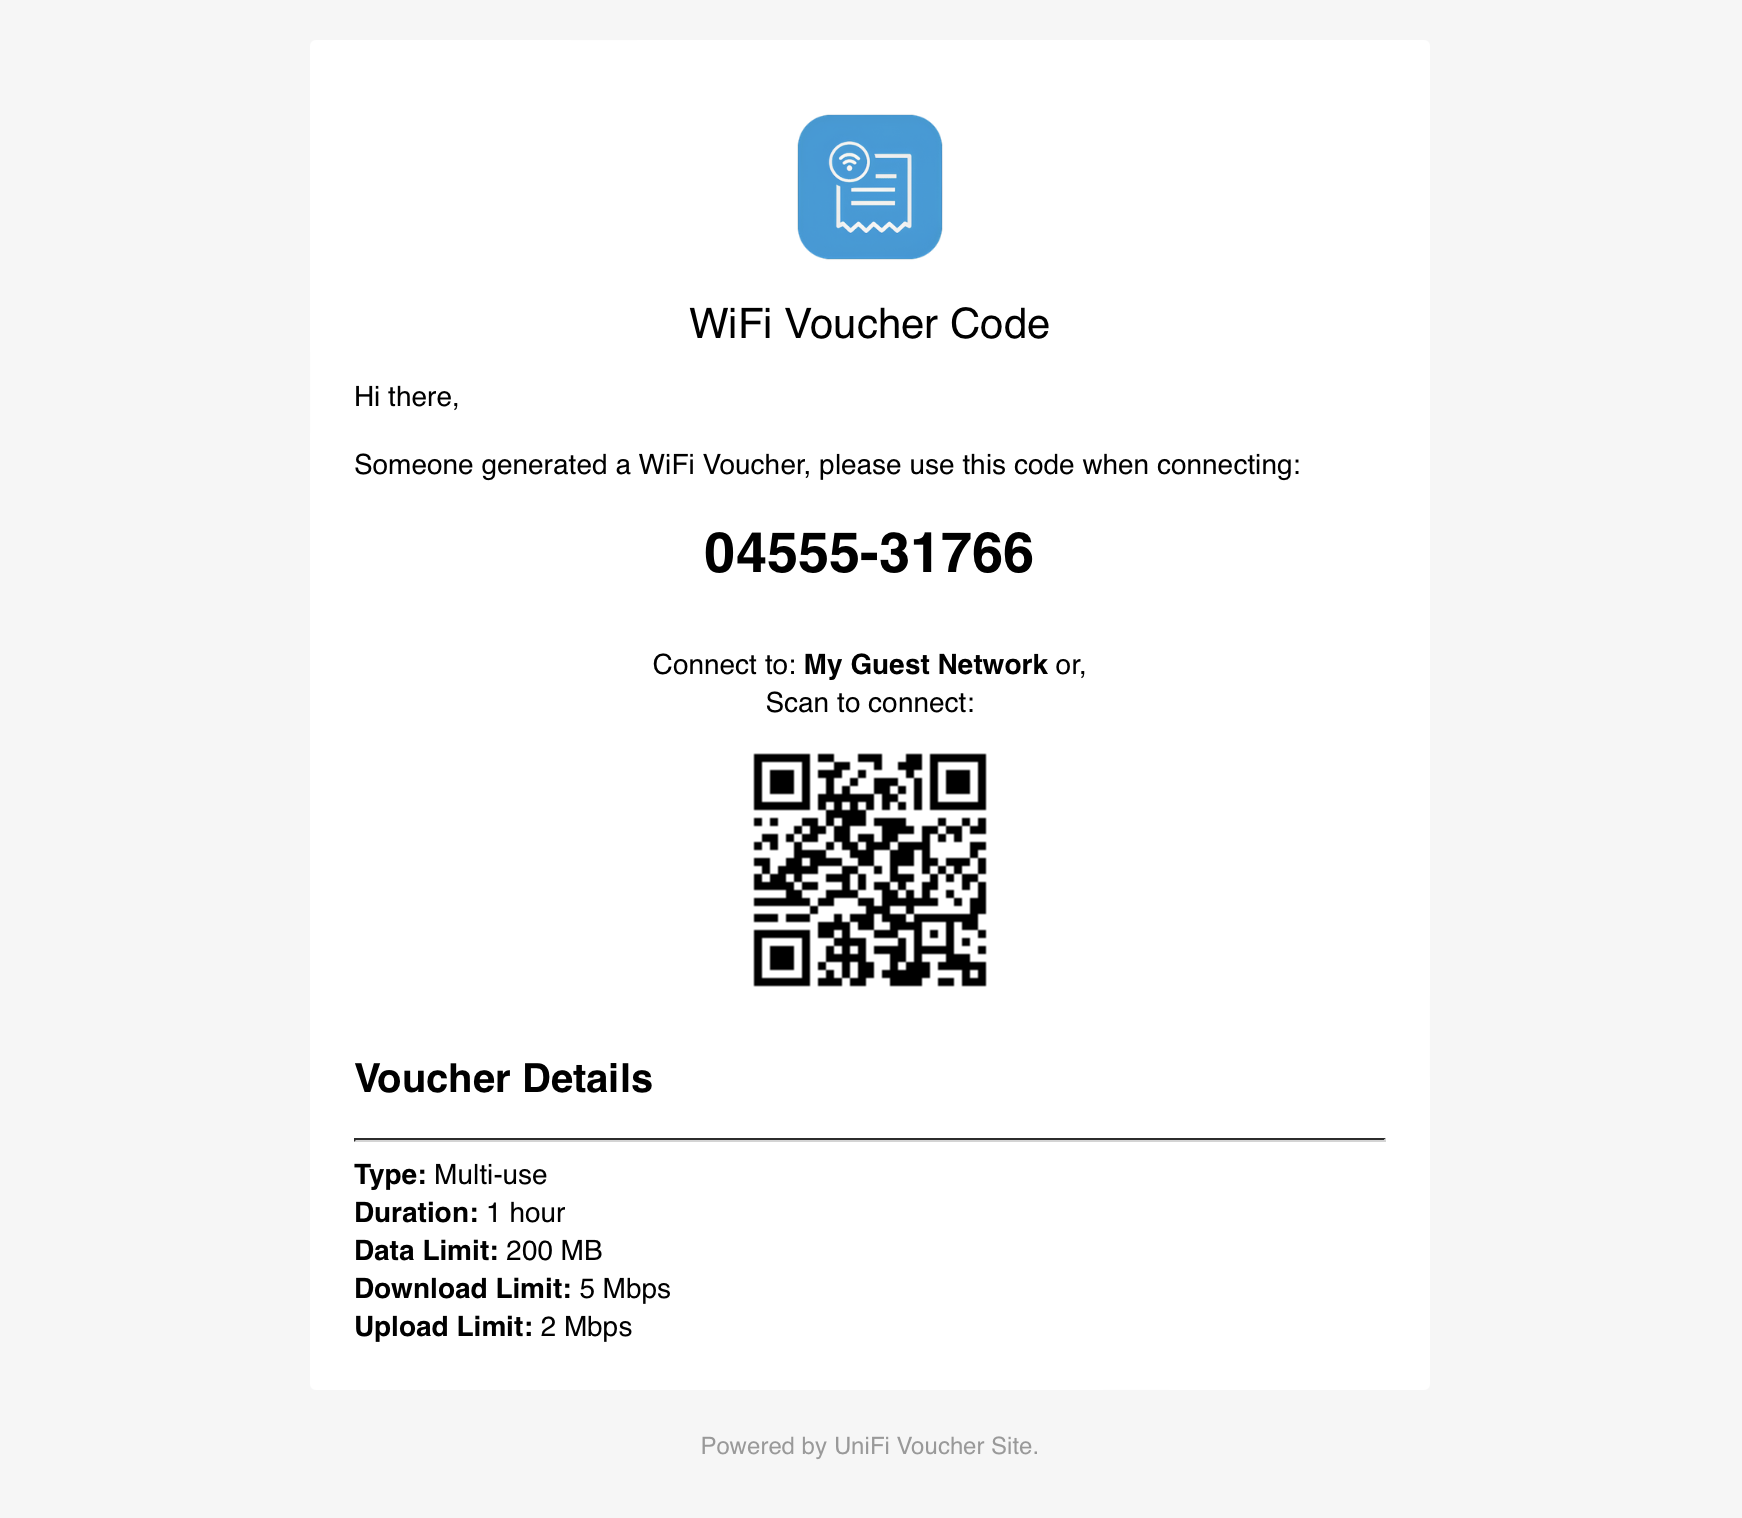
The UniFi Voucher Site includes a convenient email feature that allows you to send vouchers directly to users from the web interface. By configuring the SMTP settings, you can enable email sending and make it easy to distribute vouchers digitally.
To enable the email feature, you need to set the following environment variables with your SMTP server details:
SMTP_FROM: ''
SMTP_HOST: ''
SMTP_PORT: ''
SMTP_SECURE: ''
SMTP_USERNAME: ''
SMTP_PASSWORD: ''
Here’s what each variable represents:
SMTP_FROM: The sender email address that will appear in the "From" field when users receive the voucher.SMTP_HOST: The hostname or IP address of your SMTP server (e.g., smtp.example.com).SMTP_PORT: The port used by your SMTP server (e.g., 587 for TLS or 465 for SSL).SMTP_SECURE: Set to true if your SMTP server requires a secure connection (SSL/TLS), or false if it does not.SMTP_USERNAME: The username for authenticating with your SMTP server.SMTP_PASSWORD: The password for authenticating with your SMTP server.These settings allow the application to connect to your SMTP server and send emails on your behalf.
You can customize the appearance of the email by providing your own branding assets, including:
logo.png — Logo used in the email headerTo do this, use Docker volume mappings to mount your custom assets into the /email directory inside the container.
The application will use these files (if present) instead of the default ones.
We recommend to keep the logo at a maximum height of 75px, to prevent layout shifts
Suppose you have your custom images in a local directory called branding/:
branding/
└── logo.png
You can configure this using Docker Compose:
services:
  unifi-voucher-site:
    image: glenndehaan/unifi-voucher-site:latest
    ports:
      - "3000:3000"
    environment:
      KIOSK_ENABLED: 'true'
      KIOSK_VOUCHER_TYPES: '480,1,,,;'
    volumes:
      - ./branding:/email
Once the SMTP environment variables are configured, the email feature will be available within the UniFi Voucher Site interface. After generating a voucher, you will see an option to send the voucher via email. Enter the recipient's email address, and the application will send the voucher details directly to their inbox.
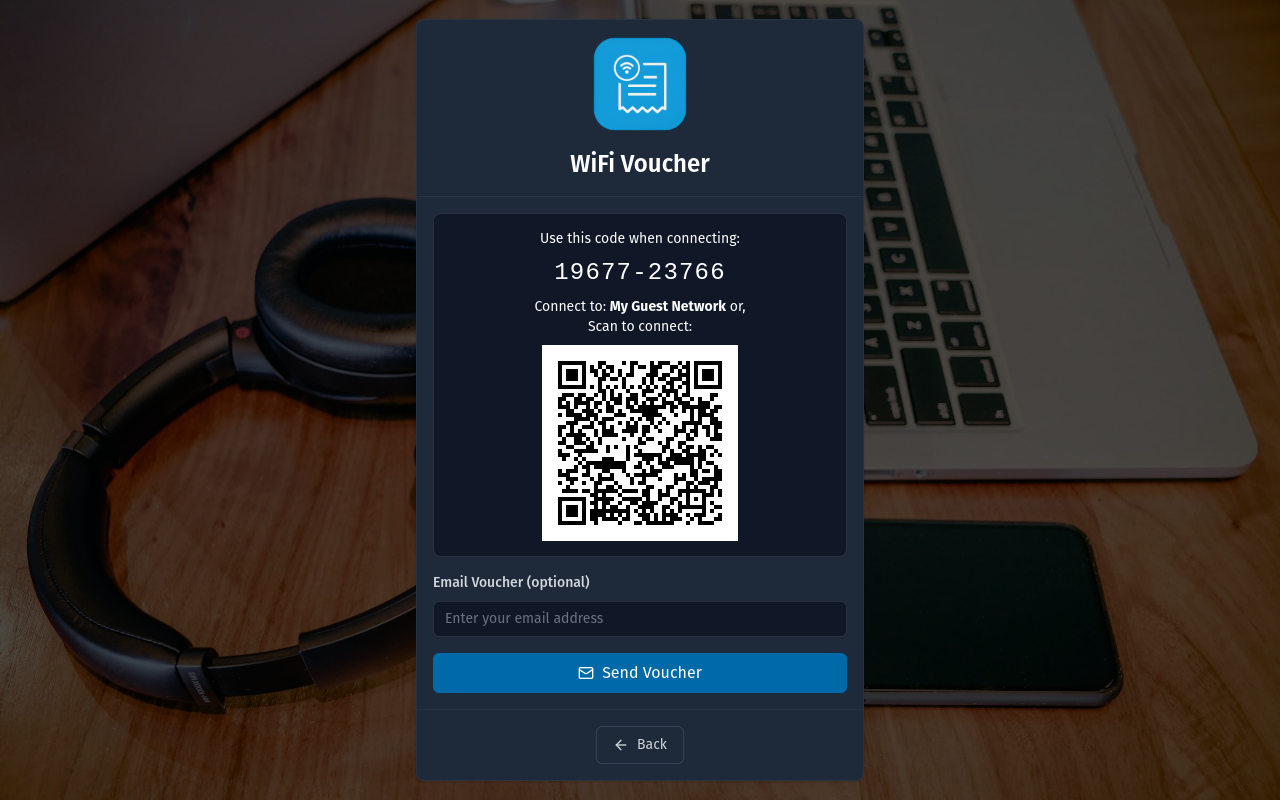
The UniFi Voucher Site includes a Kiosk Mode, allowing users to generate their own vouchers via a self-service interface. This is ideal for public areas, such as cafés, hotels, and co-working spaces, where users can obtain internet access without staff intervention.
To enable the kiosk functionality, set the following environment variables:
KIOSK_ENABLED: 'true'
KIOSK_VOUCHER_TYPES: '480,1,,,;'
KIOSK_ENABLED:
'true' to enable the kiosk page, making it accessible at /kiosk.'false' to disable the kiosk functionality.KIOSK_VOUCHER_TYPES: Defines the voucher properties for kiosk-generated vouchers. The format consists of the following parameters:
expiration_in_minutes,single_use_or_multi_use,upload_speed_limit_kbps,download_speed_limit_kbps,data_transfer_limit_MB
480 (8 hours).'0' → Multi-use (unlimited)'1' → Single-use'N' → Multi-use (N times) (e.g., '3' allows 3 uses)Multiple Voucher Types: You can define multiple voucher types by separating each configuration with a semicolon (
;). Example:480,1,,,;1440,0,512,2048,1000This defines two voucher types:
- A single-use voucher valid for 480 minutes with no speed or data limits.
- A multi-use (unlimited) voucher valid for 1440 minutes, limited to 512 Kbps upload, 2048 Kbps download, and 1000 MB data.
KIOSK_NAME_REQUIRED:
'true' to enable the requirement for a guest to enter their name before generating a voucher.'false' to disable to allow generation of vouchers without a name.KIOSK_TIMEOUT: Defines the timeout timer for inactivity. The format is in seconds.
KIOSK_HOMEPAGE:
'true' to redirect from / to /kiosk (Instead of the Admin UI).'false' to disable the redirect functionality.KIOSK_EMAIL:
'true' to enable the email voucher form.'false' to disable hide the email voucher form.Note: SMTP needs to be setup before the email form is shown!
KIOSK_PRINTER:
Set this to the IP address of an ESC/POS-compatible network printer to enable automatic voucher printing.
Leave this value empty to disable printing.
Example:
KIOSK_PRINTER=192.168.1.50
You can customize the appearance of the kiosk page by providing your own branding assets, including:
logo.png — Logo used in light modelogo_dark.png — Logo used in dark modebg.jpg — Background imageTo do this, use Docker volume mappings to mount your custom assets into the /kiosk directory inside the container.
The application will use these files (if present) instead of the default ones.
Suppose you have your custom images in a local directory called branding/:
branding/
├── logo.png
├── logo_dark.png
└── bg.jpg
You can configure this using Docker Compose:
services:
  unifi-voucher-site:
    image: glenndehaan/unifi-voucher-site:latest
    ports:
      - "3000:3000"
    environment:
      KIOSK_ENABLED: 'true'
      KIOSK_VOUCHER_TYPES: '480,1,,,;'
    volumes:
      - ./branding:/kiosk
Note: All branding files are optional — provide only the ones you want to override. Ensure
logo.png,logo_dark.png, andbg.jpgare valid image files.
Once enabled, the kiosk page is available at:
http://localhost:3000/kiosk
Users can visit this URL and generate a voucher without administrative intervention.
The UniFi Voucher Site supports multiple languages, and we're actively working to expand the list of available translations. To facilitate this, we use Crowdin, a platform that allows people from around the world to help translate and improve the localization of the project.
If you'd like to contribute by translating the UniFi Voucher Site into your language or improve existing translations, you're welcome to join our project on Crowdin. Even small contributions can make a big difference!
Simply visit our Crowdin project page by clicking the badge below:
Once you're there, you can choose your language and start contributing immediately. Crowdin provides an intuitive interface to help you suggest translations, review them, or vote on others' contributions.
Your contributions will be automatically included in the next release after review.
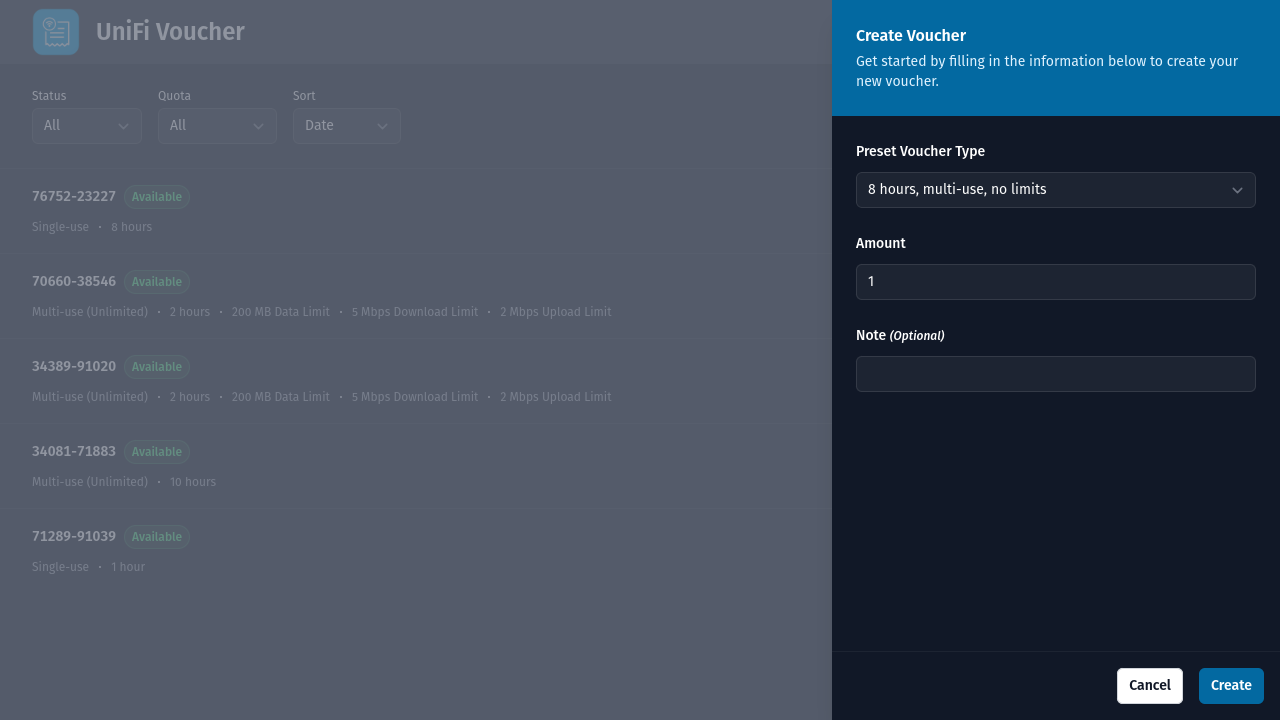
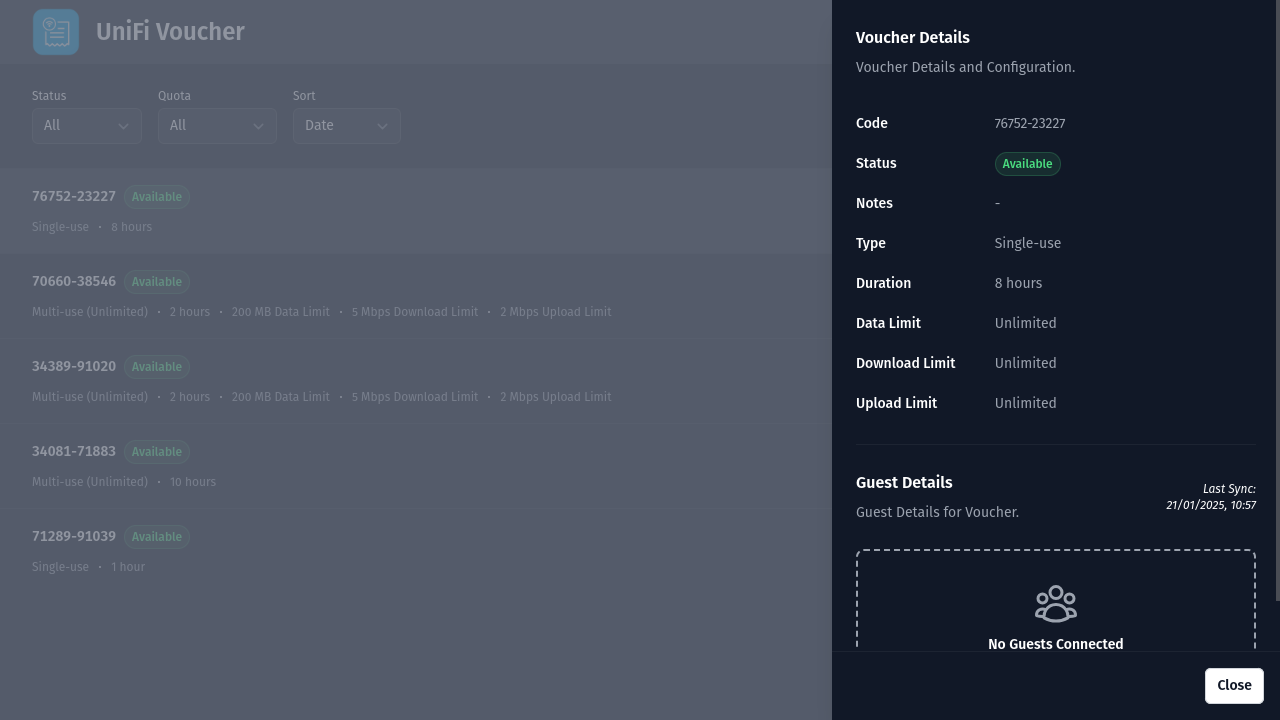
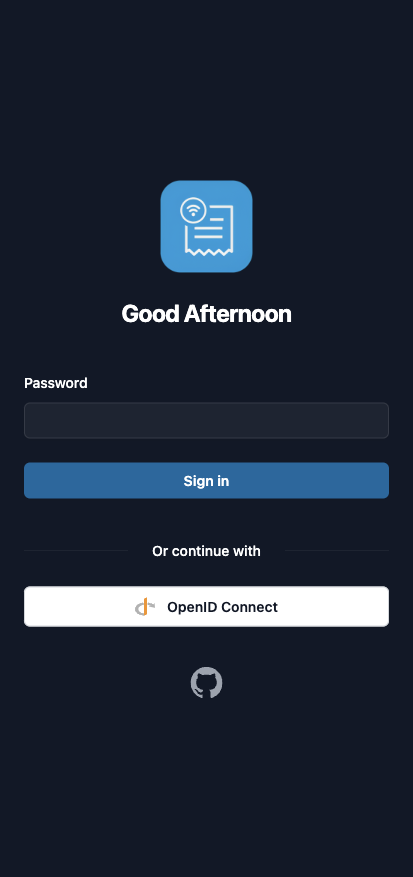
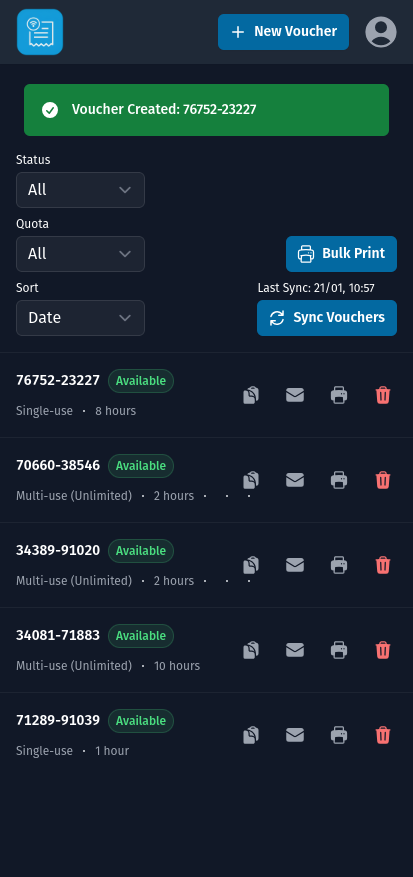
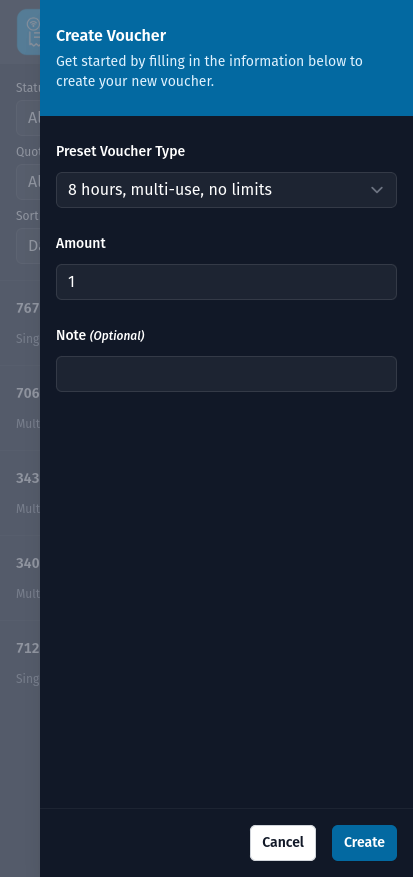
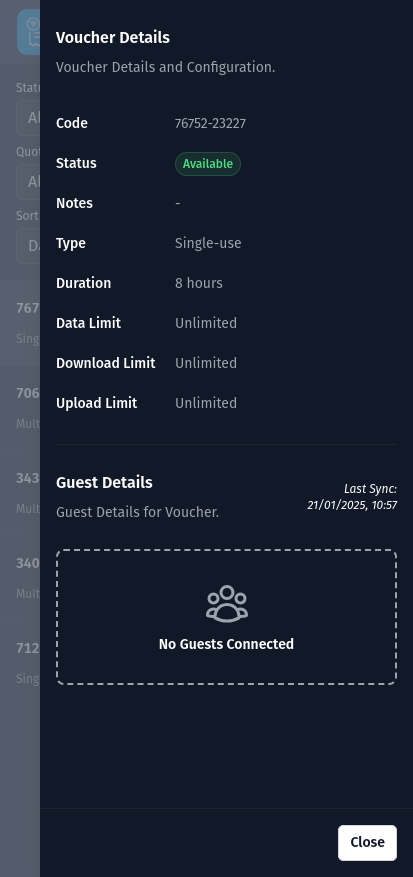
Detailed information on the changes in each release can be found on the GitHub Releases page. It is highly recommended to review the release notes before updating or deploying a new version, especially if you are upgrading from a previous version.
Warning! This release is only compatible with:
- UniFi OS v4.2.8+
- UniFi Network v9.1.119+ (Cloud Gateways, Cloud Key, or UniFi OS software)
This release requires the setup of a UniFi OS Integration API Key
Note: This release breaks the Connected Guests feature due to a limitation within the UniFi Integration API. Please check and upvote this issue: https://community.ui.com/questions/Feature-Request-Network-API-Guest-Access-Voucher-ID/d3c470e2-433d-4386-8a13-211712311202
When upgrading from 7.x to 8.x, the following changes need to be made:
UniFi Authentication Changes
UNIFI_USERNAME and UNIFI_PASSWORD have been removed in 8.x.Before (7.x):
UNIFI_USERNAME='admin'
UNIFI_PASSWORD='supersecret'
After (8.x):
UNIFI_TOKEN='your-unifi-api-token'
UNIFI_TOKEN and remove the old UNIFI_USERNAME and UNIFI_PASSWORD variables.
When upgrading from 6.x to 7.x, the following changes need to be made:
KIOSK_VOUCHER_TYPE Renamed to KIOSK_VOUCHER_TYPES
KIOSK_VOUCHER_TYPE has been renamed to KIOSK_VOUCHER_TYPES in 7.x.Before (6.x):
KIOSK_VOUCHER_TYPE='480,1,,,'
After (7.x):
KIOSK_VOUCHER_TYPES='480,1,,,;'
KIOSK_VOUCHER_TYPES variable.Make sure to remove the deprecated
KIOSK_VOUCHER_TYPEand follow the structure outlined in the documentation to avoid misconfiguration issues during deployment.
When upgrading from 5.x to 6.x, the following changes need to be made:
UI_BACK_BUTTON Removed
UI_BACK_BUTTON configuration option has been removed in 6.x.Printer Configuration Changes
PRINTER_TYPE and PRINTER_IP have been replaced by a single setting: PRINTERS.Before (5.x):
PRINTER_TYPE='pdf'
PRINTER_IP='192.168.1.10'
After (6.x):
PRINTERS='pdf,192.168.1.10'
PRINTERS and remove the old PRINTER_TYPE and PRINTER_IP variables.Make sure to clean up any deprecated variables and update your printer configuration to ensure compatibility with 6.x.
When upgrading from 4.x to 5.x, the following changes need to be made:
Updated /api Endpoint Response
/api endpoint now returns a structured response that includes the HTTP method for each available endpoint. Update API integrations to handle the new response structure.Previous Response:
{
  "error": null,
  "data": {
    "message": "OK",
    "endpoints": [
      "/api",
      "/api/types",
      "/api/voucher/:type",
      "/api/vouchers"
    ]
  }
}
New Response:
{
  "error": null,
  "data": {
    "message": "OK",
    "endpoints": [
      { "method": "GET", "endpoint": "/api" },
      { "method": "GET", "endpoint": "/api/types" },
      { "method": "GET", "endpoint": "/api/languages" },
      { "method": "GET", "endpoint": "/api/vouchers" },
      { "method": "POST", "endpoint": "/api/voucher" }
    ]
  }
}
/api/voucher/:type Endpoint Replacement
/api/voucher/:type endpoint has been replaced by /api/voucher.GET to POST.:type URL parameter is now passed in the JSON body.Example Request:
POST /api/voucher
Content-Type: application/json

{
  "type": "480,0,,,"
}
When upgrading from 3.x to 4.x, the following changes need to be made:
OIDC Public Flow Removal
OIDC Endpoints Update
/callback to /oidc/callback in your IdP configuration.Environment Variable Changes
AUTH_OIDC_CLIENT_TYPE has been removed. It is no longer required.AUTH_OIDC_ENABLED has been introduced. If you are using OIDC, you must set AUTH_OIDC_ENABLED to true in your environment configuration.AUTH_INTERNAL_ENABLED has been introduced.
AUTH_INTERNAL_ENABLED to true.AUTH_INTERNAL_ENABLED to false.Password Variable Rename
AUTH_PASSWORD has been renamed to AUTH_INTERNAL_PASSWORD.AUTH_INTERNAL_PASSWORD if you rely on internal authentication.Bearer Token Variable Rename
AUTH_TOKEN has been replaced by AUTH_INTERNAL_BEARER_TOKEN.AUTH_INTERNAL_BEARER_TOKEN for api bearer token authentication.When upgrading from 2.x to 3.x, the following changes need to be made:
SECURITY_CODE has been replaced by AUTH_PASSWORD.
AUTH_PASSWORD instead of SECURITY_CODE.DISABLE_AUTH has been replaced by AUTH_DISABLE.
DISABLE_AUTH with AUTH_DISABLE in your environment variables.The API bearer token now uses a dedicated variable AUTH_TOKEN.
AUTH_TOKEN variable and update your implementations to use this new token instead of the SECURITY_CODE.No migration steps are required.
Versions before v1 do not have a direct migration path. If you are using a version earlier than v1, a fresh installation is required. Be sure to back up any important data before proceeding with a re-install.
MIT
more like this
🎉🌟✨🎈年会抽奖程序,基于 Express + Three.js的 3D 球体抽奖程序,奖品🧧🎁,文字,图片,抽奖规则均可配置,😜抽奖人员信息Excel一键导入😍,抽奖结果Excel导出😎,给你的抽奖活动带来全新酷炫体验🚀🚀🚀
A specialized swipe card for todo lists in Home Assistant with custom styling
ESPHome Modbus TCP↔RTU Bridge – Transparent bridge for ESP8266/ESP32 that lets multiple Modbus TCP clients communicate…
search projects, people, and tags