agentlytics
Comprehensive analytics dashboard for AI coding agents — Cursor, Windsurf, Claude Code, VS Code Copilot, Zed, Antigravi…
JavaScript★ 555
Lightweight self-hosted web control panel & dashboard for Raspberry Pi — system monitoring, GPIO, services, processes,…
 gumslone

GumCP is a lightweight, self-hosted web control panel for Raspberry Pi — a simple open-source alternative to Webmin and Cockpit. Monitor your Pi from any browser (system dashboard with CPU, memory, temperature, disk, swap and network stats), control GPIO pins, manage systemd services and processes, run shell commands over SSH, and trigger custom command buttons via a REST-style HTTP API. Built with PHP and Apache, it runs on every model from the Pi 1 to the Pi 5 and is ideal for homelab and home-automation setups.
If you find GumCP useful, please ⭐️ star the repo to help others find it!
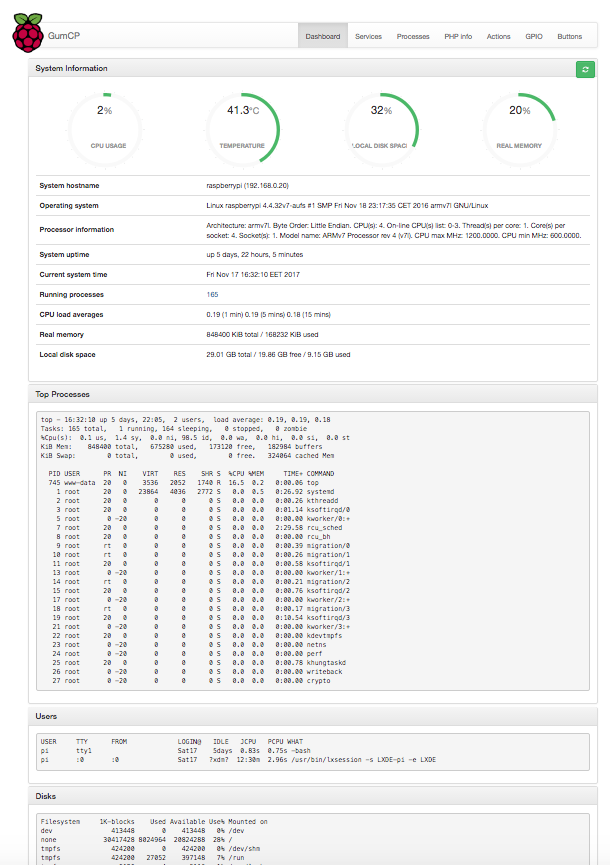
More screenshots in the screenshots folder.
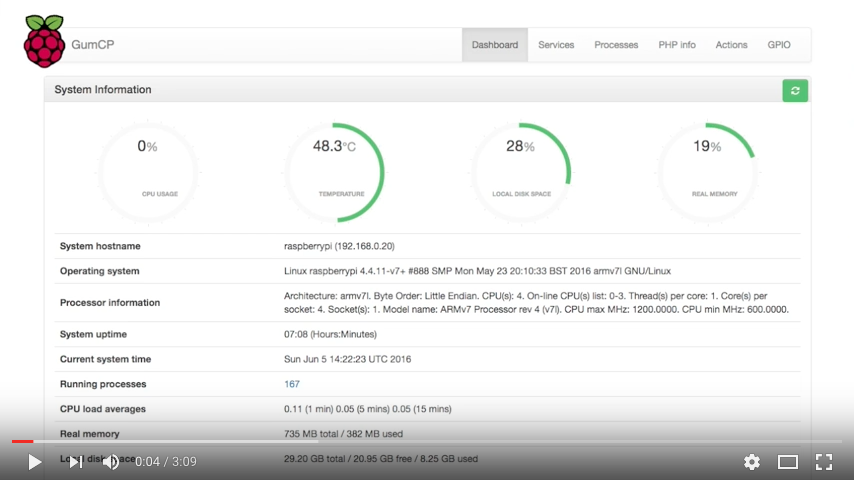
vcgencmd firmware, clock speeds, voltages, memory split and codec licences; enable/disable I2C, SPI, 1-Wire, SSH, VNC and camera via raspi-config; edit config.txt / cmdline.txt with automatic backup; live temperature & CPU-frequency history chartapt update) and upgrade everything (apt upgrade) from the browserdmesg and /var/log files with adjustable line count and text filtering/etc/crontab/etc/passwd and /etc/groupconfig.php if you run Docker)check.php) that verifies PHP extensions, directory permissions, SSH connectivity and GPIO tools; Fix buttons repair common issues over SSH without touching the terminalconfig.php and switch from the navbar (remembered per session). Untranslated strings fall back to English; add a language by dropping a file into include/lang/| Raspberry Pi model | GPIO tool |
|---|---|
| Pi 1 / Pi 2 / Pi 3 / Pi 4 | WiringPi (community fork) |
| Pi 5 | raspi-gpio (automatic fallback) |
PHP 7.0, 7.4, 8.0, 8.1, 8.2, 8.3 are all supported.
Run these two commands on your Raspberry Pi (via SSH or a terminal):
sudo apt-get update && sudo apt-get install -y wget
wget https://raw.githubusercontent.com/gumslone/GumCP/master/installer.sh && bash ./installer.sh
The installer will:
php-ssh2, php-sqlite3, php-curl, php-zip)raspi-gpio (Pi 5) automatically/var/www/html/GumCP/include/config.php from the bundled templatebuttons/, command_logs/) with correct ownershipwww-data web-server userOnce complete, open GumCP in a browser:
http://<your-pi-ip>/GumCP/
Default credentials (set in
include/config.php):
- Username:
pi- Password:
raspberryYou can sign in immediately — no extra setup step. These are published here, so change the password as soon as you are in: until you do, anyone who can reach the panel can sign in and run commands on this host. GumCP shows a warning banner on every page, and flags it in System Check, while the default is still in use.
Change it in
include/config.php(LOGIN_PASS), or from the browser atsetup.phpif no login is configured yet.
wget https://raw.githubusercontent.com/gumslone/GumCP/master/uninstall.sh && bash ./uninstall.sh
The uninstaller will:
config.php, buttons and logs to ~/gumcp_backup_<timestamp>/ before removing anything/var/www/html/GumCP/sudo apt-get update sudo apt-get install -y apache2 php libapache2-mod-php php-ssh2 php-sqlite3 php-curl php-zip sudo systemctl restart apache2
Pi 1, 2, 3, 4 — WiringPi community fork (the original git.drogon.net URL is no longer available):
git clone https://github.com/WiringPi/WiringPi.git ~/wiringPi
cd ~/wiringPi && ./build
Pi 5 — WiringPi does not support the RP1 GPIO chip; use raspi-gpio instead:
sudo apt-get install -y raspi-gpio
GumCP's GPIO page detects the available tool automatically.
sudo git clone https://github.com/gumslone/GumCP.git /var/www/html/GumCP
cd /var/www/html/GumCP

# Create your local config from the template
sudo cp include/config.example.php include/config.php

# Create runtime directories
sudo mkdir -p buttons command_logs

# Set ownership and permissions
sudo chown -R www-data:www-data /var/www/html/GumCP
sudo chmod -R 755 /var/www/html/GumCP
sudo chmod 664 /var/www/html/GumCP/include/config.php

# Stop the web server serving runtime data (button API hashes, command output).
# .htaccess alone is ignored under Debian's default AllowOverride None.
sudo sed "s|@GUMCP_DIR@|/var/www/html/GumCP|g" deploy/gumcp-apache.conf \
    | sudo tee /etc/apache2/conf-available/gumcp.conf > /dev/null
sudo a2enconf gumcp

# Allow the web server to read GPU throttling status (dashboard Power & Throttling panel)
sudo usermod -aG video www-data
sudo systemctl restart apache2
Edit include/config.php to set your credentials and SSH settings:
sudo nano /var/www/html/GumCP/include/config.php
Key settings:
define('SSH_PORT', '22');        // SSH port
define('SSH_USER', 'pi');        // the Pi account GumCP runs commands as
define('SSH_PASS', 'raspberry'); // its REAL system password — commands fail if wrong

// Web login. If you omit these they inherit SSH_USER / SSH_PASS above, so there
// is one password to keep current. Set them explicitly only if you want the web
// login to be a different account or password from the system one.
define('LOGIN_REQUIRED', true);  // false does NOT open the panel — see below
define('LOGIN_USER', 'pi');
define('LOGIN_PASS', 'raspberry'); // CHANGE THIS (and SSH_PASS above)

define('BASIC_AUTH', false);     // true = also accept HTTP Basic Auth
define('BASIC_AUTH_USER', 'api');
define('BASIC_AUTH_PASS', 'secret');
include/config.php, buttons/ and command_logs/ are not tracked by git — your credentials, buttons and logs are preserved across upgrades automatically.
cd /var/www/html/GumCP
sudo git pull origin master
Or use the Update GumCP button on the Actions page — no terminal needed.
GumCP supports three modes, configurable independently:
| Mode | Config | Description |
|---|---|---|
| Login page (default) | LOGIN_REQUIRED=true |
Browser redirected to the login form |
| Basic Auth | BASIC_AUTH=true |
Browser shows the native credentials dialog; curl/API clients send an Authorization header |
| Both | both true |
Either method grants access, with independent credentials |
| Refuses to serve | both false |
Not an open panel. With no authentication configured GumCP shows setup instructions instead of the panel |
| Open (dangerous) | GUMCP_ALLOW_UNAUTHENTICATED=true |
Deliberate opt-out. Anyone who can reach the panel can run commands as SSH_USER; a red banner is shown on every page |
Optionally check the login against the real system account. With
LOGIN_CHECK_SYSTEM_USER set to true, the submitted username and password are
verified by authenticating over SSH — the same thing GumCP does to run commands —
instead of being compared to LOGIN_PASS. LOGIN_USER still decides who may
sign in — the submitted username must match it — while only the password is
delegated to the OS, so LOGIN_PASS becomes unused and may be left empty and can
never drift out of sync with the real one. LOGIN_USER defaults to SSH_USER;
naming a different system account works, but whoever signs in can have GumCP run
commands as SSH_USER, so don't name a less trusted account. Off by default, in
which case the login is an ordinary config credential.
The login credentials are the Pi's own account. LOGIN_USER / LOGIN_PASS
default to SSH_USER / SSH_PASS, because GumCP needs the real system password
for SSH anyway — changing the Pi's password means updating SSH_PASS or every
command stops working, and the login follows automatically. Set LOGIN_USER /
LOGIN_PASS explicitly if you would rather the web login be a separate account
or password; Basic Auth always uses its own credentials.
// Login page
define('LOGIN_REQUIRED', true);
define('LOGIN_USER', 'admin');
define('LOGIN_PASS', 'changeme');

// HTTP Basic Auth (separate credentials — useful for API/curl access)
define('BASIC_AUTH', true);
define('BASIC_AUTH_USER', 'api');
define('BASIC_AUTH_PASS', 'secret');
Create one-click buttons for any shell command from the Buttons page.
| Mode | Behaviour |
|---|---|
| Modal (default) | Click opens a dialog showing the command; press Execute to run; output shown in the dialog |
| Direct | Click runs immediately; output appears inline below the button |
Toggle between modes with the Direct execution checkbox when creating or editing a button.
Off by default for new installs — it is the one endpoint that runs a command
without a login, so you opt in. Enable it in config.php:
$gumcp_modules['button_api']['module_active'] = 1;
Every button then gets a unique secret hash. That hash is the credential, so treat it like a password — no session or Basic Auth is required to use it:
curl -H 'X-GumCP-Key: <32-char-hash>' http://<your-pi-ip>/GumCP/api.php
Response:
{"success": true, "button": "Restart Apache", "output": ""}
The API URL is shown in the button's Edit dialog. Use Regenerate hash to invalidate an old URL and get a new one instantly.
Every API call is logged to command_logs/api_calls.log (JSON lines) with timestamp, IP, user-agent, and command output — including rejected ones. Log files are not accessible via the browser.
Keep the key out of logs. A ?hash= query string is recorded in web-server access logs, browser history and Referer headers. Send it as a header instead:
curl -H 'X-GumCP-Key: <32-char-hash>' http://<your-pi-ip>/GumCP/api.php
Restrict who can call it. Optionally limit the API to specific addresses in config.php — anything else gets a 403 before the hash is even examined:
$gumcp_api_allow_ips = ['192.168.1.50', '192.168.1.0/24']; // empty = no IP restriction
Matching uses the real peer address, so a spoofed X-Forwarded-For header cannot bypass it. If GumCP sits behind a reverse proxy, the allowed address is the proxy's.
Example: trigger from Home Assistant
rest_command:
  restart_apache:
    url: "http://192.168.1.10/GumCP/api.php?hash=a3f8c2d1e4b79056..."
    method: GET
GumCP includes a built-in diagnostic tool. Open it in your browser:
http://<your-pi-ip>/GumCP/check.php
Or run the CLI version on the Pi:
# Check only
bash /var/www/html/GumCP/check.sh

# Check and auto-fix permissions/missing directories
sudo bash /var/www/html/GumCP/check.sh --fix
The check covers PHP extensions, directory writability, SSH connectivity, GPIO tools and required system commands. Each failing item shows a Fix button that applies the repair over SSH without needing a terminal.
These pages require the php-ssh2 extension and a running SSH server:
sudo apt-get install -y php-ssh2
sudo systemctl enable ssh && sudo systemctl start ssh
sudo systemctl restart apache2
The buttons/ directory is missing or not owned by www-data:
sudo mkdir -p /var/www/html/GumCP/buttons
sudo chown www-data:www-data /var/www/html/GumCP/buttons
Or use the System Check page's Fix button.
gpio readallraspi-gpio: sudo apt-get install -y raspi-gpio and verify with raspi-gpio getApache strips the Authorization header by default. The included .htaccess passes it through via RewriteRule. Make sure mod_rewrite is enabled:
sudo a2enmod rewrite
sudo systemctl restart apache2
vcgencmd needs GPU access, which the www-data web user lacks by default. Add it to the video group:
sudo usermod -aG video www-data
sudo systemctl restart apache2
(The installer does this automatically on Raspberry Pi hardware.) On non-Pi hardware the panel is expected to stay unavailable.
TeHyBug is a low-power temperature/humidity/pressure Wi-Fi tracker available at Tindie.
Enable it in config.php (module_active => 1). Requires SQLite:
sudo apt-get install -y php-sqlite3
⚠️ GumCP requires authentication
GumCP executes shell commands as the SSH user (which the install guide gives passwordless
sudo). Anyone who can reach an unauthenticated panel can take over the host. Since 2.5.2 GumCP therefore fails closed: if neitherLOGIN_REQUIREDnorBASIC_AUTHis enabled, it refuses to serve and shows setup instructions instead. Never expose GumCP directly to the internet.
include/config.php before putting GumCP on any network — the shipped defaults are publicLOGIN_REQUIRED is enabled by default. Disabling it does not open the panel; GumCP refuses to serve until some authentication is configuredGUMCP_ALLOW_UNAUTHENTICATED to true, which disables all authentication. Only consider this on a fully isolated network; a red warning banner is shown on every page while it is active$gumcp_modules['button_api']['module_active'] = 0 in config.php to disable itcommand_logs/ and buttons/ are blocked from direct web access by the Apache config the installer adds (deploy/gumcp-apache.conf). This matters: buttons/buttons.json stores each button's API hash, which triggers a command with no login, and command_logs/ holds whatever your commands printed. .htaccess alone is not enough — Debian and Raspberry Pi OS set AllowOverride None for /var/www, which silently ignores it. If you installed before this was added, or set GumCP up by hand:sudo cp deploy/gumcp-apache.conf /etc/apache2/conf-available/gumcp.conf sudo sed -i "s|@GUMCP_DIR@|/var/www/html/GumCP|g" /etc/apache2/conf-available/gumcp.conf sudo a2enconf gumcp && sudo systemctl reload apache2
System Check verifies this by actually requesting the files over HTTP, so it reports what your server really does rather than assuming.
apt, journalctl, raspi-config, writing boot files) via sudo over SSH, which requires the SSH user to have passwordless sudo — the same assumption as the Actions page. See Limiting what GumCP can run below.api.php) executes a button's command with no login — the per-button hash is the only credential. It is off by default for new installs; enable it with $gumcp_modules['button_api']['module_active'] = 1 only if you need it, and treat the URLs like passwords. Prefer sending the key as a header so it stays out of access logs and browser history:curl -H 'X-GumCP-Key: <32-char-hash>' http://<your-pi-ip>/GumCP/api.php
Adminer (database manager) and TinyFileManager (web file manager) are not bundled. A vendored copy ships whatever vulnerabilities it had on the day it was copied in and then quietly goes stale — both projects have had security advisories. Install the version you choose from upstream instead. The easiest way is the Optional modules panel on the Actions page — it shows what's installed, installs or updates a chosen version, and removes it again. Or from a shell:
cd /var/www/html/GumCP
./scripts/install-module.sh adminer                # pinned default version
./scripts/install-module.sh adminer 4.8.1          # or pick any released version
./scripts/install-module.sh tinyfilemanager
Installing from the Actions panel also enables the module. From the shell, enable it afterwards in include/config.php:
$gumcp_modules['adminer']['module_active'] = 1;
Update later by re-running the script with a newer version. The upstream file is
stored in modules/<name>/vendor/ and blocked from direct web access; requests go
through a generated entry file that requires your GumCP login first, so the
module is never reachable by an unauthenticated visitor. Only enable what you use —
these are powerful tools with their own security history.
By default GumCP's SSH user needs blanket passwordless sudo, which means a
compromise of the panel is a compromise of the host. If you don't need the
free-text Execute command box or arbitrary command buttons, create a
dedicated user and grant only the commands the built-in pages actually call:
# /etc/sudoers.d/gumcp   (edit with: sudo visudo -f /etc/sudoers.d/gumcp)
Cmnd_Alias GUMCP_PKG  = /usr/bin/apt-get update, /usr/bin/apt-get -y upgrade
Cmnd_Alias GUMCP_LOG  = /bin/journalctl *, /bin/dmesg, /usr/bin/tail -n * /var/log/*
Cmnd_Alias GUMCP_SVC  = /usr/sbin/service * start, /usr/sbin/service * stop, \
                        /bin/systemctl start *, /bin/systemctl restart *, \
                        /bin/systemctl enable *
Cmnd_Alias GUMCP_SYS  = /sbin/reboot, /usr/bin/raspi-config nonint *
Cmnd_Alias GUMCP_PROC = /bin/kill -9 *, /usr/bin/killall *

gumcp ALL=(root) NOPASSWD: GUMCP_PKG, GUMCP_LOG, GUMCP_SVC, GUMCP_SYS, GUMCP_PROC
Then point SSH_USER / SSH_PASS at that account. Trade-off: anything not
listed — the Actions command box, arbitrary buttons, Docker control, the boot-file
editor, and the in-app updater — will fail with a sudo error. Add the specific
commands you need (paths vary by OS; check with command -v), and prefer widening
the list over falling back to NOPASSWD: ALL.
robots.txt is included and blocks all search crawlers from indexing GumCPIs GumCP a Webmin or Cockpit alternative for Raspberry Pi? Yes — it's a lightweight, single-purpose web control panel focused on Raspberry Pi: system monitoring, GPIO, services, processes and one-click command buttons. It installs in minutes on Raspberry Pi OS with no database required.
Which Raspberry Pi models are supported?
All of them — Pi 1, 2, 3, 4 and Pi 5. GPIO uses WiringPi on Pi 1–4 and raspi-gpio on Pi 5 automatically.
Can I monitor my Raspberry Pi remotely from a browser? Yes. The dashboard shows live CPU, memory, swap, disk, temperature, throttling and per-interface network stats, auto-refreshing without a page reload. Protect remote access with the built-in login page or HTTP Basic Auth.
Can I trigger commands from Home Assistant or scripts? Yes — every command button has a secret HTTP API URL you can call from Home Assistant, curl, or any automation tool.
Raspberry Pi web control panel · Raspberry Pi dashboard · Raspberry Pi system monitor · Raspberry Pi GPIO web interface · Webmin alternative · Cockpit alternative · self-hosted Pi monitoring · homelab control panel · PHP Raspberry Pi admin panel · remote Raspberry Pi management.
GumCP is provided "as is", without warranty of any kind, express or implied. It executes shell commands, edits system and boot configuration files, manages packages and services, and controls GPIO pins — all of which can, if misused or misconfigured, render your system unbootable, cause data loss, or damage your Raspberry Pi and any connected hardware.
You use GumCP entirely at your own risk. The authors and contributors accept no liability for any damage, data loss, downtime, or other harm arising from its use. Always keep backups, change the default credentials, restrict network access, and only run commands you understand. See the LICENSE for the full terms.
Released under the MIT License.
more like this
Comprehensive analytics dashboard for AI coding agents — Cursor, Windsurf, Claude Code, VS Code Copilot, Zed, Antigravi…
A to-do list that runs your Claude Code agents — capture anywhere, dispatch in parallel, review from your phone.
Arduino library and MATLAB/Simulink API for the AutomationShield Arduino expansion boards for control engineering educa…
search projects, people, and tags