xylocopa
A to-do list that runs your Claude Code agents — capture anywhere, dispatch in parallel, review from your phone.
Python★ 51
🔌 Detect the state of your appliances based on their power consumption ✨
 leofabri
git clone https://github.com/leofabri/hassio_appliance-status-monitor.gitleofabri/hassio_appliance-status-monitor
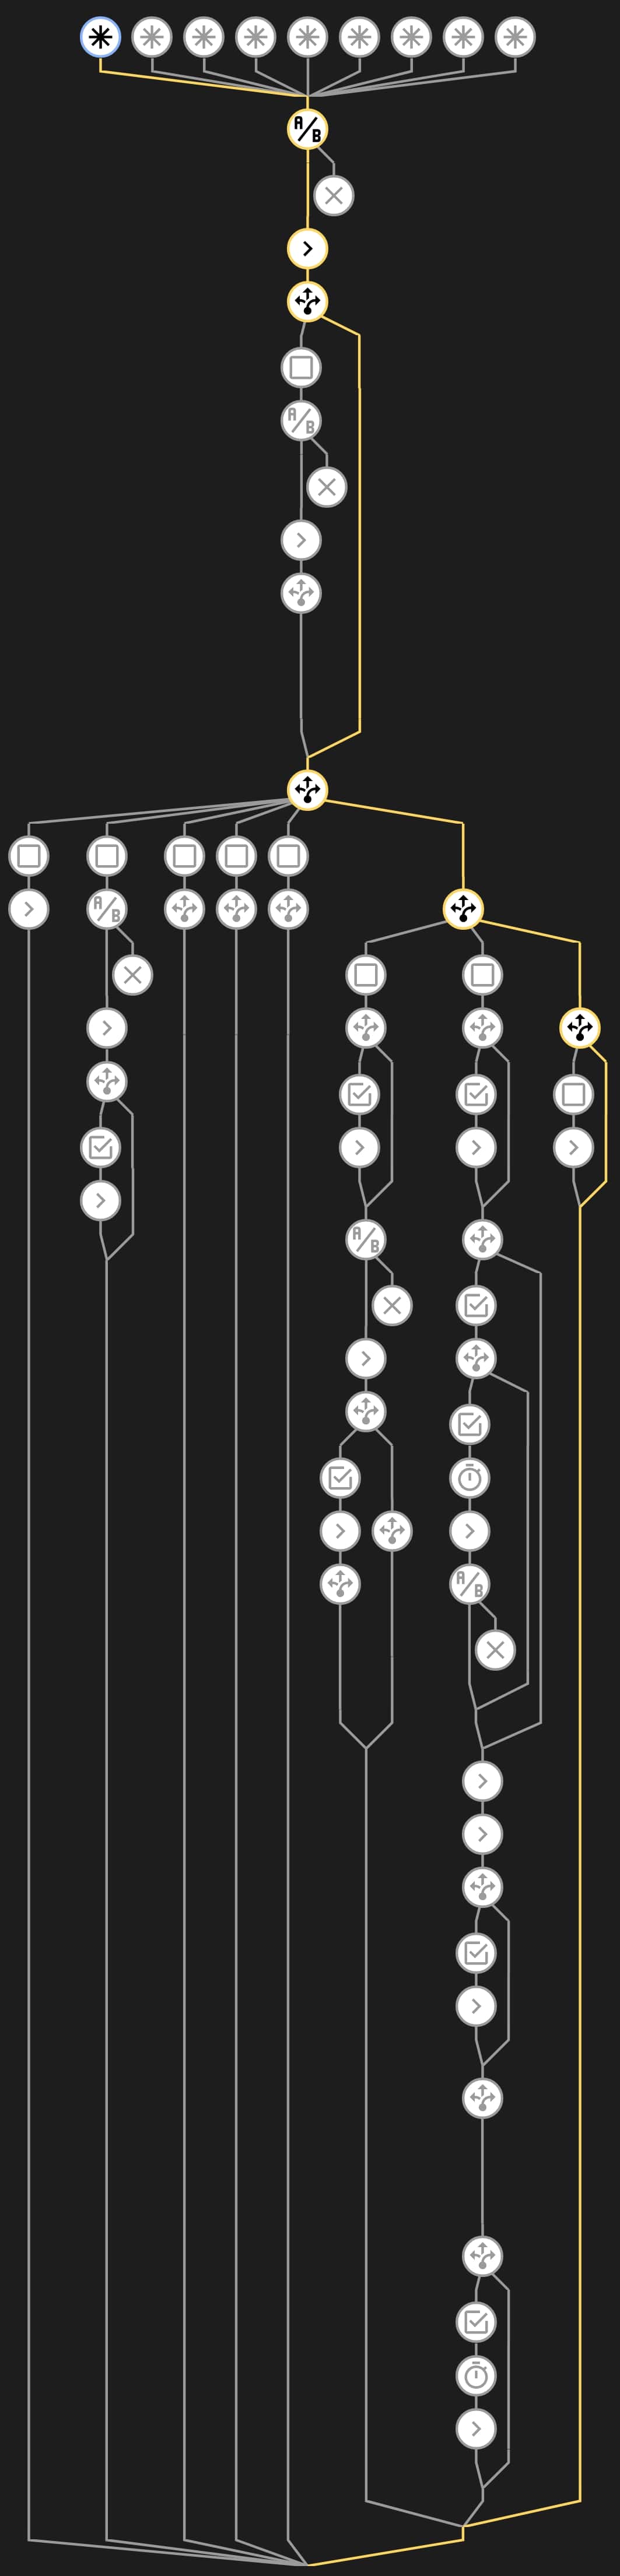
This is the automation I made to control the state of the most power-hungry appliances in my house.
There aren’t numerous blueprints that do what I want, and I’m sure that I have the skills to automate my machines without wasting money to buy them new. Here’s my cheap and reliable solution that addresses the problem, once and for all.
I use this for my dishwasher and washing machine and the results have been great! The blueprint is very extensible and easy to use. My family ❤️ this thing! Even if they don’t understand its complexity and get what all the fuss is about.
As I said, I’m sharing this with everyone. I’m sure that you’ll find it useful!
For the record: there is more inside but, here's a summary of what this thing allows you to do:
🎛️ More triggers: more control, even across Home Assistant reboots!
⏱️ Faster machine start-to-finish detection: one of the problems that I always face is timing. What if you want to measure how long it took for your appliance to complete its job? The automation has to be very reactive. This logic should solve that problem for you.
📉 Unreliable power absorption filtering and inhibition: This is useful! It prevents the blueprint from thinking that a job was completed as soon as the power falls below the finishing power threshold. You can set your timing here.
📅 Set your custom actions for each of the following conditions:
All of these are optional!
So that you can tell if it's in one of the following states:
unplugged - means that the appliance is no longer powered. It happens when the user manually turns off the smart socket (from HA or the socket itself).
idle - There is no pending job, the machine is powered but idling.
paused - Indicates that a job is pending (incomplete cycle) but the appliance is not performing it. The inhibitors of these state are the detached_overload and unplugged states. In this condition, the Power absorption is lower than the finishing power threshold. The appliance must be off (maybe the user turned it off manually, or maybe the job needs some time to recover). The blueprint is waiting for the appliance to resume.
Pro Tip! You could use this state to diagnose and warn if a job is not resumed after x minutes.
detached_overload - This happens when, during a cycle, the appliance used too much power and was therefore suspended. It is also technically unplugged.
job_ongoing - Triggered in two situations:
job_completed - Triggered when the current incomplete job cycle is finished. The appliance consumes less than the Finishing Power threshold (with the possibility of selecting for how long).
Note: Each state transition is handled automatically, you just have to provide the initial configuration.
Let's install it!
To achieve this level of control the socket must have some basic features:
Mine is a Meross MSS310EU, but most smart sockets should be supported.
There are two possible ways of doing this:
Setup via the UI [Discouraged but Beginner Friendly]: newcomers that might be a little into shiny-but-dark UIs 😎 might want to set up this blueprint following this documentation here.
...
Setup via the old school YAML [Optimal & Suggested]: The best way of creating what we need is to create a package (suggestion provided by @HollyFred) because it allows us to create all the necessary helpers (timers, input_booleans, etc.) in one shot. Continue reading for this one ⬇️
Creating a package is super easy. Some of you may already have the right configuration in place, but I'll show you how to do that anyway.
Note: you need to have the VS Code integration enabled. This will allow you to manually edit the necessary files. Need help with that? Read this.
Back to us, here are the two steps for creating a package:
Make sure that you have a directory called 'packages'.
If you are a beginner, or you are starting fresh with your HA installation, likely, the packages dir is not present.
To add it, you can:
Open your HomeAssistant VS Code editor and create a directory called
packages(at the same level as the configuration.yaml file).
OR
Issue this command in the terminal section of your VS Code:
cd /config && mkdir packagesEasy-peasy.
Result: You should see the packages' directory at the same level as the configuration.yaml file.
Make sure that the packages support is enabled inside the configuration.yaml file as shown below:
homeassistant:
  ## Packages support enabled - Includes every .yaml file that is inside the packages/ directory
  packages: !include_dir_named packages/
  ## Warning! Please pay attention to the indentation!
Now we are ready to create our first package.
PRESETS - If you want to simplify this setup even more, check out one of the already pre-made packages I prepared for you. (Washing Machine, Dryer, Dishwasher and more are already supported)
Open the packages/ directory and create a file with the name of your appliance.
For example, I'm calling mine washing_machine.yaml but yours could be different. It's always better to call it something like <your_appliance_name>.yaml. Here's a blank file for that.
Remember that in order to use the blueprint you'll always need these four ingredients inside a package:
input_select:
  <your_appliance_name>_state_machine:
    name: <Your Appliance Name> - State Machine
    options:
      - unplugged
      - idle
      - paused
      - detached_overload
      - job_ongoing
      - job_completed
    icon: mdi:<your_appliance_icon>
input_boolean:
  <your_appliance_name>_job_cycle:
    name: <Your Appliance Name> - Job Cycle
    icon: mdi:<your_appliance_icon>
timer:
  <your_appliance_name>_delayed_job_completion_timer:
    name: <Your Appliance Name> - Delayed Job Completion Timer
    duration: "00:15:00" # <- Note that the time here. Leave it 15 min
    restore: true
    icon: mdi:<your_appliance_icon>
input_boolean:
  <your_appliance_name>_automation_self_trigger:
    name: <Your Appliance Name> - Automation Self-trigger
    icon: mdi:<your_appliance_icon>
Important! Don't forget to edit all the fields <your_appliance_name>, <Your Appliance Name> and <your_appliance_icon> accordingly.
Are you trying to update to a newer version? Let's do that in a snap! Follow this guide.
If you have just created your package, please reboot Home Assistant (at this page → Verify & if okay, Reboot)
That's it!
Warning | always use those entities as indicators, do not change their values manually! Leave that to your automation
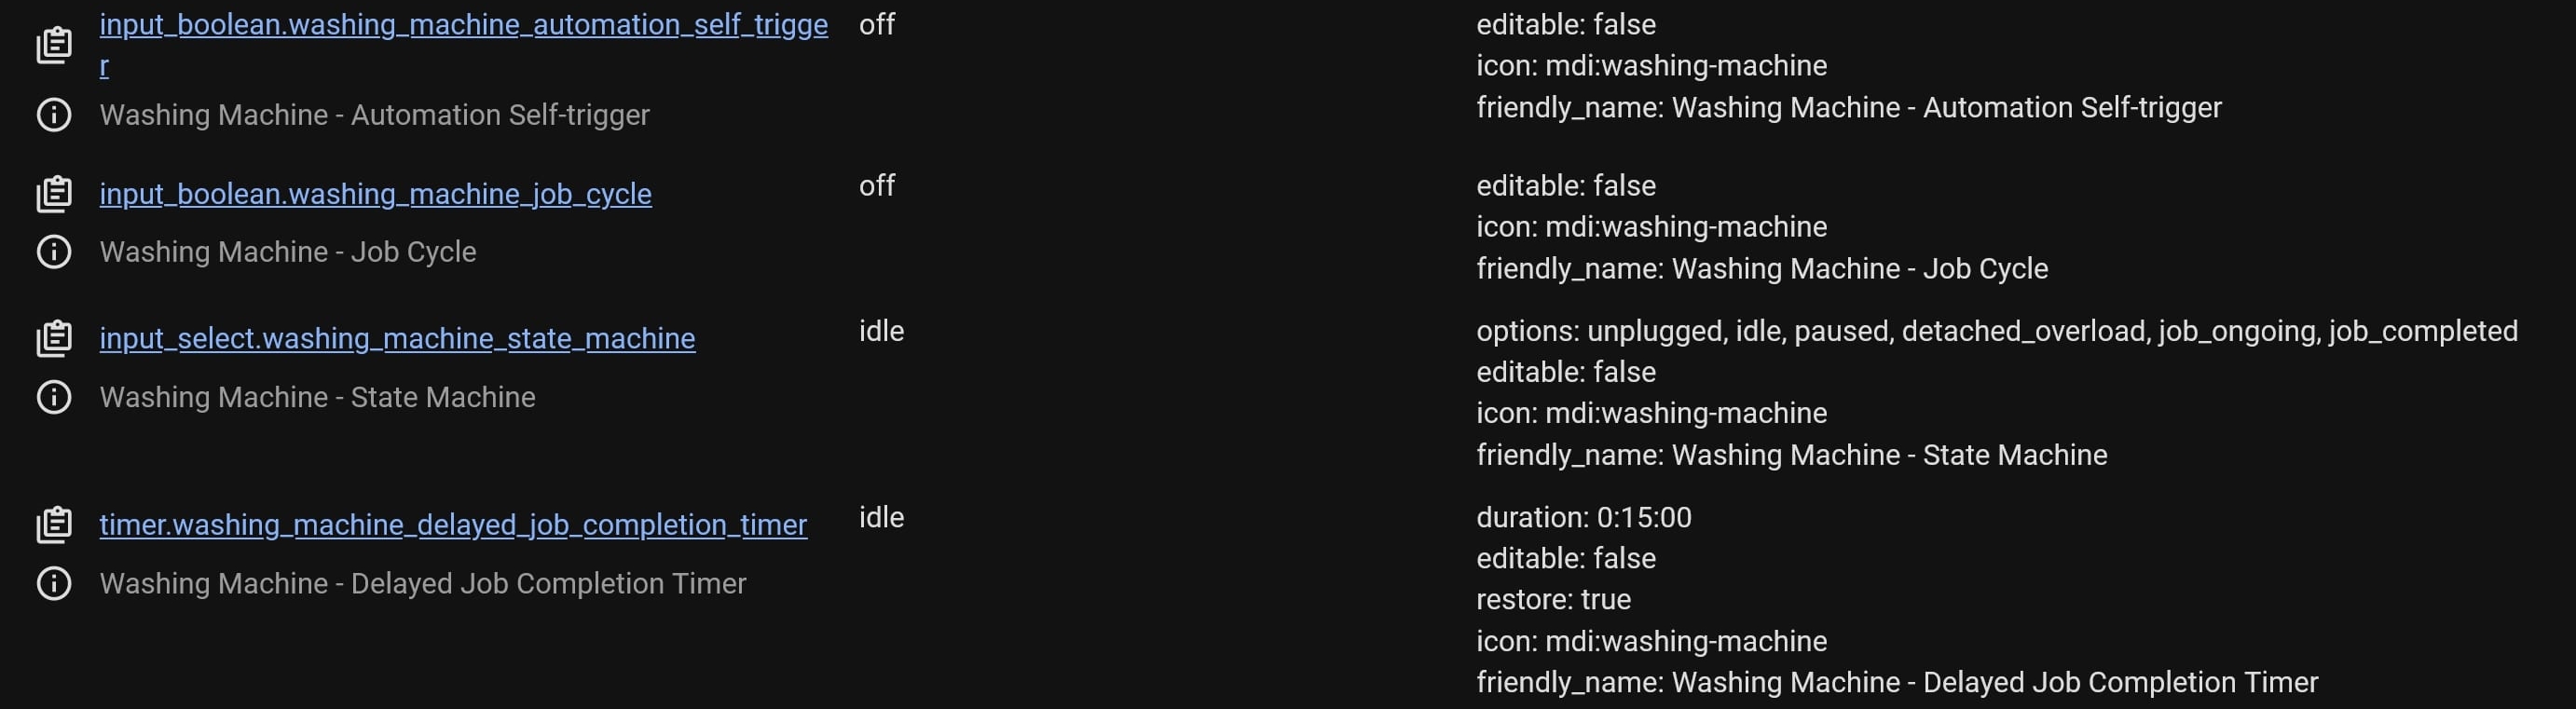
Washing Machine entities
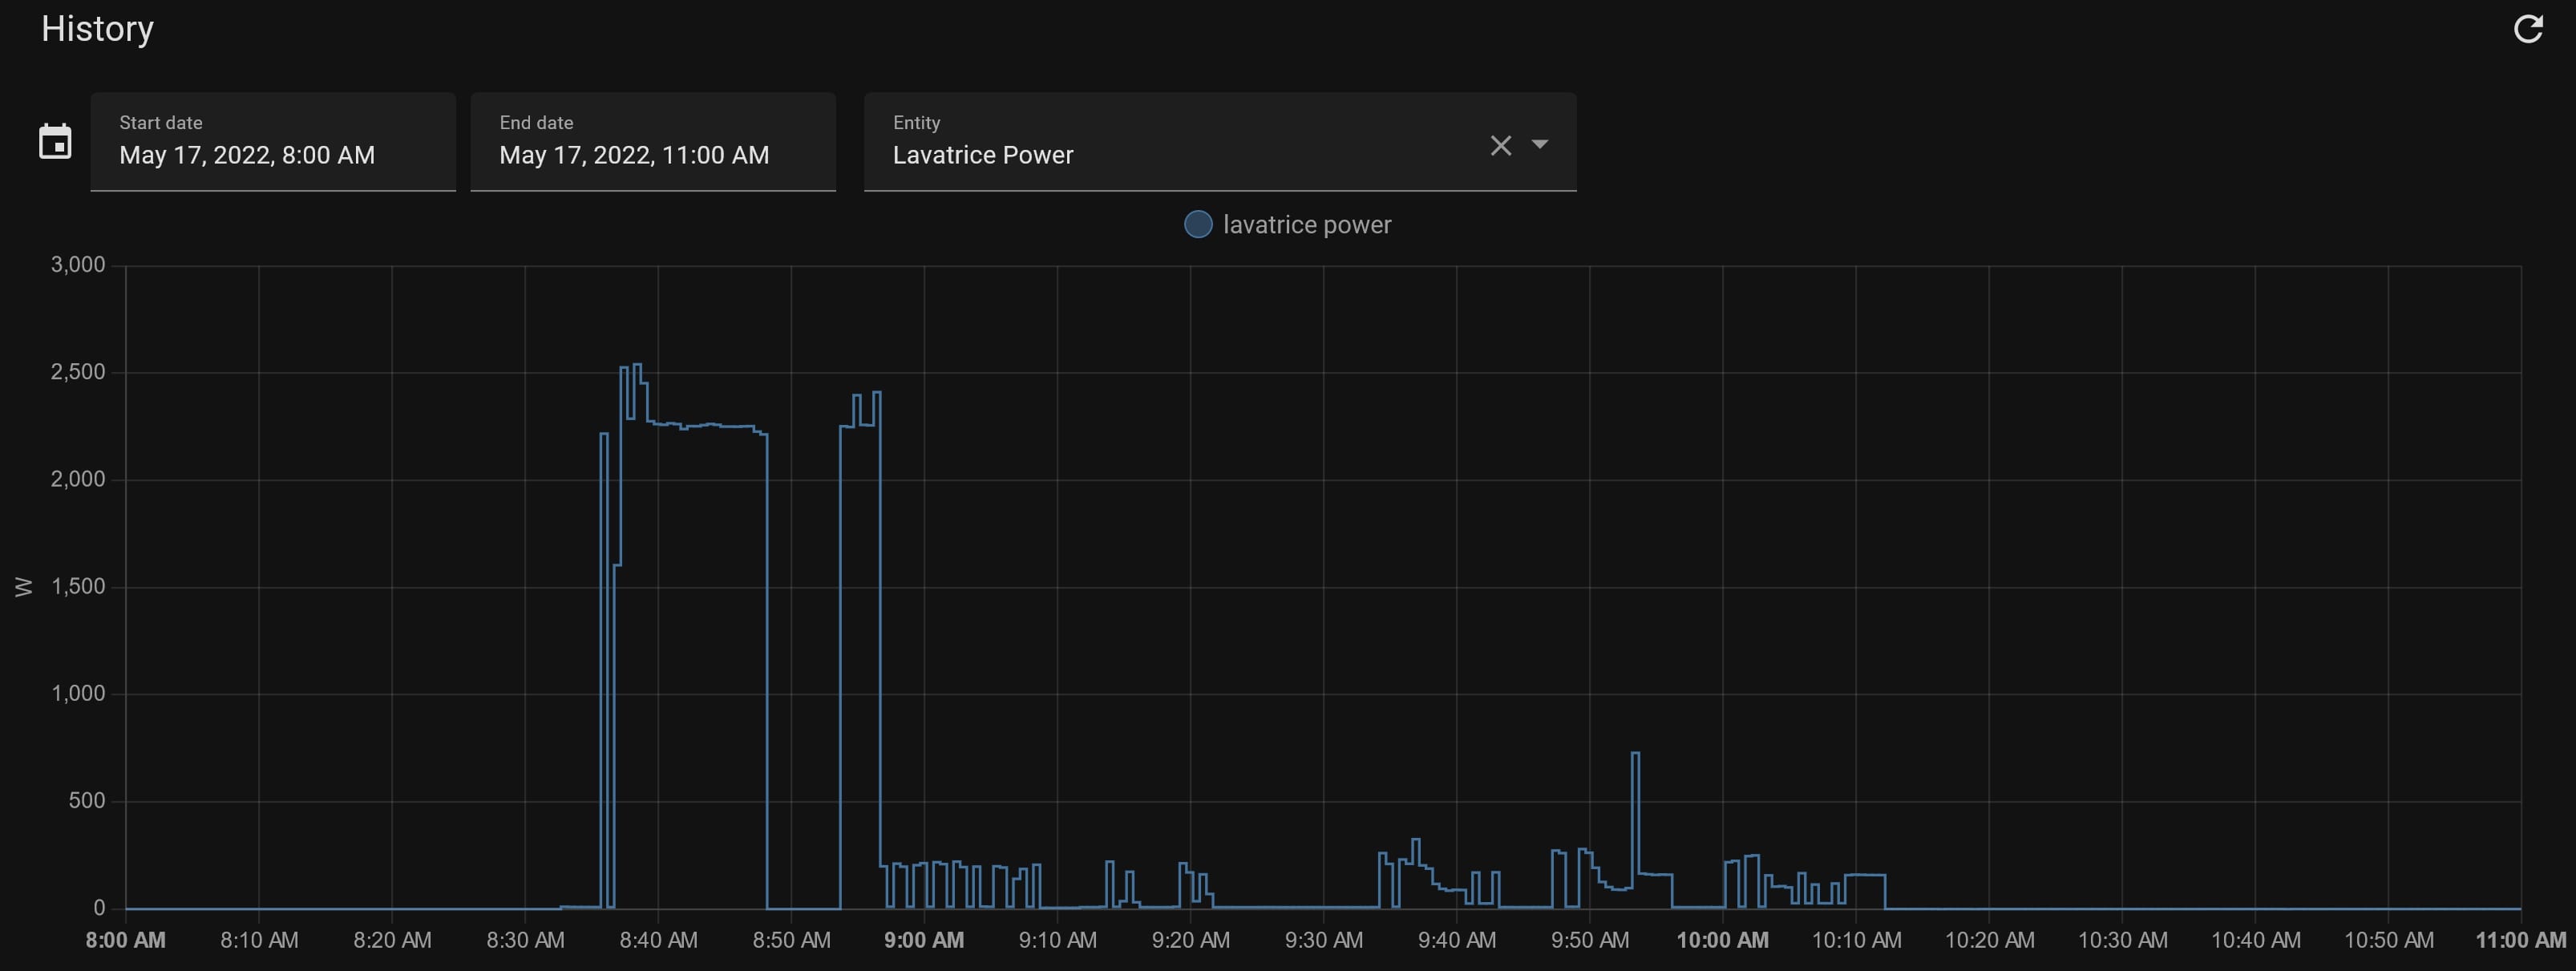
This is my washing machine. Power usage example
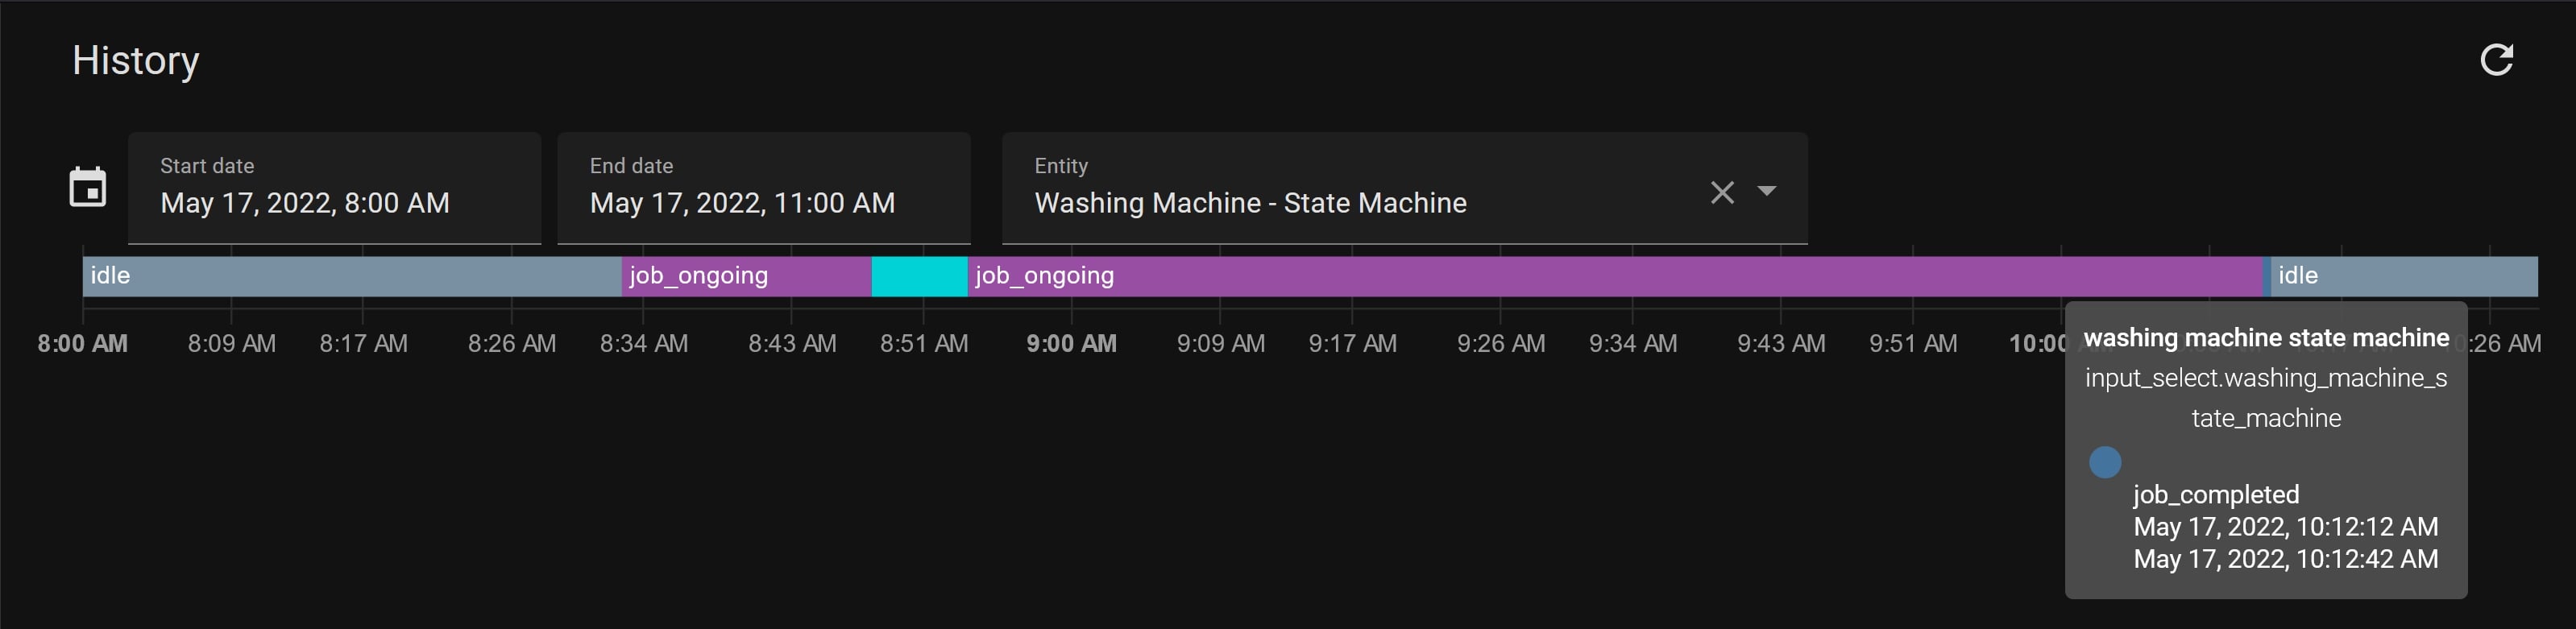
The State machine. The one in light blue is a simulated overload situation.
Description:
When you don’t indicate the Appliance suspended entity - which I marked as optional - the automation becomes unresponsive, thus making the optional value a required one.
Easy! Look for the current version number in the title. Now, open one of the automations that currently uses this blueprint and notice the version tag:
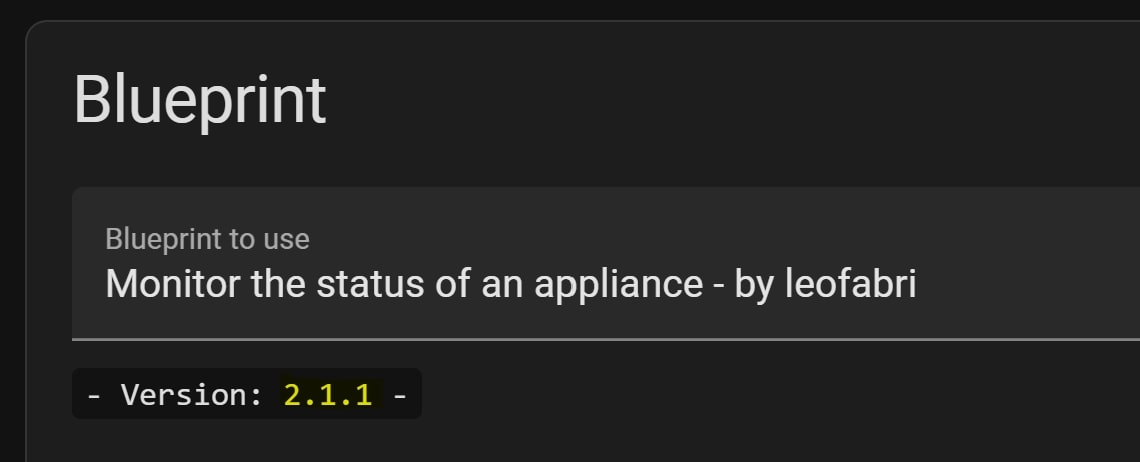
How to update:
- Open this page
(just click the link, it's magical) and scroll till you find "Monitor the status of an appliance - by leofabri" and delete it by clicking on the trash bin 🗑. Don't worry, we'll add it right back in a few secs, you can leave the automation as it is for now.
- Create the missing helpers (entities) as shown in the instructions
- Add the blueprint again
and reload Home Assistant.
- Open your automation and add the previously created helpers (entities)
more like this
A to-do list that runs your Claude Code agents — capture anywhere, dispatch in parallel, review from your phone.
Arduino library and MATLAB/Simulink API for the AutomationShield Arduino expansion boards for control engineering educa…
search projects, people, and tags