lottery
🎉🌟✨🎈年会抽奖程序,基于 Express + Three.js的 3D 球体抽奖程序,奖品🧧🎁,文字,图片,抽奖规则均可配置,😜抽奖人员信息Excel一键导入😍,抽奖结果Excel导出😎,给你的抽奖活动带来全新酷炫体验🚀🚀🚀
JavaScript★ 4.6k
Your first steps into immersive web development with WebXR.
 meta-quest
git clone https://github.com/meta-quest/webxr-first-steps.gitmeta-quest/webxr-first-steps
Welcome to WebXR First Steps! This 2-hour tutorial is designed to help you take your first steps into developing immersive WebXR experiences using Three.js. Whether you’re a web developer looking to expand your skillset or a hobbyist interested in creating virtual reality (VR) applications, this tutorial will guide you through the fundamentals of building interactive 3D worlds for the web.
By the end of this tutorial, you’ll have created a fully functional WebXR game where players can use VR controllers to shoot targets, track their score, and enjoy an immersive experience complete with sound, vibration, and smooth animations. Here's what the final experience looks like:

To prepare your development environment and get started with building your WebXR experience, follow the steps below:
Clone this repository:
git clone git@github.com:meta-quest/webxr-first-steps.git
cd webxr-first-steps
Verify that you have Node.js and npm installed:
20.x or later10.x or later
You can check your versions with these commands:node -v npm -v
Install dependencies:
npm install
Run the local development server:
npm run dev
After running the above command, your development server will be available at localhost:8081.
You can access the local development server from your XR headset by using one of two methods: via the IP address of your computer or by using ADB with port forwarding.
On most home networks, you can access the local server by entering your computer's IP address and the port number (8081) in the browser on your VR headset. This information is displayed in the Webpack console when you start the server.
For example:
<i> [webpack-dev-server] Project is running at:
<i> [webpack-dev-server] On Your Network (IPv4): https://192.168.0.123:8081/
You might encounter a warning about an invalid certificate when accessing the site from your browser client, which you can safely dismiss to access your site.
If accessing via IP address doesn’t work due to network restrictions or firewall settings, you can use ADB (Android Debug Bridge) and port forwarding:
Connect your headset to your computer: Use a USB cable and enable developer mode on your headset. Check your device's official documentation for instructions on enabling developer mode.
Set up port forwarding: Open Chrome on your computer and navigate to chrome://inspect/#devices. Your headset should appear under Remote Target.
Configure port forwarding:
8081 from your computer to your headset.You can now access the local server on your headset by entering https://localhost:8081 in the browser. As with the IP address method, you may encounter a certificate warning, which can be dismissed.
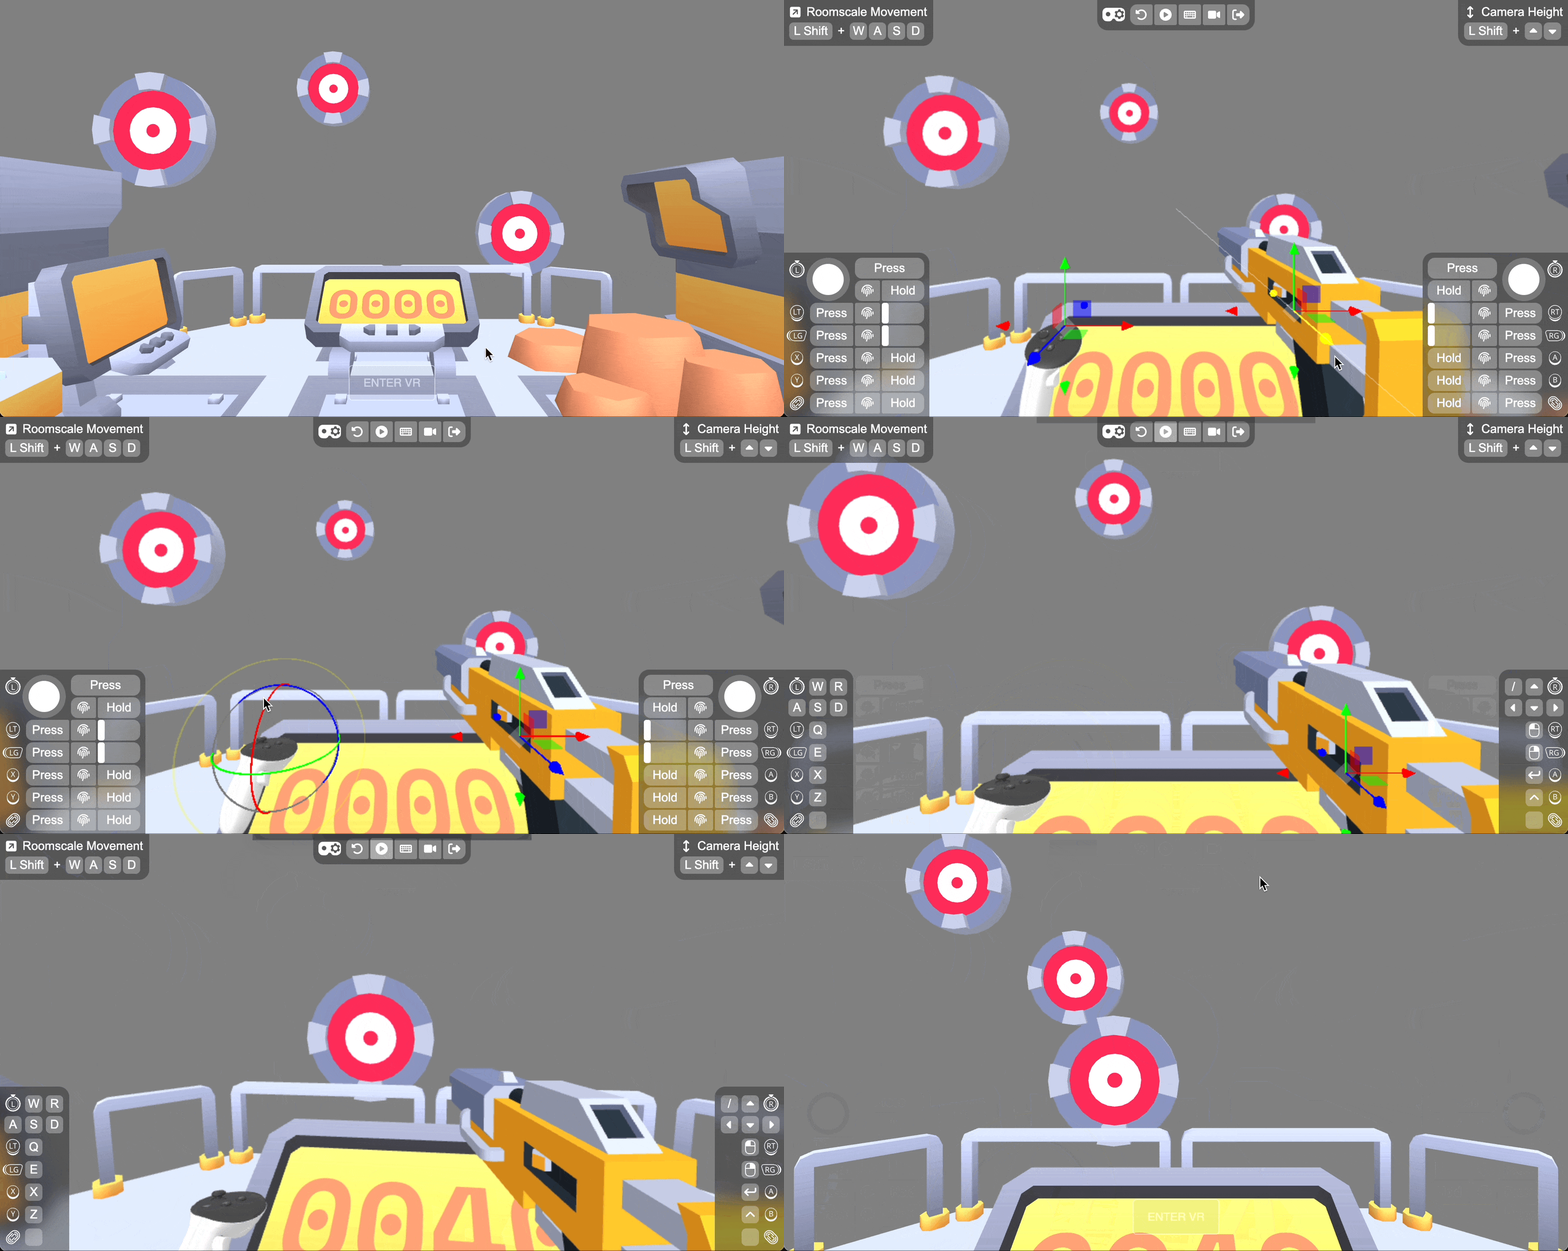
This project includes a built-in emulation setup located in ./src/init.js, powered by IWER (Immersive Web Emulation Runtime) and @iwer/devui. The emulation setup automatically detects native WebXR support in your browser and activates itself if no native WebXR support is found.
If you're already using the Immersive Web Emulator browser extension, the built-in emulation will not conflict with it, and you can safely skip this section. However, if you use other WebXR emulators, we recommend disabling them and using the built-in emulation setup for the best results.
Here’s a showcase of the emulation setup in action:
This tutorial is structured into chapters to help you progressively build your WebXR game. Follow each chapter in sequence, as each builds upon concepts introduced in the previous ones.
We hope you enjoy working through the tutorial. Happy coding, and have fun building your WebXR game!
Once you've completed the development of your WebXR game, you can build and deploy it for others to experience. Here's how you can do that:
This repository includes a ready-to-use GitHub Actions workflow located at .github/workflows/deploy.yml, which automates both the build and deployment to GitHub Pages. Once enabled, every time you push changes to the main branch, a new build will automatically be deployed.
Once this is set, GitHub Actions will handle the build and deployment process automatically. Any time you push changes to the main branch, the app will be built and deployed to GitHub Pages without any additional manual steps.
You can monitor the status of the deployment job or manually re-run it via the Actions tab in your GitHub repository.
If you prefer to host the app yourself, you’ll need to manually build the app and then deploy the generated files to your hosting provider.
To generate the build, run the following command:
npm run build
This will create a dist folder containing the static files for the app. You can then upload these files to your hosting platform of choice.
Please read CONTRIBUTING.md for details on how to contribute to the project.
This project is licensed under the MIT License - see the LICENSE.md file for details.
This sample is configured for AI coding agents.
For the best experience in VS Code or Cursor, install the Meta Horizon extension:
https://marketplace.visualstudio.com/items?itemName=meta.meta-vr-dev
This repository also includes agent instructions and MCP configuration for Meta Quest Agentic Tools:
https://github.com/meta-quest/agentic-tools
Suggested first prompt:
Read AGENTS.md, detect what type of Meta Quest sample this is, enable the hzdb MCP server if available, and explain how to build, run, and debug this sample on a Quest device.
more like this
🎉🌟✨🎈年会抽奖程序,基于 Express + Three.js的 3D 球体抽奖程序,奖品🧧🎁,文字,图片,抽奖规则均可配置,😜抽奖人员信息Excel一键导入😍,抽奖结果Excel导出😎,给你的抽奖活动带来全新酷炫体验🚀🚀🚀
🎥🤟 8 minimalistic templates for tfjs mediapipe handpose and facemesh
A repository about starting from scratch for monorepo, fastify, Phaser, colyseus, and threejs.
search projects, people, and tags