dsclaude
Claude Code & Desktop launchers for 11+ third-party LLM backends (DeepSeek, Qwen, Kimi, GLM, MiniMax, Doubao, LongCat,…
PowerShell★ 56
A powerful AI assistant integrated into KOReader.
 zeeyado
git clone https://github.com/zeeyado/koassistant.koplugin.gitzeeyado/koassistant.koplugin
Powerful, customizable AI assistant for KOReader.
New to KOAssistant? The Wiki has short getting-started guides. Help expand it.
Note: This README is the main documentation for now, and is being migrated to the Wiki. It was substantially refreshed in July 2026 to match the current code; if you spot anything out of date, or want to help with the wiki migration and docs cleanup, contributions are appreciated.
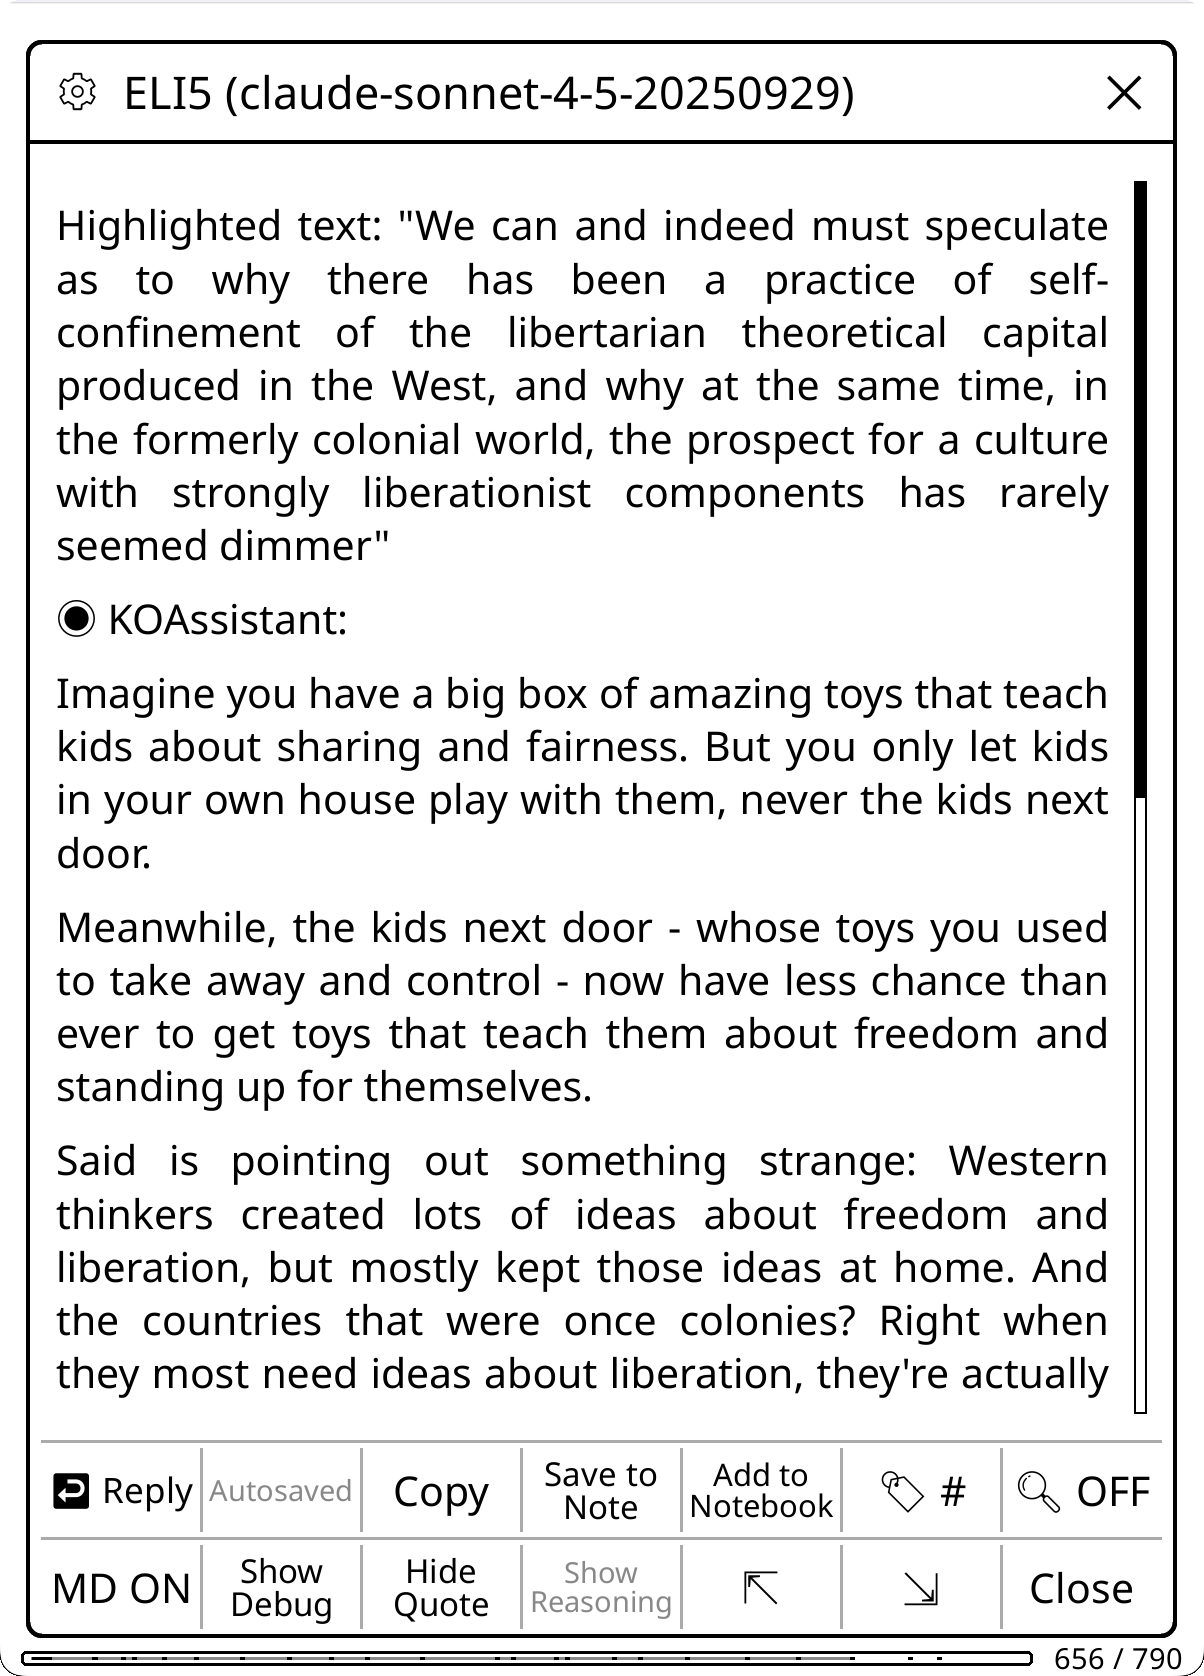
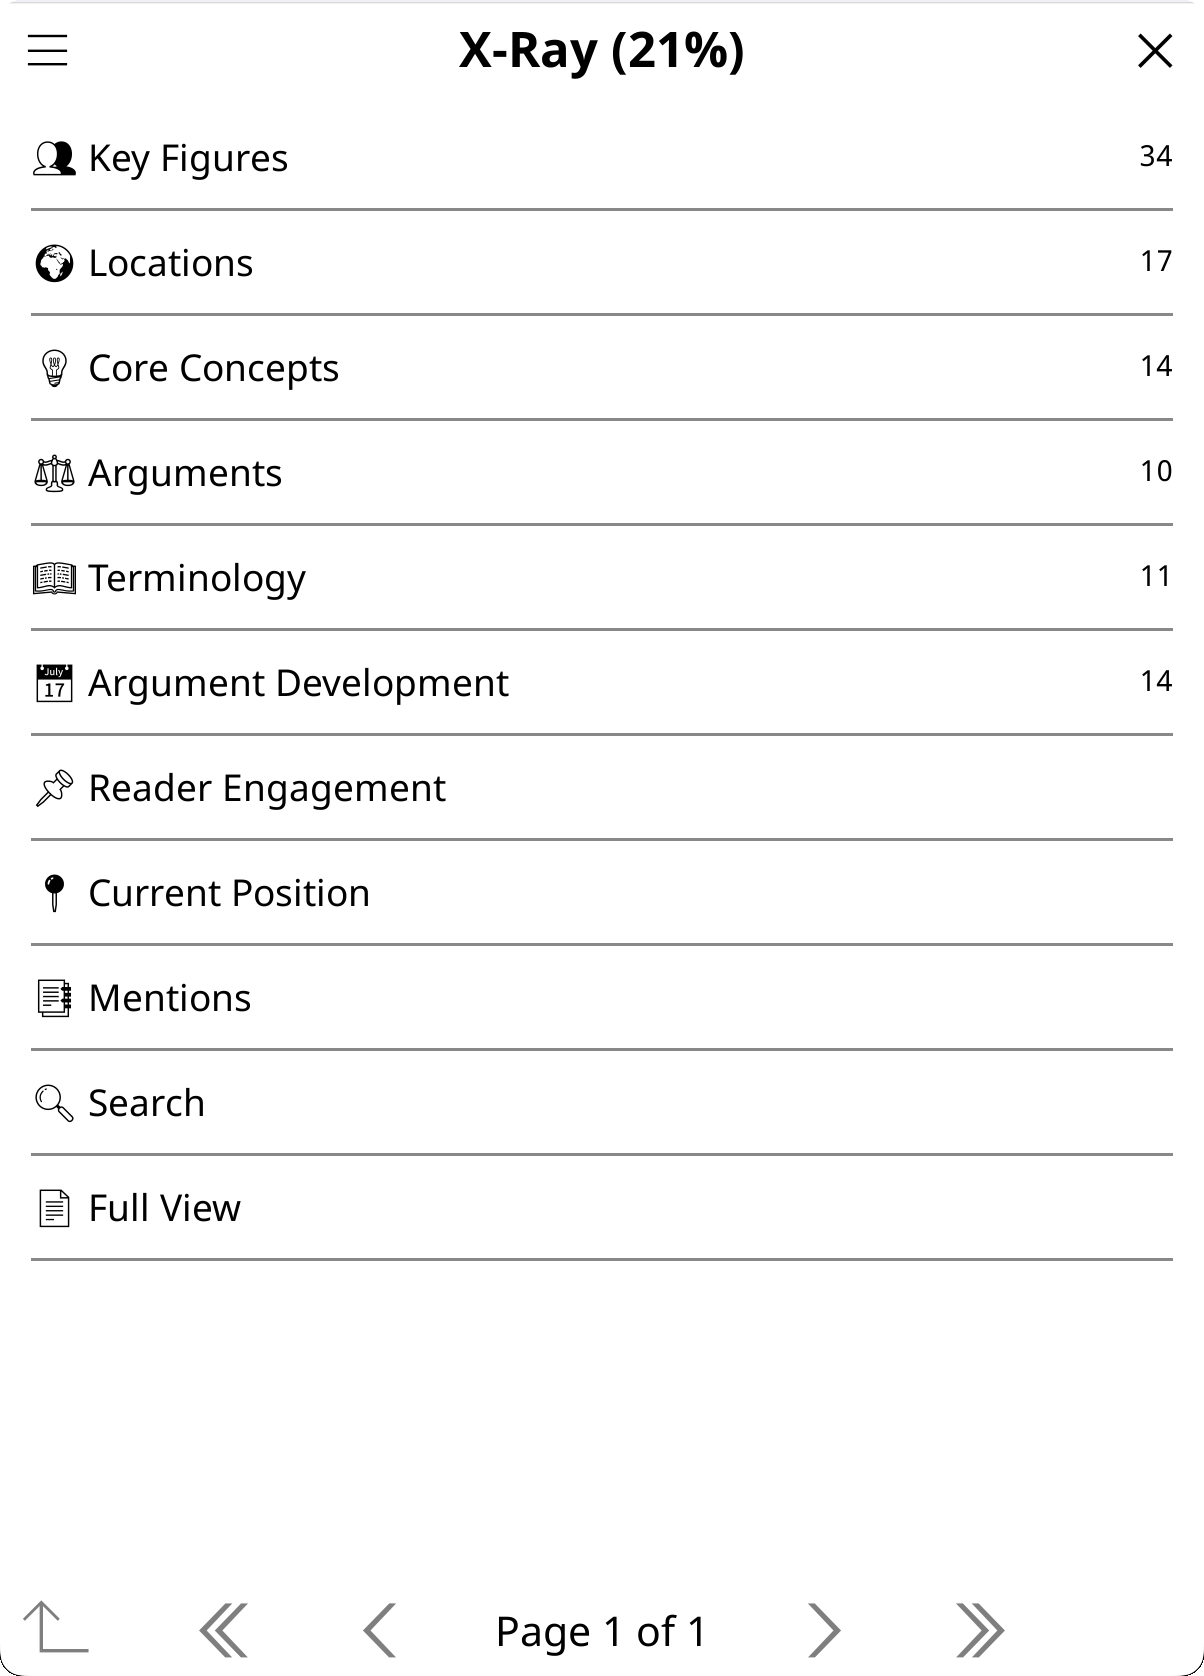
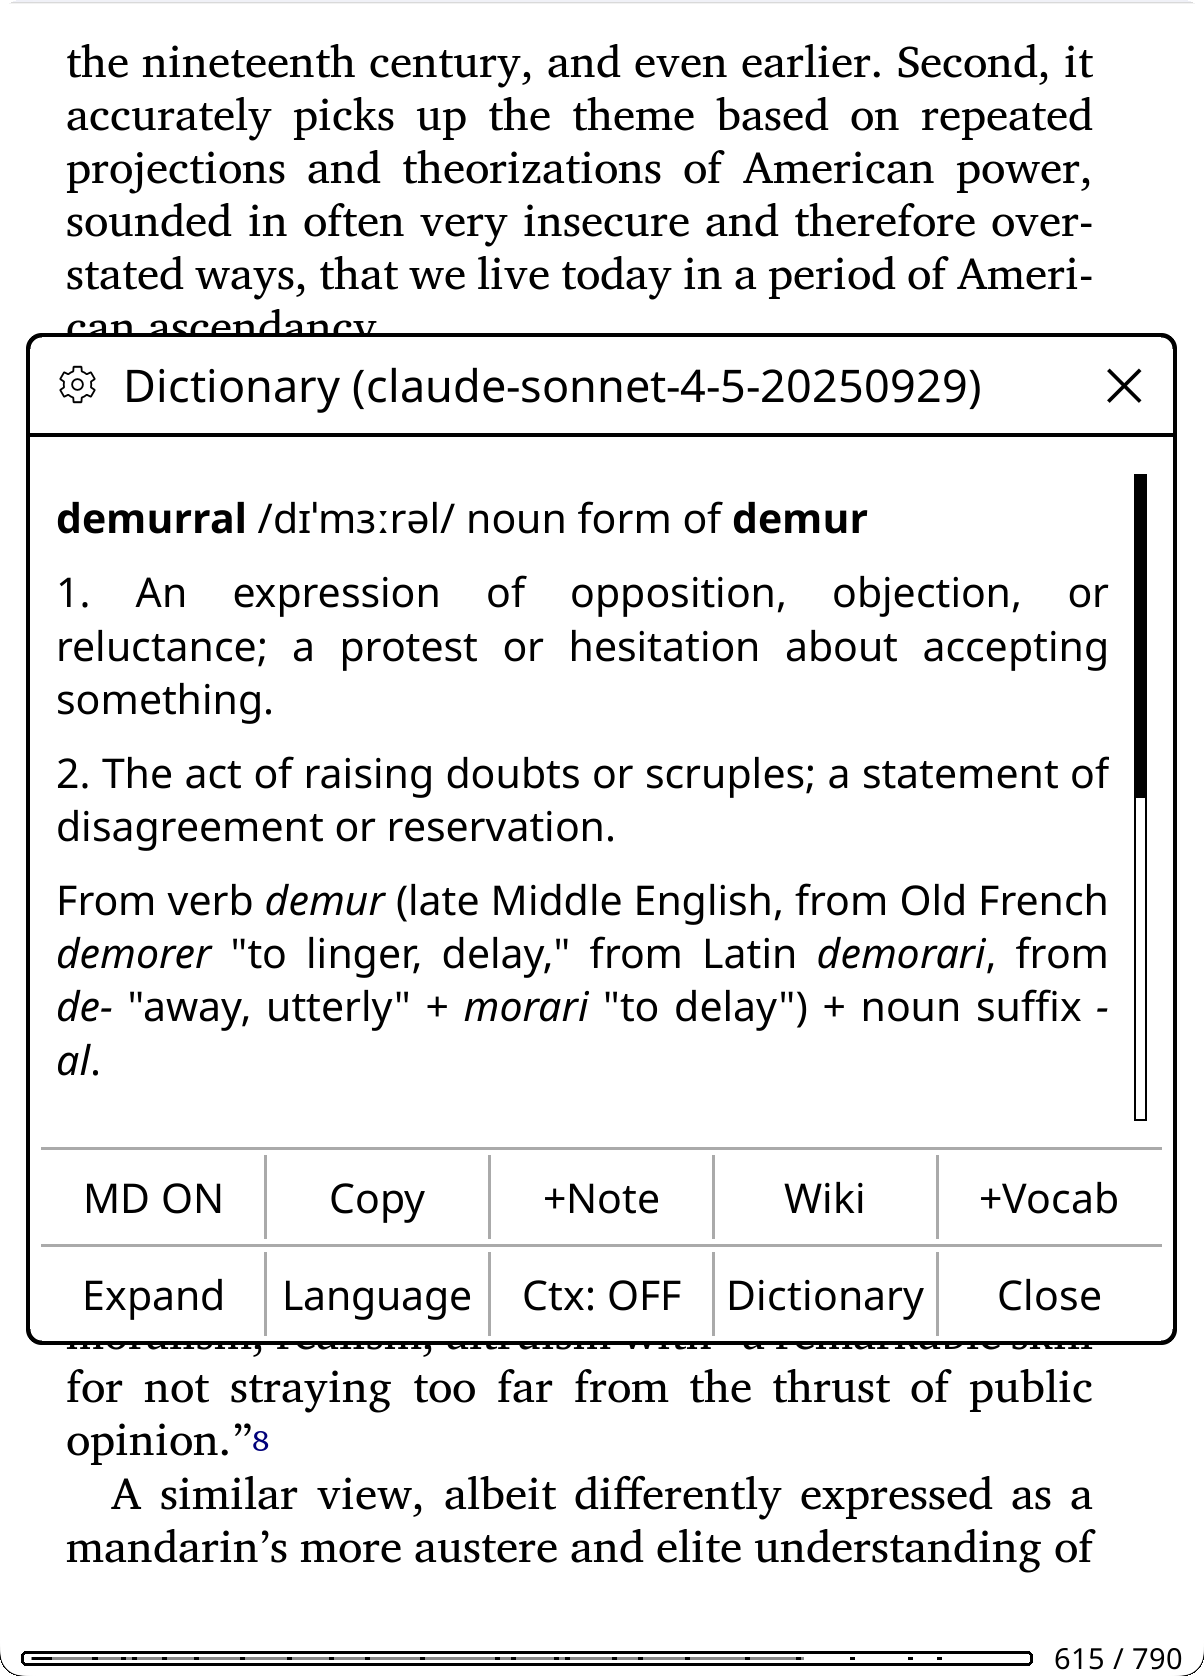
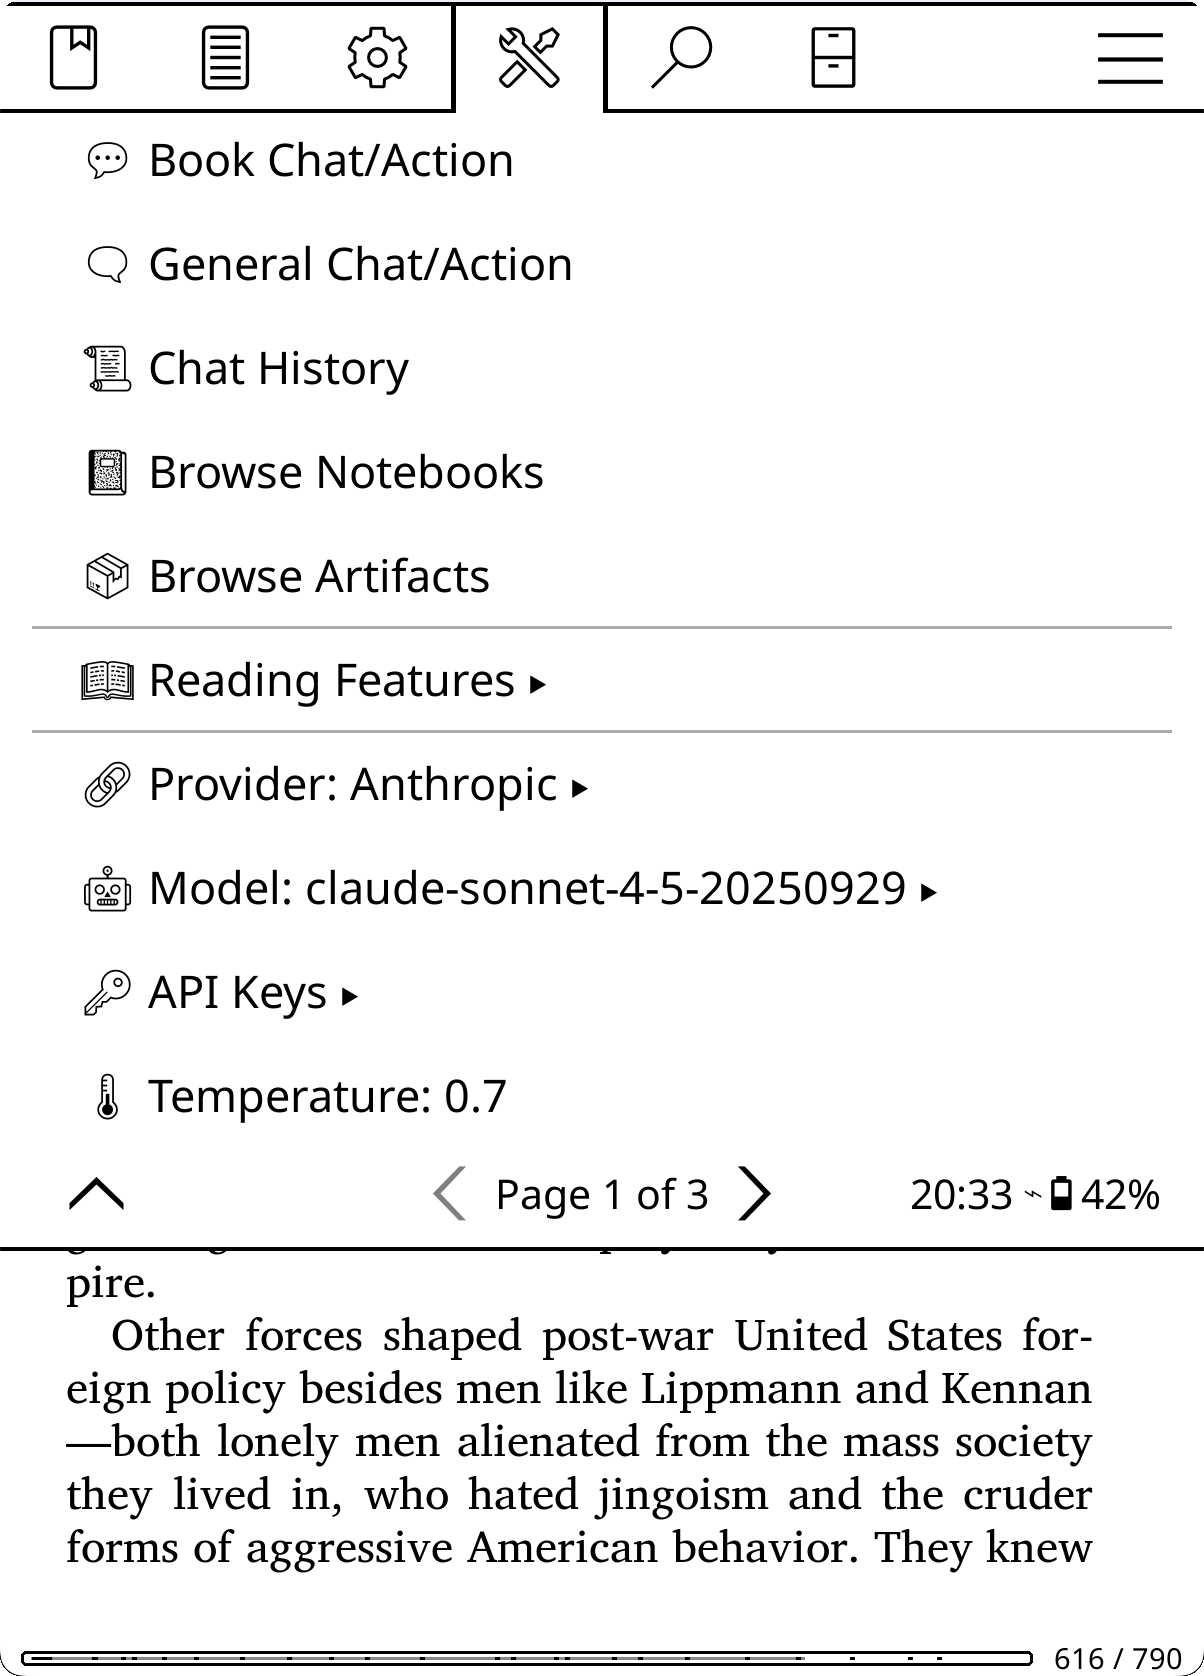
19 built-in providers (Anthropic, OpenAI, Gemini, Ollama, and more) plus custom OpenAI-compatible providers. Fully configurable: custom actions, behaviors, domains, per-action model overrides. Reasoning/thinking is configured per model (stance dial + per-model overrides). One-tap auto-update keeps the plugin current. Personal reading data (highlights, annotations, notebooks) is opt-in, not sent to the AI unless you enable it.
Status: Active development. issues, discussions, and translations welcome. If you are somewhat technical and don't want to wait for tested releases, you can run off main branch to get the latest features. Breakage may happen. Also see Assistant Plugin; both can run side by side.
New to KOAssistant? Start here for the fastest path to productivity:
You can also test your setup: Web inspector for experimenting
Want to go deeper? The rest of this README covers all features in detail.
Note: The README is intentionally verbose and somewhat repetitive to ensure you see all features and their nuances. Use the table of contents to jump to specific topics. A more concise structured documentation system is planned (contributions welcome).
Prefer a minimal footprint? KOAssistant is designed to stay out of your way. The main menu is tucked under Tools (page 2), and all default integrations (file browser buttons, highlight menu items, dictionary popup, gesture actions) can be disabled via Settings → Menus & Buttons. Use only what you need.
Get started in 3 steps:
Download koassistant.koplugin.zip from the latest Release → Assets, or to run the latest from main branch: Code -> Download Zip, or clone the repo:
git clone https://github.com/zeeyado/koassistant.koplugin
Extract or copy the koassistant.koplugin folder to your KOReader plugins directory:
Kobo/Kindle:  /mnt/onboard/.adds/koreader/plugins/koassistant.koplugin/
Android:      /sdcard/koreader/plugins/koassistant.koplugin/
macOS:        ~/Library/Application Support/koreader/plugins/koassistant.koplugin/
Linux:        ~/.config/koreader/plugins/koassistant.koplugin/
For the plugin to be installed correctly, the file structure should look like this (no nested folder, and foldername must be koassistant.koplugin exactly; remove "-main" or similar if you downloaded the zip from head):
koreader
└── plugins
    └── koassistant.koplugin
        ├── _meta.lua
        ├── main.lua
        └── ...
This is the only time you need to install manually. After this, KOAssistant updates itself: when a new version is available, you'll see release notes with an "Update Now" button. One tap and it handles everything (download, install, preserve your settings). See Updating the Plugin for details.
Alternative: You can also install KOAssistant directly from within KOReader using the App Store plugin, which lets you browse, install, and update KOReader plugins without a computer. It can install from releases or from the latest main branch code.
Option A: Via Settings
Option B: Via Configuration File
Make a copy of apikeys.lua.sample and name it apikeys.lua
cp apikeys.lua.sample apikeys.lua
Edit apikeys.lua and add your API key(s):
return {
    anthropic = "your-key-here",  -- console.anthropic.com
    openai = "",                  -- platform.openai.com
    -- See apikeys.lua.sample for all 19 providers
}
Note: GUI-entered keys take priority over file-based keys. The API Keys menu shows
[set]for GUI keys and(file)for keys from apikeys.lua. Provider pickers only list providers that have a key configured (plus local/no-key providers like Ollama), so the menus stay short.
See Supported Providers for full list with links to get API keys.
Free Options Available: Don't want to pay? Groq, Gemini, and Ollama offer free tiers. See Free Tier Providers.
Find KOAssistant Settings in: Tools → Page 2 → KOAssistant and follow the Setup Wizard.
Some features require opt-in to work. Go to Settings → Privacy & Data to configure. See Privacy & Data for details.
Quick option: Use Preset: Full to enable all data sharing at once. Text extraction is enabled separately.
On first launch, KOAssistant walks you through a 5-step setup wizard:
The wizard runs once and won't appear again. If you re-run the wizard (by resetting the setup flag), it skips the language step if you've already configured a language. You can always change language, emoji, and gesture settings later in Settings.
After the setup wizard, complete these steps for the best experience:
Tip: Edit built-in actions to always use the provider/model of your choice (regardless of your main settings); e.g. Dictionary actions benefit from a lighter model for speed.
Automatic setup: The setup wizard offers to assign both panels to tap bottom-right corner: Quick Settings in the file browser and Quick Actions in the reader. Accept to set up both gestures automatically (requires KOReader restart). If the bottom-right corner is already assigned to another action, you'll get an informational tip instead.
Manual setup (same gesture, two contexts):
Now the same tap gives you Quick Settings in the file browser and Quick Actions while reading. Both panels include most functions you need, plus buttons to open Settings and other features. In reader mode, each panel has a button to switch to the other.
Recommended: Two Quick Access Panels
KOAssistant provides two distinct quick-access panels for different purposes:
1. Quick Settings (available everywhere)
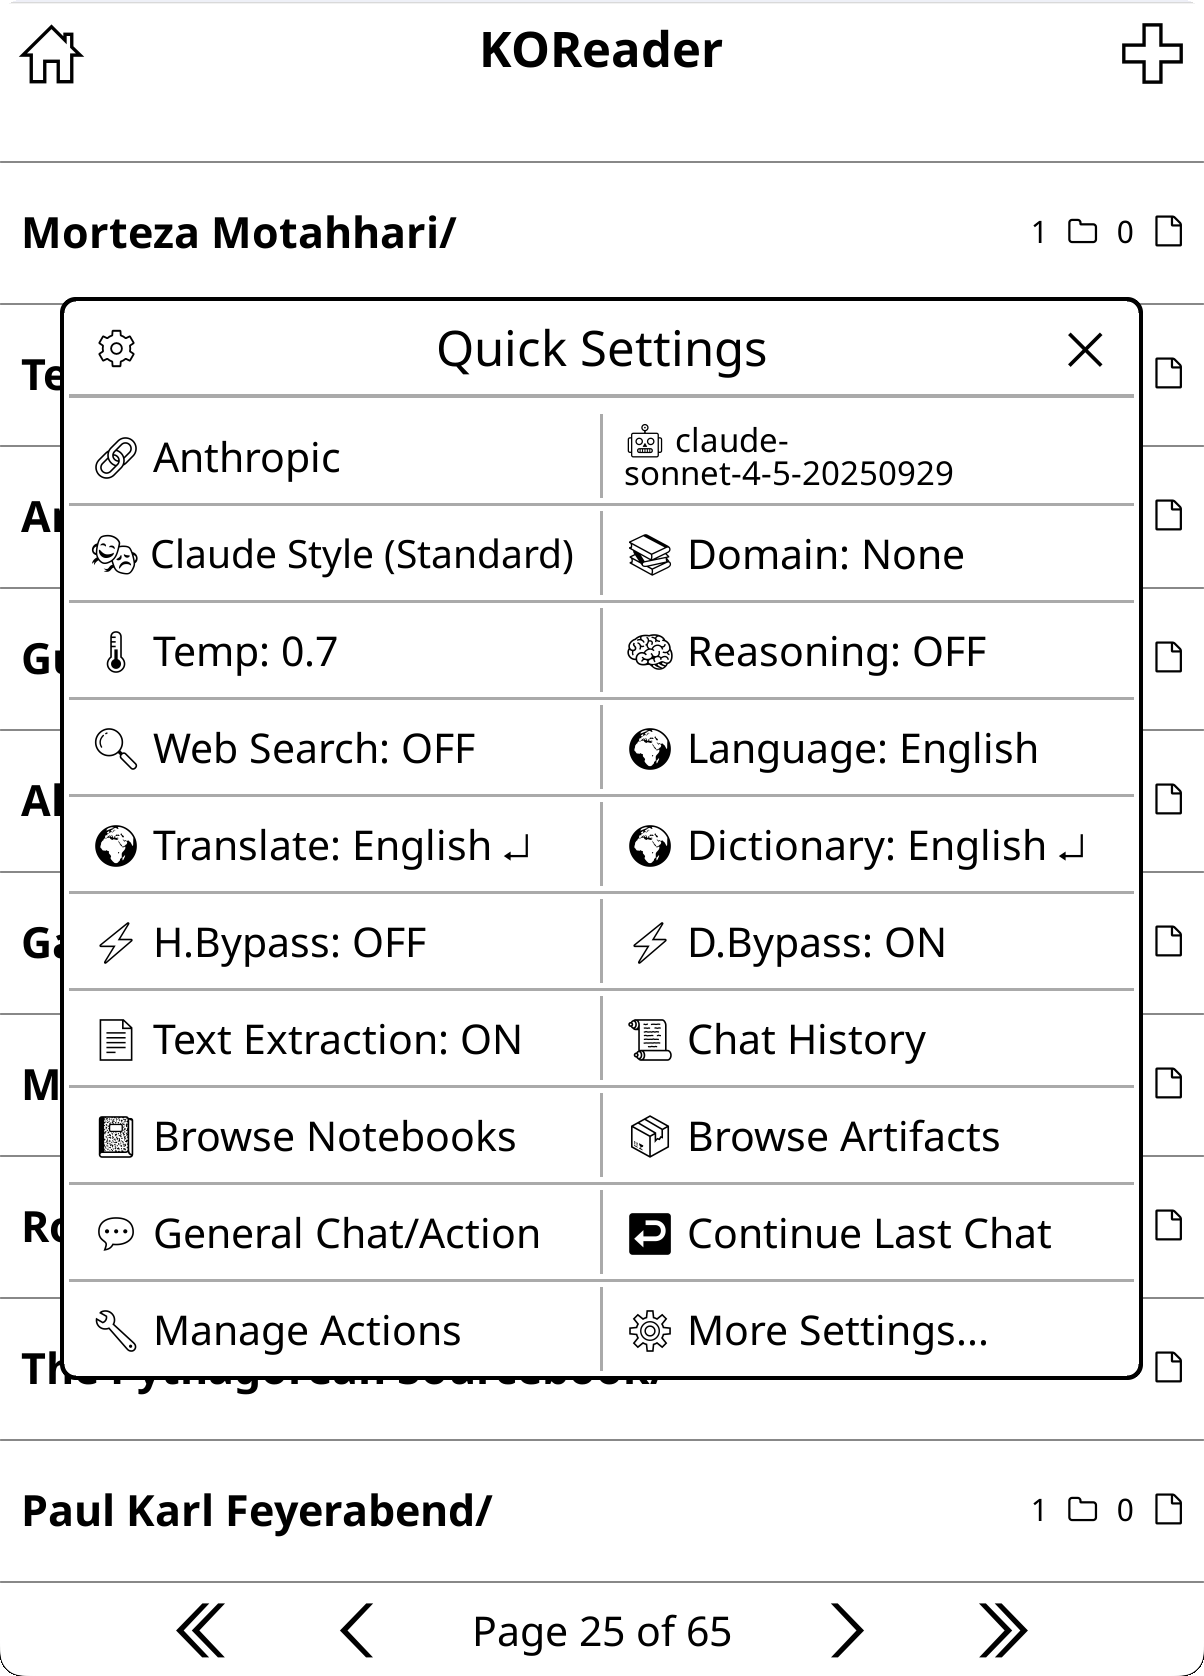
Assign "KOAssistant: Quick Settings" to a gesture for one-tap access to a two-column settings panel with commonly used options:
In reader mode, two additional buttons appear (items naturally shift to accommodate):
The panel has a gear icon (top-left) that opens a small menu with Sort Items (reorder and show/hide the tiles) and Align Buttons (left-align vs. centered). The same tile manager is also reachable via Settings → Menus & Buttons → Quick panels → Quick Settings Items.
2. Quick Actions (reader mode only)
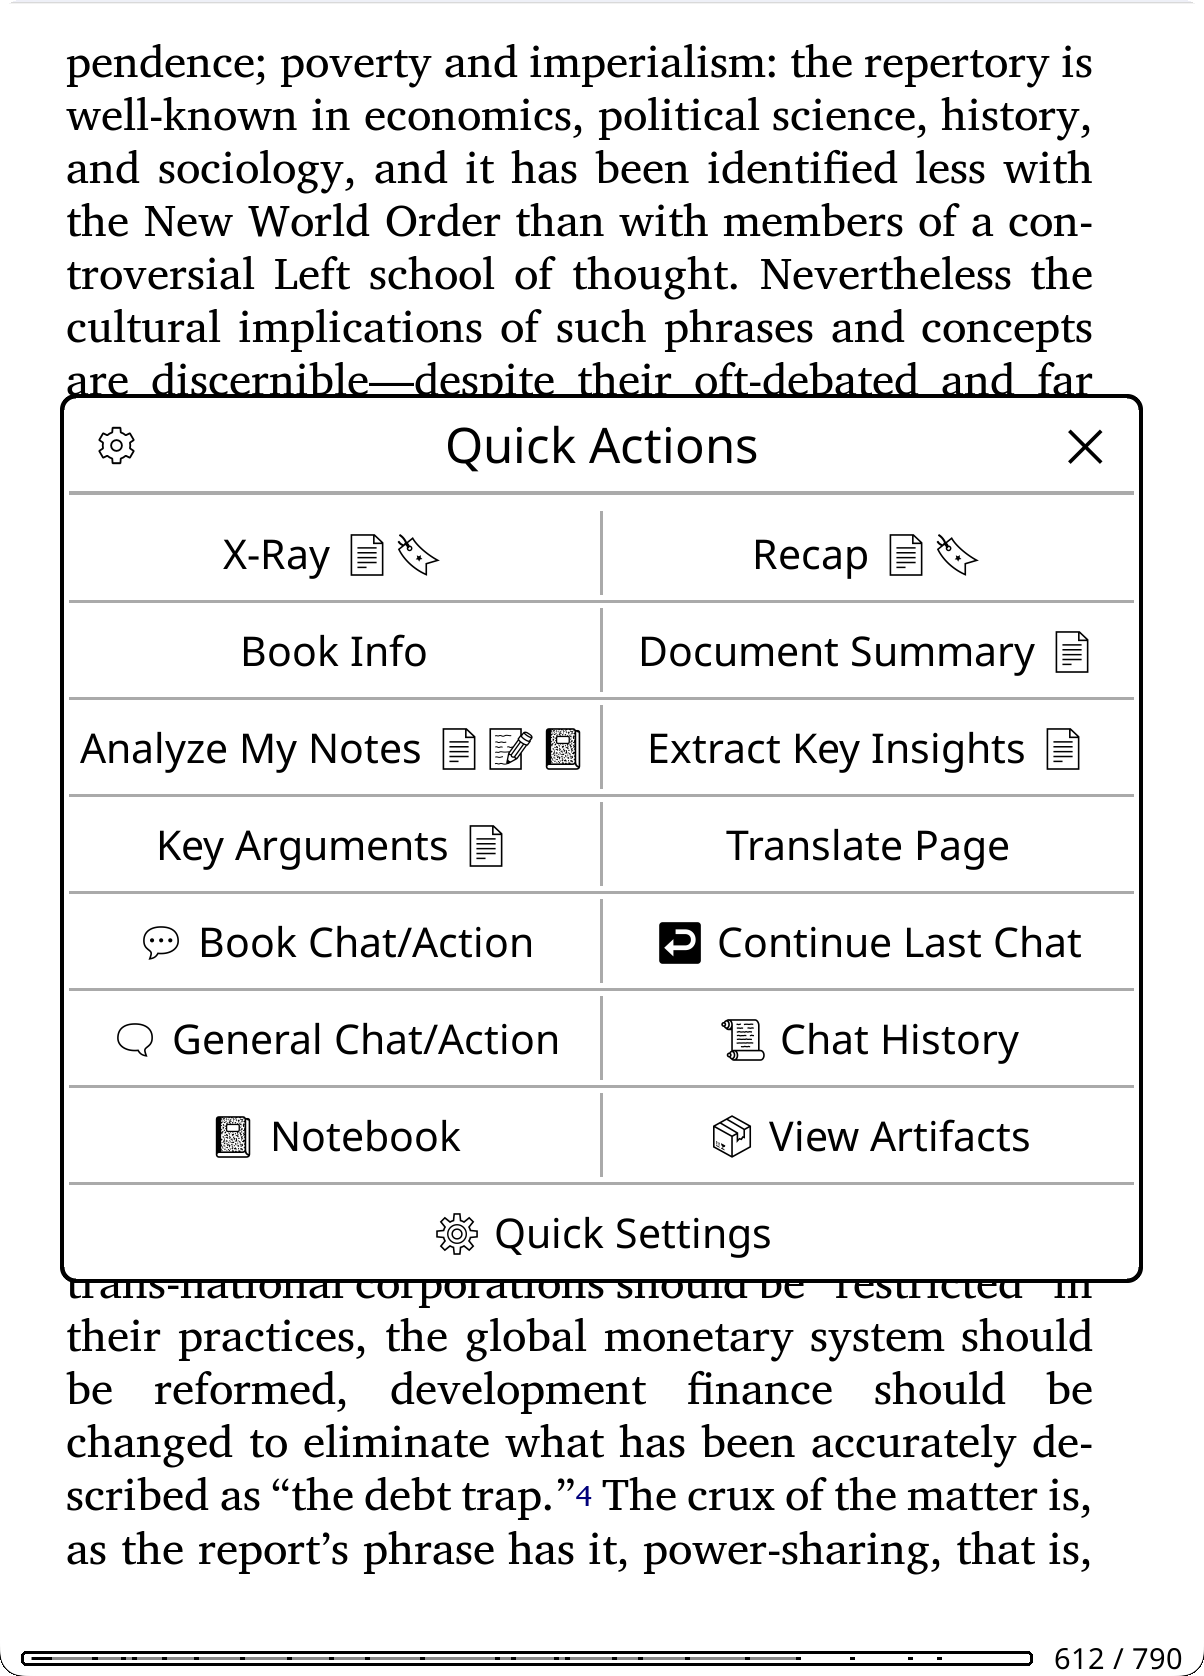
Assign "KOAssistant: Quick Actions" to a gesture for fast access to reading-related actions:
You can add any book action to Quick Actions via Action Manager → hold action → "+ Quick Actions". The panel has a gear icon (top-left) that lets you choose between managing Panel Actions (reorder/remove actions) or Panel Utilities (show/hide/reorder utility buttons). These managers are also reachable via the hamburger menu in Manage Actions and via Settings → Menus & Buttons → Quick panels. Defaults can also be removed.
Tip: For quick access, assign Quick Settings and Quick Actions to their own gestures (e.g. corner tap). This gives you one-tap access to these panels from anywhere. Alternatively, you can add them to a KOReader QuickMenu alongside other actions (see below).
Alternative: Build a KOReader QuickMenu For full customization, assign multiple KOAssistant actions to one gesture and enable "Show as QuickMenu" to get a selection menu with any actions you want, in any order, mixed with non-KOAssistant actions:
Unlike KOAssistant's built-in panels (Quick Settings, Quick Actions) which show two buttons per row, KOReader's QuickMenu shows one button per row but allows mixing KOAssistant actions with any other KOReader actions.
Direct gesture assignments You can also assign individual actions directly to their own gestures for instant one-tap access:
Add your own actions to gestures Any book or general action (built-in or custom) can be added to the gesture menu. See Custom Action Gestures for details.
Important: KOReader has two separate gesture configurations:
- File Browser gestures: Configure from the file browser (Settings → Gesture Manager)
- Reader gestures: Configure while a book or document is open (Settings → Gesture Manager)
You must set up gestures in both places if you want access from both contexts. Reader-only gestures (like Quick Actions, Translate Page, Book Chat/Action) will appear grayed out if you try to add them to File Browser gestures. This is expected. General gestures (like Quick Settings, Chat History) work in both contexts and can be added to either or both.
After basic setup, explore these features to get the most out of KOAssistant:
| Feature | What it does | Where to configure |
|---|---|---|
| Behaviors | Control response style (concise, detailed, custom) | Settings → Actions & Prompts → Manage Behaviors |
| Domains | Add project-like context to conversations | Settings → Actions & Prompts → Manage Domains |
| Actions | Create your own prompts and workflows | Settings → Actions & Prompts → Manage Actions |
| Quick Actions | Fast access to reading actions while in a book or document | Gesture → "KOAssistant: Quick Actions" |
| Research Mode | Automatic academic enhancements when DOI detected (academic X-Ray, web search, research prompts) | Automatic, no configuration needed |
| X-Ray Browser | Browsable reference guide with Section X-Rays, AI Wiki, version history, chapter tracking | Quick Actions → X-Ray |
| Highlight Menu | Actions in highlight popup (11 defaults including Translate, Explain, ELI5) | Settings → Menus & Buttons → Highlight Menu Actions |
| Image Generation | Turn a highlighted passage into an AI-generated illustration | Highlight menu → Generate Image |
| Notebooks | Per-book markdown notes with Obsidian vault support | Settings → Notebook Settings |
| Dictionary Integration | AI-powered word lookups when selecting single words | Settings → Dictionary Settings |
| Bypass Modes | Instant AI actions without menus | Settings → Dictionary/Highlight Settings |
| Reasoning/Thinking | Per-model reasoning depth, via a global stance (Minimal/Default/Maximum) or per-model overrides | Settings → Advanced → Reasoning |
| Backup & Reset | Backup settings, restore, and reset options | Settings → Backup & Reset |
| Languages | Configure multilingual responses (native script pickers) | Settings → AI Language Settings |
See detailed sections below for each feature.
The test suite includes an interactive web inspector that lets you test and experiment with KOAssistant without launching KOReader:
What you can do:
domains/ folder)Requirements:
Quick Start:
cd /path/to/koassistant.koplugin
lua tests/inspect.lua --web
# Then open http://localhost:8080 in a browser
Tip: The web inspector reads from your actual KOAssistant settings (koassistant_settings.lua), so run KOReader on the same device/computer first to load your full configuration (languages, behavior, temperature, etc.).
Why use it:
⚠️ Some features are opt-in. To protect your privacy, personal reading data (highlights, annotations, notebook) is NOT sent to AI providers by default. You must enable sharing in Settings → Privacy & Data if you want features like Analyze Notes or Connect with Notes to work fully. See Privacy Controls below.
KOAssistant sends data to AI providers to generate responses. This section explains what's shared and how to control it. This is not privacy theater: the "threat model" is simply users including sensitive data (annotations, notes, content) by accident. You are already being permissive by using online AIs at all, and this plugin encourages AI analysis of your reading material — and the available placeholders/template variables can carry a substantial amount of sensitive data. Advanced Stats (opt-in, off by default) accesses KOReader's Statistics plugin locally to derive reading engagement groups; see Design Choices for what this means and why it's opt-in. Best practice is to pick providers thoughtfully, and the very best practice is to use local or self-hosted solutions, e.g. Ollama.
Always sent (cannot be disabled):
Sent by default: (for Actions using it)
Opt-in (disabled by default):
Settings → Privacy & Data provides three quick presets:
| Preset | What it does |
|---|---|
| Default | Basic stats (progress, chapter info) shared for context-aware features. Personal content (highlights, annotations, notebook) stays private. Advanced stats off. |
| Minimal | Maximum privacy. Only your question and book metadata are sent. All stats (including basic stats), library scanning, and personal content disabled. |
| Full | All data sharing enabled for full functionality, including advanced stats. Does not automatically enable text extraction (see below). |
Individual toggles (under Data Sharing Controls):
{highlights} placeholders. Does not include personal notes. Grayed out when annotations is enabled (annotations implies highlights).Library Settings (in Reading & Library):
use_library flag provides the second gateTrusted Providers: Mark providers you fully trust (e.g., local Ollama) to bypass all data sharing controls AND text extraction AND the library scanning toggle. Trust is evaluated against the provider a request actually goes to — your active provider, or an action's own pinned provider if it has one — so pinning an action to a different provider never inherits trust it shouldn't. When that provider is trusted, all data types (highlights, annotations, notebook, reading progress, book text, and library catalog) are available without toggling individual settings. Trusted providers still require at least one folder (permanent or on-the-fly) for library scanning. Trust also satisfies the consent check that background features (such as Automatic X-Ray) run against — those can then extract text in the background without a per-request tap.
Graceful degradation: When you disable a data type, actions adapt automatically. Section placeholders like {highlights_section} simply disappear from prompts, so you don't need to modify your actions. For text extraction, most actions fall back to AI training knowledge; see Text Extraction and Double-gating for details.
Visibility tip: If your device supports emoji fonts, enable Emoji Data Access Indicators (Settings → Display Settings → Emoji) to see at a glance what data each action accesses: 📄 document text, 🔖 highlights, 📝 annotations, 📓 notebook, 📚 library, 📊 advanced stats, 🌐 web search, directly on action names throughout the UI.
⚠️ Text extraction is OFF by default. To use features like X-Ray, Recap, and context-aware highlight actions with actual book content (rather than AI's training knowledge), you must enable it in Settings → Privacy & Data → Text Extraction → Allow Text Extraction.
Text extraction sends actual book/document content to the AI, enabling features like X-Ray, Recap, Document Summary/Analysis, and highlight actions like "Explain in Context" to analyze what you've read. Without it enabled, most actions gracefully fall back to the AI's training knowledge: the AI is explicitly told no document text was provided and asked to use what it knows about the work (or say so honestly if it doesn't recognize it). This works reasonably for well-known titles but will be inaccurate for obscure works, and basically unusable for research papers and articles the AI hasn't seen. Exception: X-Ray requires text extraction and blocks generation without it; use X-Ray (Simple) for a prose overview from AI knowledge.
Background features: this same consent covers background runs you opt into separately — Automatic X-Ray and X-Ray checkpoint builds extract text and spend tokens without a per-request confirmation. They re-check consent at fire time (revoking it stops them), their size is bounded by their own guards (the progress-gap window; incremental checkpoint steps), and the interactive truncation/size warnings don't apply: an oversized background extraction aborts the run instead of asking.
Tip: If you enable text extraction but don't want to send the whole document, you have finer-grained options: choose "Document summary" or a specific section in an action's source-selection popup, attach a text range with the Scope session chip on a freeform chat, or let AI Book Tools retrieve only the relevant passages (see AI Book Tools). Hidden Flows also exclude front matter, appendices, etc. from extraction.
Why it's off by default:
Token costs and context window (primary reasons, and also why it is not automatically enabled by Privacy presets, even Full): Extracting book text uses significantly more context than you might expect. A full book can consume 60k+ tokens per request, which adds up quickly with paid APIs. Users should consciously opt into this cost. Large contexts also significantly degrade response quality, especially for follow up questions. That's why actions with source selection let you choose "Document summary" as an alternative: run your queries on a previously generated summary (~2-8K tokens) rather than the full document text.
Content awareness (See double-gating below): For most users reading mainstream books, the text itself isn't privacy-sensitive. However, if you're reading something non-standard, subversive, controversial, or otherwise sensitive, you should be aware that the actual content is being sent to cloud AI providers. This is a secondary consideration for most users but important for some.
How to enable:
Double-gating for custom actions: When you create a custom action from scratch, sensitive data requires both a global privacy setting AND a per-action permission flag. This prevents accidental data leakage if you use sensitive placeholders/template variables: enabling a global setting doesn't automatically expose that data in all your custom actions.
For built-in actions: You only need to enable the global setting. Built-in actions already have the appropriate per-action flags set. When you copy a built-in action, it inherits those flags.
The table below documents which flags are required for each data type (relevant when creating custom actions from scratch):
| Data Type | Global Setting | Per-Action Flag |
|---|---|---|
| Book text | Allow Text Extraction | "Allow text extraction" checked |
| X-Ray analysis cache | Allow Text Extraction if cache was built with text (+ Allow Highlights if cache was built with highlights) | "Allow text extraction" (if cache used text) and "Allow highlight use" (if cache used highlights) checked |
| Analyze/Summary caches | Allow Text Extraction if cache was built with text | "Allow text extraction" (if cache used text) checked |
| Highlights | Allow Highlights (or Allow Annotation Notes) | "Allow highlight use" checked |
| Annotations | Allow Annotation Notes (degrades to highlights when off but Allow Highlights is on) | "Allow annotation use (notes)" checked |
| Notebook | Allow Notebook | "Allow notebook use" checked |
| Library catalog | Enable Library Scanning + folders configured | "Allow library use" checked |
| Advanced stats | Allow Advanced Stats | "Allow advanced stats" checked |
| Surrounding context* | None (hard-capped 2000 chars) | Field use_surrounding_context (no in-app checkbox): nil/omitted = follow the global Surrounding Context setting (the default for custom actions), true = always on (also auto-set when your prompt contains {surrounding_context}), false = never |
| Page text* | None (single current page, exempt) | Auto-inferred from a {page_text} placeholder |
* Surrounding context is the text around a highlight (more than you actually selected). It has no global privacy gate because it is hard-capped at 2000 characters, but it is off by default: it only rides along when the global Surrounding Context mode (Settings → Highlight Settings → Surrounding Context, or per-book in Book Settings, or the Scope session chip) is set to Sentence / Paragraph(s) / Characters rather than "None". Per-action this is a tri-state value in the action's Lua definition (not an editor checkbox): leave use_surrounding_context unset to follow that setting, or set it to true/false in a custom action to pin it always-on or never. Page text is the single currently visible page and is likewise exempt from the global gate; it is included only when an action's prompt uses the {page_text} placeholder.
Tip: Enable Emoji Data Access Indicators to see which flags each action has directly on its name, no need to inspect action settings manually.
Privacy compromise for X-Ray: X-Ray, X-Ray (Simple), and Recap use highlights (not annotations). If you want them to see your highlighted passages but not personal notes, enable Allow Highlights only (leave Allow Annotation Notes off). If you prefer no personal data at all, leave both off: X-Ray and Recap analyze the book text alone, and X-Ray (Simple) uses AI knowledge alone.
Cache permission inheritance: When caches are built, they record what data was used. Actions that later reference cache placeholders inherit requirements based on what the cache actually contains:
The artifact viewer shows "Based on AI training data knowledge" or "Based on extracted document text" so you always know what a cache contains. If you change privacy settings after building a cache (e.g., disable text extraction), actions may render the cache placeholder empty. To fix: either re-enable the required permissions, or regenerate the cache with your current settings.
Two text extraction types (determined by placeholder in your action prompt):
{book_text_section}: Extracts from start to your current reading position (used by X-Ray, Recap){full_document_section}: Extracts the entire document regardless of position (used by most text extraction actions including Explain in Context, Analyze in Context, Summarize, Document Analysis, and more)See Troubleshooting → Text Extraction Not Working if you're having issues.
For maximum privacy, Ollama can run AI models entirely on your device(s):
ollama pull qwen2.5:0.5b → Select "Ollama" as provider in KOAssistant settingshttp://192.168.1.100:11434/api/chat)Other local options: LM Studio, llama.cpp, Jan, vLLM, KoboldCpp, and LocalAI all have one-tap presets: go to Settings → Provider → Quick setup: Local provider, pick your engine, and the name and URL are pre-filled. Just change localhost to your server's IP if it's on another machine. See Adding Custom Providers for details.
Anyone using local LLMs is encouraged to open Issues/Feature Requests/Discussions to help enhance support for local, privacy-focused usage.
Cloud providers have their own data handling practices. Check their policies on data retention and model training. Remember that API policies are often different from web interface ones.
Library scanning is opt-in. When enabled (Settings → Reading & Library), KOAssistant scans configured folders for book metadata (title, author, series, reading status, progress, last read date) to power library-aware features like "What to read next?" and reading pattern analysis. Only catalog metadata is sent, not book content, highlights, or annotations. Library scanning is triple-gated: (1) global enable_library_scanning toggle, (2) at least one folder configured, and (3) per-action use_library flag. Trusted providers bypass the global toggle but still require configured folders.
Reading engagement data (Advanced Stats): KOReader's Statistics plugin collects extensive local data (reading time, pages per session, reading speed, session history, daily patterns). With Allow Advanced Stats enabled (Settings → Privacy & Data, default: OFF), KOAssistant queries this database locally to compute engagement groups: curated categories like "books read extensively" (complete + significant reading time), "stalled reads" (started but inactive for weeks), "briefly started" (opened but barely read), and "recently finished". These groups are exposed as template variables ({deep_reads_section}, {stalled_section}, etc.) for library scan actions to compose.
What reaches the AI: Only human-readable book lists, e.g., "The Brothers Karamazov" by Fyodor Dostoevsky (47 hours). Raw statistics (exact timestamps, pages per session, reading speed, session logs) are used for local computation only and never leave the device. The AI sees categorized book lists, not behavioral data.
Why opt-in: Reading patterns over time create a surprisingly detailed personal profile. Even the curated groups reveal information about reading habits: which books were abandoned, which consumed obsessively, which ignored for months. This warrants conscious opt-in rather than a default-on toggle.
KOAssistant works in 4 contexts, each with its own set of built-in actions (12 library actions shown as 4 scan-based + 7 selection-based + 1 book-context action that uses library data):
| Context | Built-in Actions |
|---|---|
| Highlight | Explain, ELI5, Summarize, Elaborate, Connect, Connect (With Notes), Explain in Context, Analyze in Context, Thematic Connection, Fact Check*, Counterpoint, Current Context*, Translate, AI Wiki, Grammar, Dictionary, Quick Define, Deep Analysis, Look up in X-Ray†† |
| Book | About, Find Similar, Suggest from Library†, About Author, Historical Context, Related Thinkers, Reviews*, X-Ray, X-Ray (Simple), Recap, Analyze Notes, Key Arguments, Counterarguments, Discussion Questions, Quiz, Reading Guide, Document Analysis, Document Summary, Extract Key Insights |
| Library | Next Read‡, Discover New‡, Analyze Library‡, Challenge My Taste‡, Compare§, Find Common Themes§, Analyze Collection§, Quick Summaries§, Reading Order§, Recommend§, Analyze Notes§ⁿ |
| General | News Update* |
*Requires web search (Anthropic, Gemini, OpenAI, xAI, Perplexity, OpenRouter). News Update is available in gesture menu by default but not in the general input dialog. See Web Search and General Chat for details.
†Book-context action that also appears in end-of-book suggestion popup. Requires library scanning.
‡Scan-based library action, requires library scanning enabled with folders configured. Available immediately in the library dialog without selecting books.
§Selection-based library action, requires 2+ books selected via presets or history browser.
ⁿRequires Allow Highlights or Allow Annotation Notes. Reads per-book sidecar data (highlights, annotations, notes) across selected books.
††Local action, searches cached X-Ray data instantly, no AI call or network required. Only appears when the book has an X-Ray cache.
Note: A separate Generate Image button also appears in KOReader's highlight popup (see below). It is a standalone highlight-menu button rather than a KOAssistant action, so it is not listed in the table above.
You can customize these, create your own, or disable ones you don't use. See Actions for details.
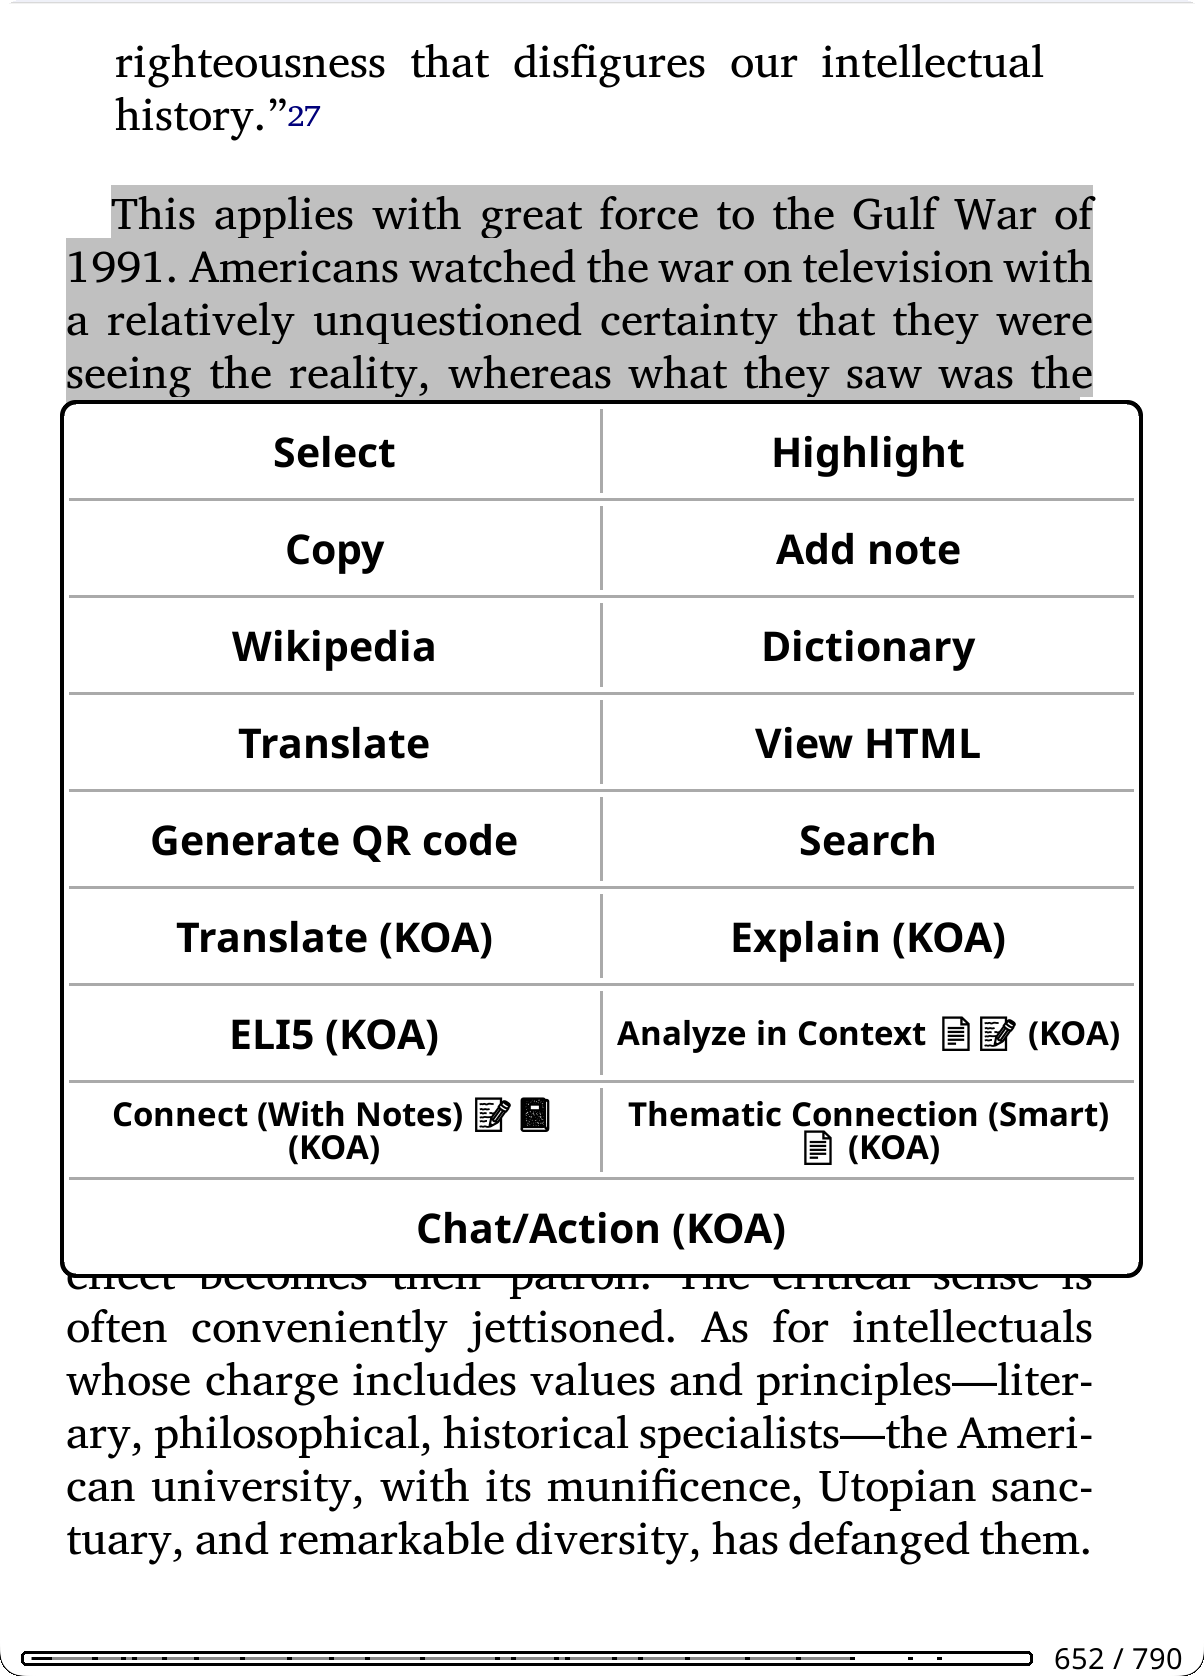
Access: Highlight text in a document → tap "KOAssistant"
Quick Actions: You can add frequently-used actions directly to KOReader's highlight popup menu for faster access. Instead of going through the KOAssistant dialog, actions like "KOA: Explain" or "KOA: Translate" appear as separate buttons. See Highlight Menu Actions below.
Bypass Mode: Skip the highlight menu entirely and trigger your chosen action immediately when selecting text. See Highlight Bypass below.
Built-in Actions:
| Action | Description |
|---|---|
| Explain | Detailed explanation of the passage |
| ELI5 | Explain Like I'm 5 - simplified explanation |
| Summarize | Concise summary of the text |
| Elaborate | Expand on concepts, provide additional context and details |
| Connect | Draw connections to other works, thinkers, and broader context |
| Connect (With Notes) | Connect passage to your personal reading journey ⚠️ Requires: Allow Annotation Notes, Allow Notebook |
| Explain in Context | Comprehension-focused: what the passage means, what leads up to it, and what it builds on. Source selection: full text, summary, AI knowledge, or Smart retrieval (AI searches the book) |
| Analyze in Context | Reader-focused: connects the passage to your highlights, annotations, and the threads you've been tracking. Source selection: full text, summary, AI knowledge, or Smart retrieval (AI searches the book) ⚠️ Requires: Allow Annotation Notes, Allow Notebook |
| Thematic Connection | Craft-focused: examines the author's technique (language, structure, imagery) and how the passage fits into the work's thematic architecture. Source selection: full text, summary, or AI knowledge |
| Fact Check | Verify claims using web search ⚠️ Requires: Web Search |
| Counterpoint | Argues against the selected passage in good faith and at full strength: the strongest objections to its claim, reasoning, and framing, and who would disagree. (Fact Check verifies accuracy; Counterpoint challenges the argument.) |
| Current Context | Get latest information about a topic using web search ⚠️ Requires: Web Search |
| Translate | Translate to your configured language |
| AI Wiki | Wikipedia-style encyclopedia entry about the selected text, using AI knowledge. Cached as an artifact (same as X-Ray browser wiki entries). Uses web search if enabled globally. Available in dictionary popup by default |
| Dictionary | Full dictionary entry: definition, etymology, synonyms, usage (also accessible via dictionary popup) |
| Quick Define | Minimal lookup: brief definition only, no etymology or synonyms |
| Grammar | Sentence-level grammatical breakdown: constituency parse plus word-by-word analysis with part of speech, morphological features, and structural role. Language-aware — e.g., Arabic responses use traditional grammatical terminology alongside modern linguistic labels. |
| Deep Analysis | Linguistic deep-dive: morphology, word family, cognates, etymology path |
| Look up in X-Ray | [Local] Instant search of cached X-Ray data for selected text, no AI call, works offline. Searches by name and alias across all X-Rays (main + sections). Single match shows full detail; multiple matches across X-Rays show a grouped results view. Available in highlight menu and dictionary popup. Only appears when the book has an X-Ray cache. |
Generate Image: A separate Generate Image (KOA) button in the highlight popup turns the selected text into an image via an image-generation provider (OpenAI, xAI, or Gemini). It uses its own provider/model and settings (independent of your chat provider) and appears only when image generation is enabled and the effective provider supports it. Generated images are kept on device in data_dir/koassistant_images and collected in a Generated Images gallery (tap to view, hold to delete, or delete all), with a per-book association so each book's images also appear on its "View Artifacts" list and in the cross-book artifact browser. You can hide the button via Settings → Menus & Buttons ("Show Generate Image button"). See Image Generation for details.
Source selection:
Several actions let you choose which document source the AI uses when you trigger them. A unified popup combines scope (what part of the book) and source (what data to send) in a single dialog:
Scope (rows shown depend on the action, whether the book has a table of contents, and your reading position):
Source:
Actions with source selection: Explain in Context, Analyze in Context, Thematic Connection, Key Arguments, Counterarguments, Discussion Questions, Quiz, Reading Guide, Extract Key Insights, Document Summary, Document Analysis, Recap. For highlight-context actions (Explain in Context, Analyze in Context, Thematic Connection), the scope controls the text extraction range around the highlighted passage. Document Summary and Document Analysis require text extraction (other sources are grayed out). Recap doesn't support section scoping (scope row is grayed with an explanation).
When to use each source:
How sources affect AI behavior:
These aren't just quality tiers; they change how the AI thinks. When you provide actual text, the AI shifts from recall mode to analytical mode. Instead of (only) reconstructing a work from memory (filtered through whatever patterns, emphasis, and blind spots its training absorbed), it's doing direct analysis on the material in front of it, parsing structure, tracing arguments, finding patterns in what's actually written. Training-era biases and editorial slant matter less (but still matter) when the AI is working from your text rather than its pre-trained impressions of it.
With AI knowledge only, the AI is essentially giving you its "remembered take" on a work, shaped by which reviews, summaries, and discussions dominated its training data. For canonical works, this is often good enough. But for anything where framing matters (political texts, contested histories, philosophical arguments, novel research), the difference between "analyze this passage" and "tell me about this work" can be substantial.
In short: Text extraction gives the AI a job to do on specific material. AI knowledge asks it what it thinks it knows.
Accessing summaries:
Tip: For documents you'll query multiple times, generate the summary proactively via the Document Summary action. All artifact actions produce viewable reference guides that are also browsable via "View Artifacts". See Document Artifacts.
What the AI sees: Your highlighted text, plus document metadata (title, author). Actions like "Explain in Context" and "Analyze in Context" also use extracted document text to understand the surrounding content. When surrounding-context is enabled (Settings → highlight context mode, a per-book override, or the session Scope chip), highlight requests can also include a bounded window of text around your selection. Custom actions can access reading progress, chapter info, your highlights/annotations, notebook, and extracted book text, depending on action settings and privacy preferences. See Template Variables for details.
Save to Note: After getting an AI response, tap the Save to Note button to save it directly as a KOReader highlight note attached to your selected text. See Save to Note for details.
Tip: Add frequently-used actions to the highlight menu (Action Manager → hold action → "Add to Highlight Menu") for quick access. Other enabled highlight actions remain available from the main "KOAssistant" entry in the highlight popup. From that input window, you can also add extra instructions to any action (e.g., "esp. the economic implications" or "in simple terms").
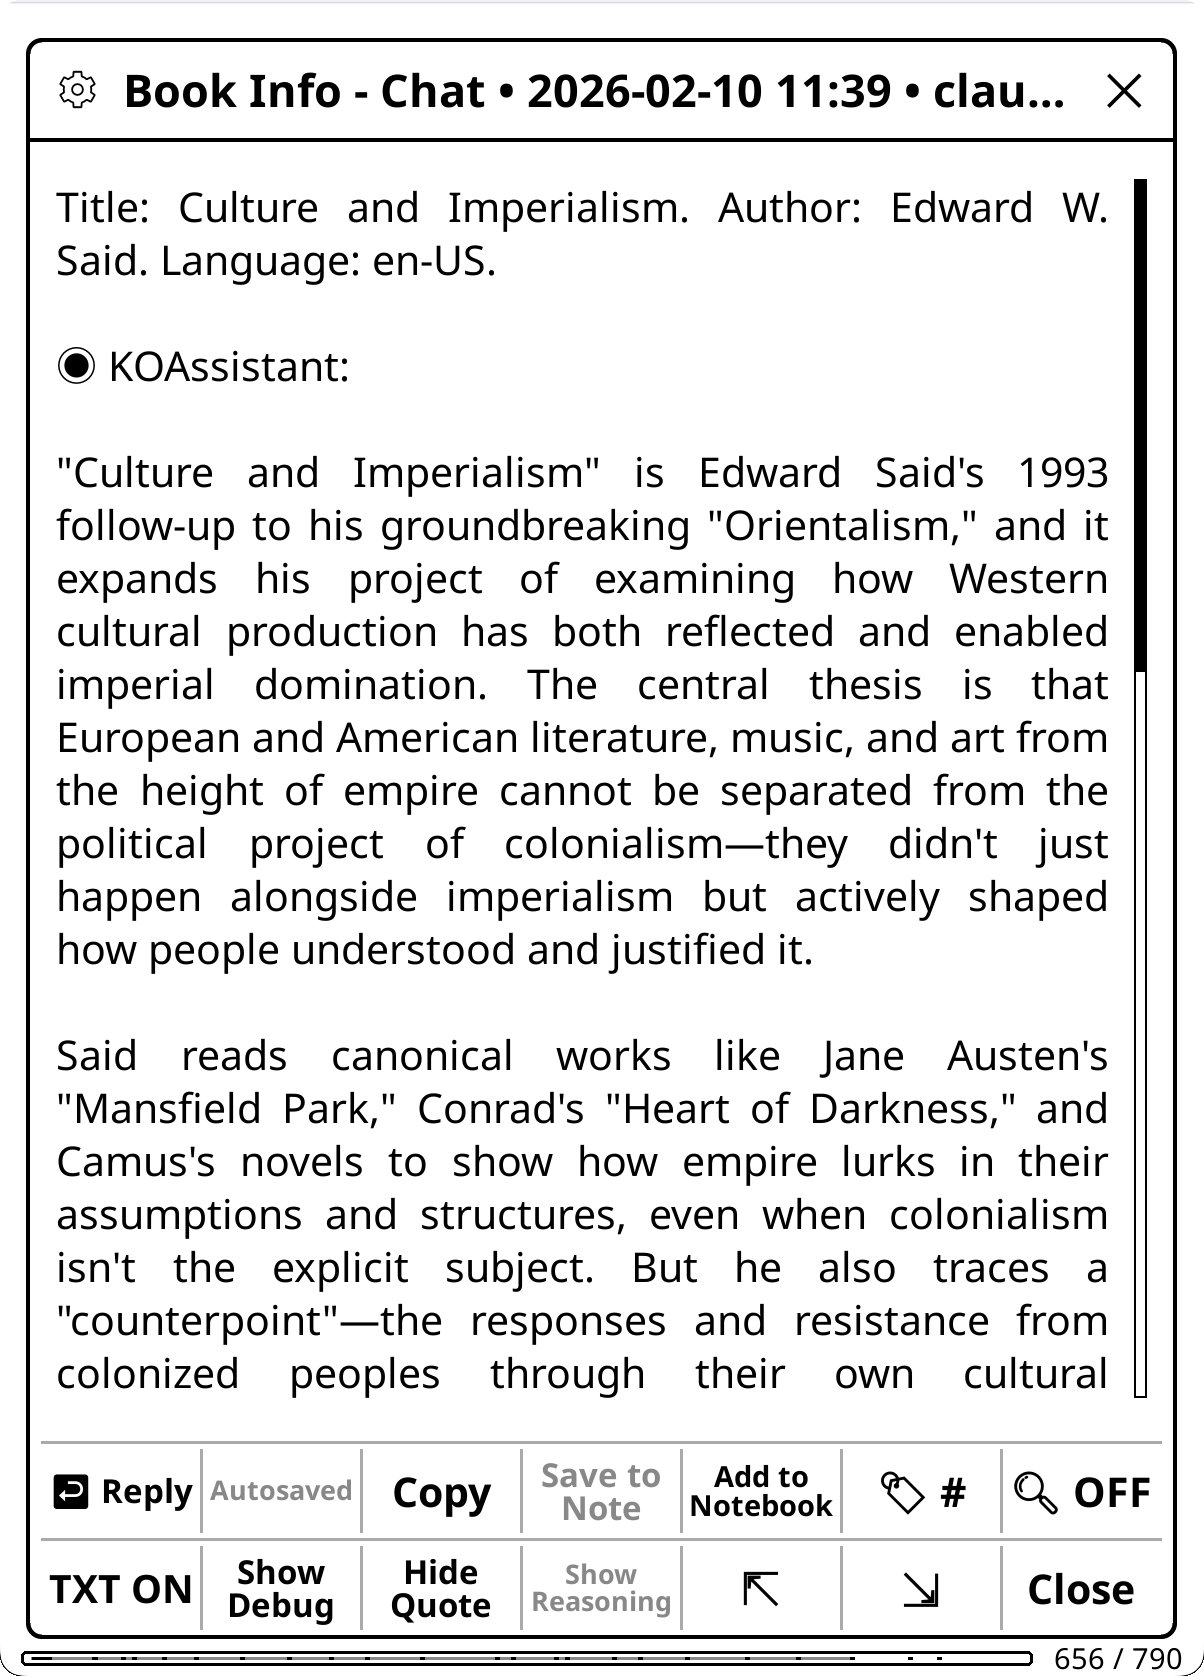
Access: Long-press a book in File Browser → "Chat/Action (KOA)" or while reading, use gesture or menu
Some actions work from the file browser (using only document metadata like title/author), while others require reading mode (using document state like progress, highlights, or extracted text). Reading-only actions are automatically hidden in file browser. You can pin frequently-used file browser actions directly to the long-press menu via Action Manager → hold action → "Add to File Browser", so they appear as one-tap buttons without opening the action selector. All file browser buttons (utilities + pinned actions + Chat/Action) are distributed across rows of up to 4 buttons each. Long-press any pinned action button to see its description.
Built-in Actions:
| Action | Description |
|---|---|
| About | Overview, significance, and why to read it |
| Find Similar | Recommendations for similar works. When library scanning is enabled, notes which you already own |
| About Author | Author biography and writing style |
| Historical Context | When written and historical significance. Adapts to work type (novel, manifesto, religious text, research paper) |
| Related Thinkers | Intellectual landscape: influences, contemporaries, and connected thinkers |
| Reviews | Find critical and reader reviews, awards, and reception ⚠️ Requires: Web Search |
| X-Ray | Browsable reference guide: characters (with aliases and connections), locations, themes, lexicon, timeline. Opens in a structured menu with search (including cross-section search across all X-Rays), chapter/book mention tracking, per-item chapter distribution, AI Wiki per-item encyclopedia, Section X-Rays for focused chapter/part analysis, linkable cross-references, local lookup, and highlight integration. Supports Automatic X-Ray (background upkeep), checkpoints, and version history. ⚠️ Requires: Allow Text Extraction |
| X-Ray (Simple) | Prose companion guide from AI knowledge: characters, themes, settings, key terms. No text extraction needed. Uses reading progress to avoid spoilers. |
| Recap | "Previously on..." style summary to help you resume reading. Source selection: extracted text (with incremental updates) or AI knowledge. Use Hidden Flows to limit scope ⚠️ Best with: Allow Text Extraction |
| Analyze Notes | Discover patterns and connections in your notes and highlights ⚠️ Requires: Allow Annotation Notes |
| Key Arguments | Thesis, evidence, assumptions, and counterarguments. Source selection: full text, summary, or AI knowledge. Supports section scope |
| Counterarguments | Prosecutes the case against the work: steelmanned opposing positions, the argument's weakest links, what would falsify it, and who disagrees and why. (Key Arguments maps the argument; this one argues back.) Source selection: full text, summary, or AI knowledge. Supports section scope. Saved as an artifact |
| Discussion Questions | Comprehension, analytical, and interpretive prompts. Source selection: full text, summary, or AI knowledge. Supports section scope |
| Quiz | Interactive comprehension quiz, one question at a time with answer selection, scoring, and review. Multiple choice (auto-graded), short answer and discussion (self-graded). Triggered automatically at chapter ends (configurable) or manually from Quick Actions with scope picker. Question types, count, and difficulty configurable in Settings. Result saved as artifact. Source selection: full text, summary, or AI knowledge. Supports section scope |
| Reading Guide | Spoiler-free guide to what's ahead: threads in motion, patterns to notice, helpful background, how to approach the rest. Uses reading position to stay safe. Source selection: full text, summary, or AI knowledge. Supports section scope |
| Document Analysis | Deep analysis: thesis, structure, key insights, audience. Saved as an Analysis artifact. Supports section scope. ⚠️ Requires: Allow Text Extraction |
| Document Summary | Comprehensive summary. Saved as a Summary artifact, which other actions can use as their document source. Supports section scope. ⚠️ Requires: Allow Text Extraction |
| Extract Key Insights | Distills the most important takeaways: ideas worth remembering, novel perspectives, actionable conclusions. Source selection: full text, summary, or AI knowledge. Supports section scope |
| Suggest from Library | Suggests what to read next from your own library, based on the current book and your reading patterns. Also triggers in the end-of-book popup. ⚠️ Requires: Library scanning enabled |
What the AI sees: Document metadata (title, author, DOI when detected). For Analyze Notes: your annotations. For full document actions: entire document text. For Suggest from Library: your library catalog (title, author, series, status, progress, last read date). For library scan actions with Advanced Stats enabled: curated engagement groups (book lists categorized by reading patterns, see Privacy & Data).
Research Mode adapts KOAssistant's prompts, X-Ray schema, and web search behavior for academic and research texts. It can activate automatically via DOI detection or be turned on manually for any book.
Triggering Research Mode:
| Trigger | How it works |
|---|---|
| DOI auto-detection | When KOAssistant detects a DOI (Digital Object Identifier) in your document, Research Mode activates automatically |
| Per-book toggle | Set manually via the Domain & Research picker, persists in the book's sidecar |
| Global setting | Enable in Domain & Research picker (global target) or Settings, applies to all books without a per-book override |
| Per-action override | Actions can force Research Mode on or off regardless of other settings |
Resolution order: Action override > per-book setting > DOI auto-detection > global setting. Per-book "Off" explicitly suppresses Research Mode even if a DOI is detected.
What changes with Research Mode:
| Enhancement | What it does |
|---|---|
| Academic X-Ray | Replaces fiction/non-fiction categories with 7 research-appropriate categories: Key Concepts, Foundations (intellectual lineage, paradigms), Methodology, Findings, Referenced Works (with aliases and connections), Technical Terms, Figures & Data |
| Academic Prompt Tracks | About, Find Similar, and X-Ray (Simple) switch to research-oriented prompts (research context, methodology, cited works instead of characters/themes). Recap, Key Arguments, Discussion Questions, Quiz, Reading Guide, and Analyze Notes include expanded academic adaptation (methodology, evidence evaluation, field positioning) |
| Research Nudge | System prompt addition guiding the AI to ground analysis in the provided text, verify claims via web search, and contextualize within the paper's field |
| Web Search Override | Actions that normally have web search disabled (X-Ray, Summarize, etc.) follow your global web search setting instead: if web search is on globally, research texts get web-enriched analysis |
| DOI in Prompts | When a DOI is detected, every book-context prompt includes it, helping the AI identify the exact paper and its citation context |
How to enable Research Mode:
The toggle is inside the Domain & Research picker (the Domain button in the chat input dialog, or the Domain item in Quick Settings). Below the domain list, a "Research Mode" section appears:
This shares the same book/global target toggle as domain selection. Research Mode for the current book can also be set from Book Settings.
How DOI detection works:
DOI detection runs independently of the Research Mode toggle: the DOI is always available for {doi_clause} in prompts. The toggle only controls whether Research Mode behavior (nudge, prompt swaps, web override) activates.
The DOI is a public identifier (like a URL). Only the DOI string enters metadata: no document content leaves the device beyond what you've already opted into via privacy settings.
Academic X-Ray categories are discipline-agnostic: the prompt tells the AI to adapt categorization to the field (a physics paper has different natural categories than a sociology study or a philosophy paper). The browsable X-Ray browser works identically: category navigation, search, chapter appearances, AI Wiki, linkable cross-references, and all other features carry over. Academic X-Rays use the same two-track design (incremental vs complete) and support Section X-Rays.
Cache track consistency: When updating an existing artifact (e.g., "Update X-Ray to 50%"), the update respects the track the cache was originally built with: a non-fiction X-Ray stays non-fiction even if Research Mode is now on, and vice versa. "Redo" regenerates from scratch using the current Research Mode setting.
Tip: Good metadata matters. DOI detection works best when your documents have clean metadata. Use Calibre or your reference manager (Zotero, Mendeley) to ensure the DOI is in the document's identifier or description fields. For PDFs without metadata DOI, the first-page text scan catches most academic papers since publishers print the DOI on page 1. After the first action run, the detected DOI is cached: subsequent actions (including from the file browser) use the cached result instantly.
Tip: Research Mode without DOI. For academic books, textbooks, or research-adjacent texts that don't have a DOI, enable Research Mode manually via the Domain & Research picker. This gives you the academic X-Ray schema, research nudge, and web search override: everything except the DOI-specific prompt enrichment.
These actions analyze your actual reading content. They require specific privacy settings to be enabled:
| Action | What it analyzes | Privacy setting required |
|---|---|---|
| X-Ray | Book text + highlights up to current position | Allow Text Extraction (required), Allow Highlights (optional) |
| X-Ray (Simple) | AI training knowledge + reading progress + highlights | Allow Highlights (optional) |
| Recap | Book text or AI knowledge (user choice) + highlights up to current position | Allow Text Extraction (for extracted text), Allow Highlights |
| Analyze Notes | Your highlights and annotations | Allow Annotation Notes |
| Key Arguments | Full text, summary, or AI knowledge (user choice) | Allow Text Extraction (for full text/summary) |
| Discussion Questions | Full text, summary, or AI knowledge (user choice) | Allow Text Extraction (for full text/summary) |
| Quiz | Full text, summary, or AI knowledge (user choice) | Allow Text Extraction (for full text/summary) |
| Document Analysis | Entire document or section (user choice) | Allow Text Extraction |
| Document Summary | Entire document or section (user choice) | Allow Text Extraction |
| Extract Key Insights | Full text, summary, or AI knowledge (user choice) | Allow Text Extraction (for full text/summary) |
| Reading Guide | Full text, summary, or AI knowledge (user choice) + reading progress | Allow Text Extraction (for full text/summary) |
| About | AI training knowledge (+ optional web search) | None (web search optional) |
| Suggest from Library | Library catalog + current book + reading progress | Enable Library Scanning + folders configured |
| Next Read | Library catalog + engagement groups (recently finished, stalled, briefly started) | Enable Library Scanning + folders configured; Allow Advanced Stats (optional, enhances with engagement data) |
| Discover New | Library catalog + engagement groups (deep reads, recently finished) | Enable Library Scanning + folders configured; Allow Advanced Stats (optional) |
| Analyze Library | Library catalog + all engagement groups | Enable Library Scanning + folders configured; Allow Advanced Stats (optional) |
| Challenge My Taste | Library catalog + all engagement groups | Enable Library Scanning + folders configured; Allow Advanced Stats (optional) |
⚠️ Privacy settings required: These actions won't have access to your reading data unless you enable the corresponding setting in Settings → Privacy & Data. Without text extraction enabled, actions with source selection show "AI knowledge only" as the available option. For other actions, the AI gracefully falls back to its training knowledge, with a "Response generated without: ..." notice in the chat. Exception: X-Ray requires text extraction and blocks generation without it: use X-Ray (Simple) for a prose overview from AI knowledge.
Tip: Highlight actions can also use text extraction. "Explain in Context" and "Analyze in Context" send the full document text (
{full_document_section}) to understand your highlighted passage within the complete work. See Highlight Mode for details.
X-Ray, Document Summary, and Document Analysis require text extraction enabled (Settings → Privacy & Data → Text Extraction). Without it, generation is blocked with a message directing you to enable text extraction (or use X-Ray (Simple) as an alternative for X-Ray). If you've already generated a cached result and later disable text extraction, you can still view it but cannot regenerate or redo it.
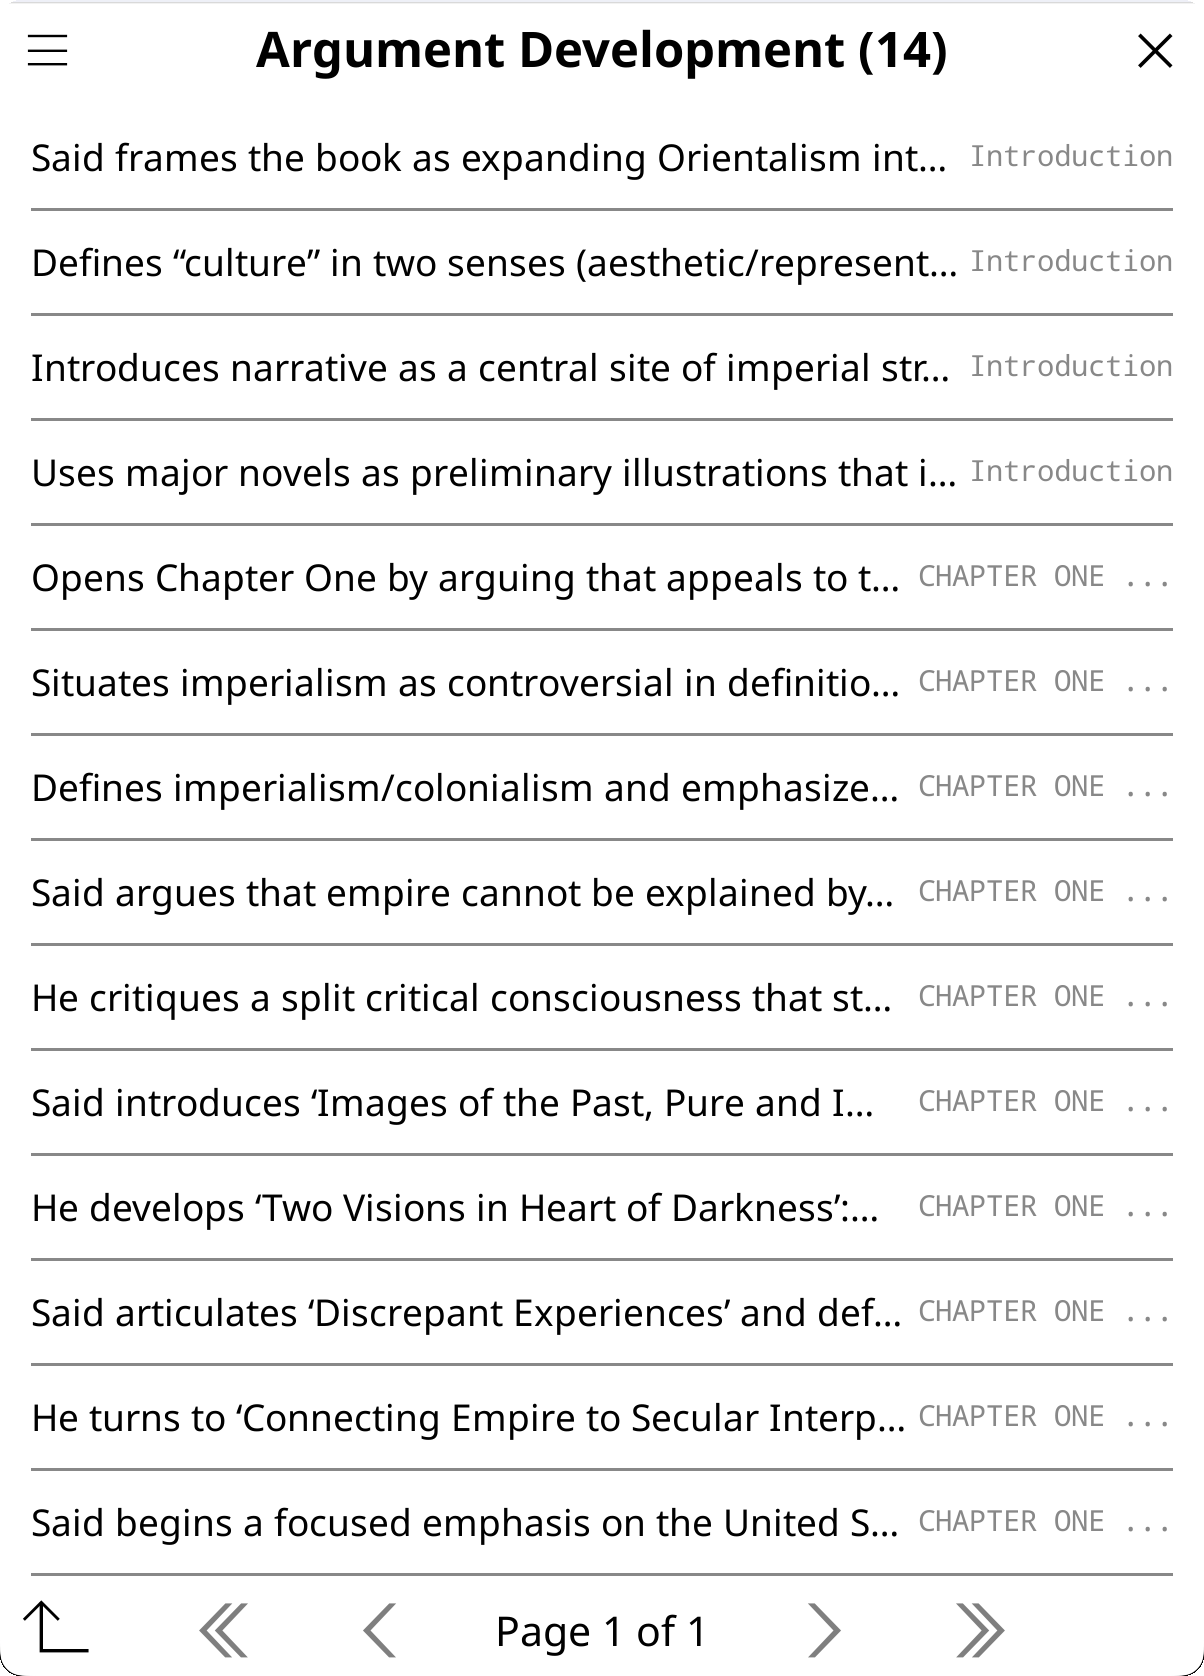
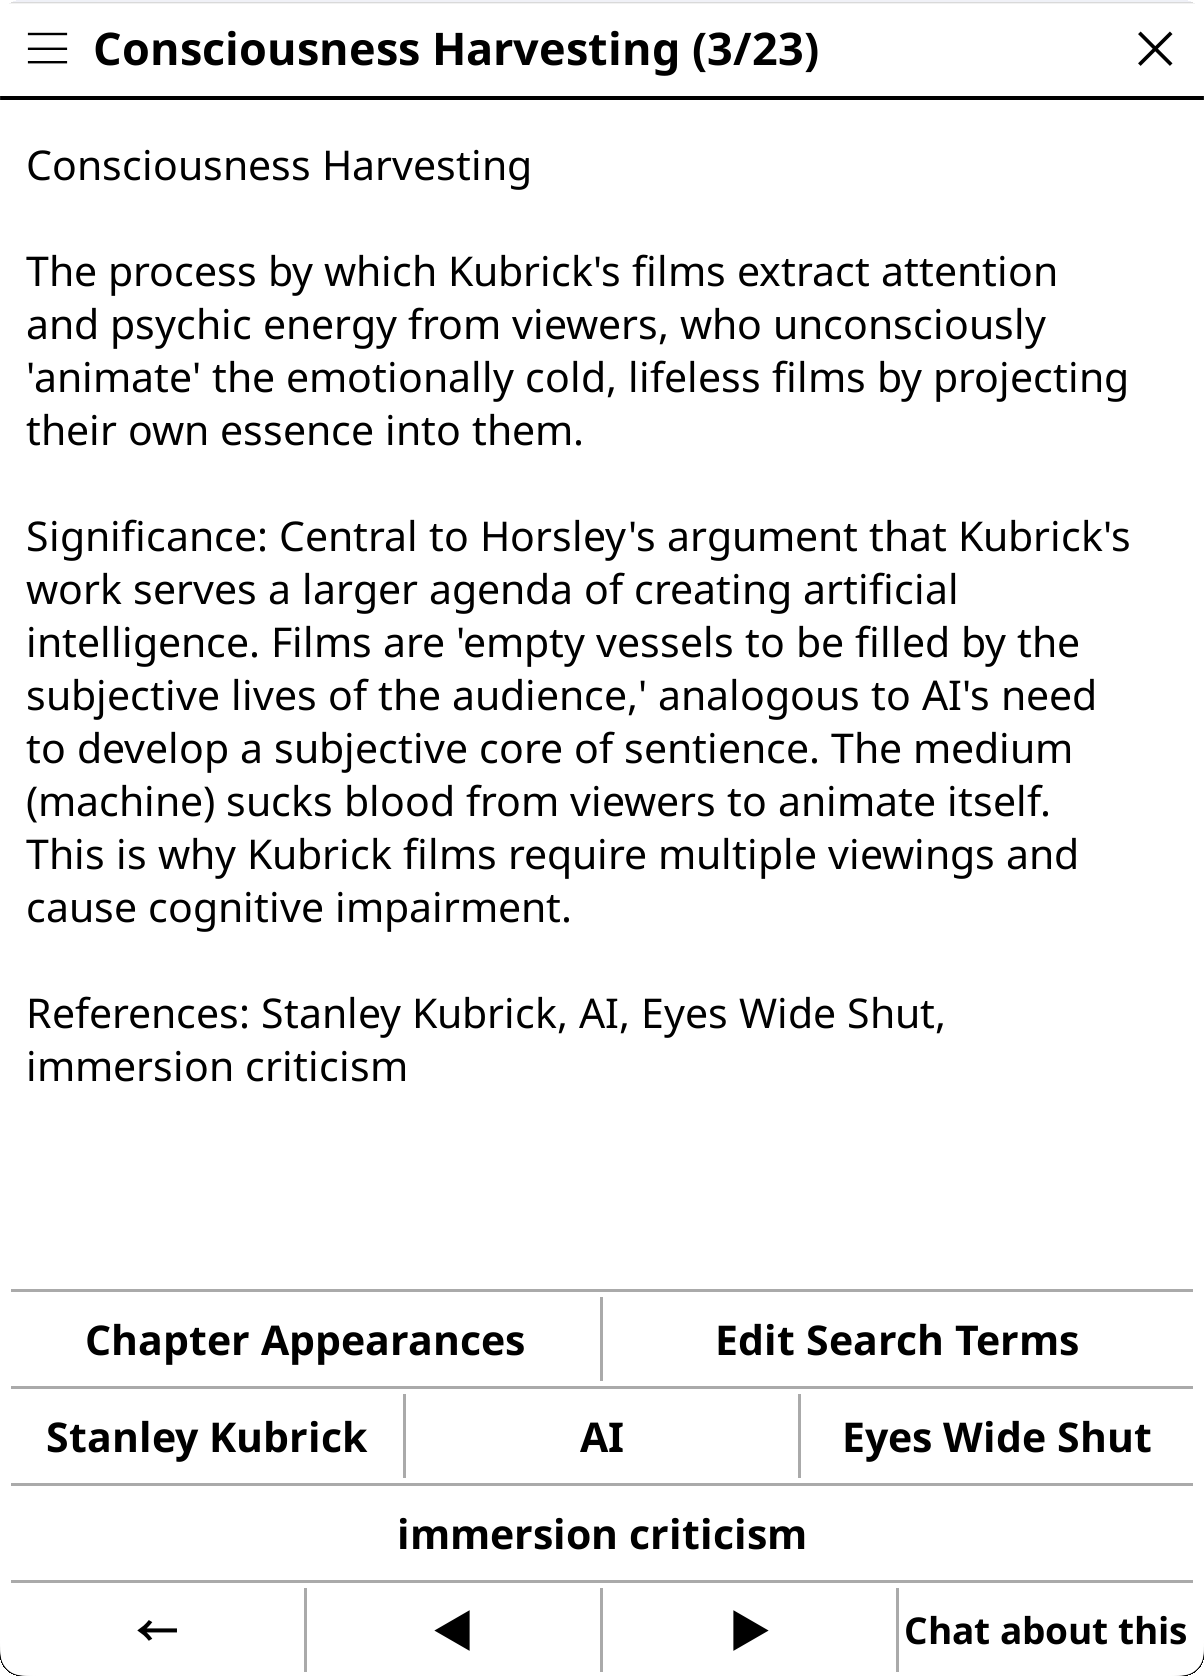
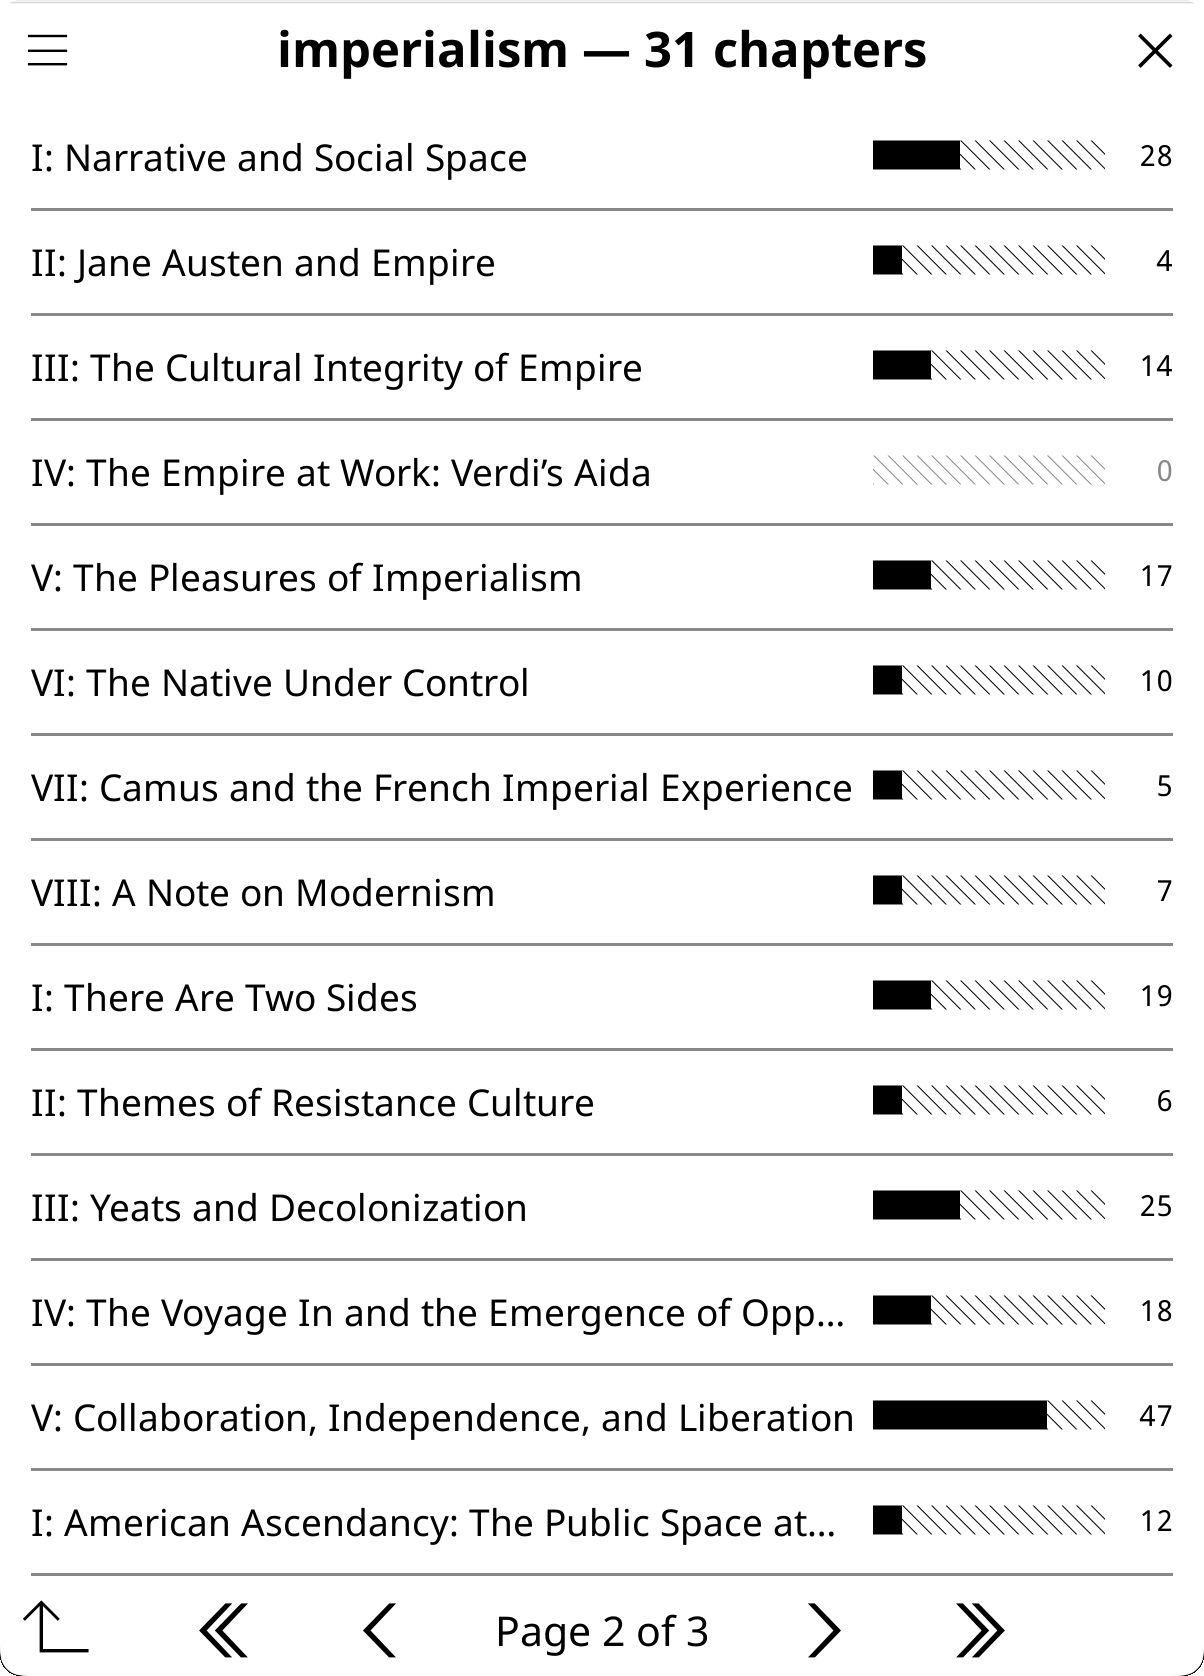
The X-Ray action produces a structured JSON analysis that opens in a browsable category menu rather than a plain text document. The initial browsable menu concept was inspired by X-Ray Plugin for KOReader by 0zd3m1r. Chapter distribution, linkable connections, and local lookup features were informed by Dynamic X-Ray by smartscripts-nl, a comprehensive manual X-Ray system with curated character databases, live page markers, and a custom histogram widget. Our approach differs: KOAssistant uses AI generation instead of manual curation, and menu-based navigation instead of custom widgets, but DX demonstrated the value of per-item chapter tracking and cross-reference linking. The browser provides:
Constantine|Mithrandir). A floating "← X-Ray" button appears during the search: tap it to return directly to the distribution view; hold to dismiss. Auto-dismisses when the search dialog is closed. Uses TOC-aware chapter boundaries with configurable depth and page-range fallback for books without TOC. Per-session caching avoids re-scanning.Model selection for X-Ray: X-Ray generates detailed structured JSON (for the X-Ray browser to work) that can be large (10K-30K+ tokens of output), and it is a complex task for the AI. The action requests up to 64K output tokens to avoid truncation. Weaker models can struggle to follow these instructions, and even if they manage it, will produce low quality content for the actual analysis, and models with low output caps (e.g., some Groq models at 8K) will produce shorter, potentially truncated results, so use larger models with higher output limits for best results. If you find a model that produces great X-Rays, you can lock it in for this action while keeping your global model for everything else, see the tip below.
Tip: Per-action model overrides. You don't have to use the same model for every action. If you discover that a particular model excels at X-Ray (or any other action), you can assign it permanently to just that action:
- Go to Settings → Actions → Manage Actions
- Long-press the action (e.g., X-Ray) → "Edit Settings"
- Scroll to Advanced → set Provider and Model
Your global model continues to be used for all other actions. This is useful for mixing cost and quality: for example, use a fast model (Gemini 3.5 Flash, Haiku, small Mistral models, etc.) as your global default for quick lookups and chat, while assigning a more capable model (Gemini 3.1 Pro, Sonnet, large Mistral models, etc.) specifically to X-Ray or Deep Analysis where quality matters most. See Tuning Built-in Actions for more examples. You can of course also momentarily change you global model to run an action and then change back if you don't want to tie an action to a model.
Tip: If your device supports emoji fonts, enable Emoji Menu Icons in Settings → Display Settings → Emoji for visual category icons in the X-Ray browser (e.g., characters, locations, themes). See Emoji Menu Icons.
Custom TOC support: Chapter-based features (Mentions, Chapter Appearances) automatically use KOReader's active TOC, including custom/handmade TOCs. If your book has no chapters or a single chapter, the fallback is page-range chunks (~20 pages each). For better results, create a custom TOC in KOReader (long-press the TOC icon → "Set custom TOC from pages") and the X-Ray browser will use it.
Hidden flows support: When KOReader's hidden flows feature is active (hiding endnotes, translator introductions, or separate books in collected works), KOAssistant automatically adapts:
- Text extraction skips hidden content: only visible pages are sent to the AI
- Reading progress reports your position within visible content only (e.g., page 42 of 70 visible pages = 60%, not 42%)
- TOC-based features (Mentions, Chapter Appearances) filter out chapters from hidden flows
- Cache staleness detects when your hidden flow configuration changes and notifies you
This works for both EPUB and PDF. Useful for collected works where you want to analyze just one book, or for editions with long endnotes/apparatus you want excluded from AI analysis. The hidden content is simply invisible to KOAssistant: extraction, progress tracking, and chapter features all operate on visible pages only.
Tip: Hidden Flows is one of the best ways to save tokens and improve AI results. By hiding front matter, introductions, appendices, bibliography, indices, references, and other non-narrative content, you send only the parts that matter: what remains becomes the "whole book" from KOAssistant's perspective. All actions (X-Ray, Summary, Analysis, etc.) operate on this trimmed scope. For collected works or anthologies, use Hidden Flows to isolate individual volumes: a "Complete X-Ray" treats the visible content as the entire document. Hidden Flows and Section X-Rays are complementary: use Hidden Flows to permanently trim away content you never want analyzed, then use Section X-Rays for focused analysis of specific chapters within the trimmed document. See KOReader's documentation for how to set up Hidden Flows.
Highlights in X-Ray: When Allow Highlights is enabled, X-Ray incorporates your highlighted passages into its analysis, adding a Reader Engagement category that tracks which themes and ideas you've engaged with, and weaving your highlights into character and location entries. This gives the X-Ray a personal dimension tied to your reading. To control this:
- Disable for all actions: Turn off "Allow Highlights" in Settings → Privacy & Data. No action will see your highlights.
- Disable for X-Ray only: Go to Settings → Actions → Manage Actions, long-press the X-Ray action → "Edit Settings", and untick "Allow highlight use". Other actions keep highlight access.
Without highlights, X-Ray still works fully: you just won't see the Reader Engagement category or highlight mentions in entries.
Tip: Reasoning for complex tasks. For short, dense works (research papers, academic chapters, technical documents under ~100 pages), more reasoning can significantly improve X-Ray quality and depth. The additional processing time is worthwhile when the text is concentrated: the AI produces more thorough entries and fewer omissions. Set the global reasoning stance to Maximum, or override your current model's reasoning to a high level (Settings → Advanced → Reasoning, or the Quick Settings Reasoning chip, or the input dialog's Quick (⚡) chip for a one-shot per-chat override). This also applies to Document Analysis and other complex one-off tasks. See Reasoning/Thinking.
X-Ray requires text extraction to generate: it blocks with a message directing you to enable text extraction or use X-Ray (Simple) instead. If you've already cached an X-Ray and later disable text extraction, you can still view the cached result but cannot update or redo it.
X-Ray (Simple) is a separate action that produces a prose overview (Characters, Themes, Setting, Key Terms, Where Things Stand) from the AI's training knowledge, no text extraction needed. Uses your reading progress for spoiler gating and optionally includes your highlights. Available in the Quick Actions panel and as a separate artifact. Every generation is fresh (no incremental updates). Best for well-known books when you don't want to enable text extraction. For obscure works or research papers, results will be limited since the AI may not recognize the title.
Recap works with source selection: choose between extracted text (recommended, with incremental updates as you read) or AI knowledge only. Use KOReader's Hidden Flows to limit scope to specific chapters or parts of the book.
Tip: Enable Recap Reminder in Settings → Reading & Library to get a prompt to run Recap when you open a book you haven't read in a while (off by default).
Two-track X-Ray: When generating a new X-Ray, you choose between two tracks:
The track is chosen at initial generation and cannot be converted. To switch tracks, delete the cache and regenerate. Both tracks use the same browsable category menu, the same JSON structure for all shared categories (characters, locations, themes, etc.), and the same privacy gates. The only structural difference is the final status section (Current State/Current Position vs Conclusion).
When an X-Ray cache covers 100% (whether from a complete generation, an incremental "Update to 100%", or simply reading to the end and updating), tapping X-Ray goes directly to the browser viewer with no popup (Redo is available in the browser's options menu).
Spoiler safety: By default, X-Ray and Recap use the incremental track, which limits extraction to your current reading position (
{book_text_section}). Choosing the whole-book one-request build uses the complete track, which sends the full document ({full_document_section}). All other text extraction actions, including "Explain in Context" and "Analyze in Context", always send the full document. If you need a spoiler-free variant of any action, create a custom action using{book_text_section}instead of{full_document_section}.
Note: Marking a book as "finished" in KOReader does not affect text extraction. Incremental X-Ray and Recap still extract up to your actual page position, not 100%. This means you can navigate to a specific point in a finished book and get a spoiler-free analysis up to that point. For a full analysis of a finished book, use "Create X-Ray…" → "The whole book" → "In one request now" to get the complete track with Conclusion.
⚠️ To enable text extraction: Go to Settings → Privacy & Data → Text Extraction → Allow Text Extraction. This is OFF by default to avoid unexpected token costs.
X-Ray version history: Every time an X-Ray is updated or redone, the version it replaces is archived automatically, so an update or a full regeneration never silently destroys your previous analysis. To browse the archive:
How many versions are kept per book is set by Settings → Reading & Library → X-Ray Versions to Keep (default 5, range 0-20; oldest dropped first). Setting it to 0 stops archiving new versions; already-archived ones stay until you delete them or delete the X-Ray itself (deleting the X-Ray clears its version history and AI Wiki entries too).
Re-reader shortcut: If you jump back in a book so your live X-Ray covers more than you've re-read, the X-Ray popup offers a "View earlier version (NN% · …)" row that opens the nearest archived version at or below your current position, and the version list marks that entry "(latest before your position)". This handles the one case where a live, ahead-of-you X-Ray could otherwise spoil a re-read.
Automatic X-Ray (opt-in): KOAssistant can quietly keep a book's X-Ray up to your reading position in the background as you read, so you never face one giant catch-up extraction on a long book. Everything is off by default, and there are two ways to opt in:
There is also an optional once-per-book offer: with Offer Automatic X-Ray for New Books enabled, opening a book that has no X-Ray asks — early in the book, and only when it could act right away — whether to turn Automatic X-Ray on for it. Declining sets the book's switch to Off, so it never asks again.
Spend guards keep it conservative and predictable:
Failures are silent (surfaced only in the X-Ray popup's coverage line and the debug console); enable Notify on Background Activity for a brief notification when background work starts and completes. Tunable dials (minimum/maximum progress gap, cooldown) live under the master toggle. This is currently EPUB-only (flowing formats; page-based PDFs don't show the rows). Automatic X-Ray extracts book text and spends API tokens without a per-request tap — the interactive truncation/size warnings don't apply to background runs (an oversized background extraction aborts instead of asking) — so leave it off if you want every request to be deliberate.
X-Ray checkpoints (manual, runs in the background): from the X-Ray popup's Versions group, "Build checkpoints…" generates a full set of prefix versions of the book's X-Ray (continuing from your existing X-Ray's coverage when one exists, or from the beginning of the book when none does — the confirmation dialog states which) — roughly one every 10% of a normal-length book (spacing adapts to book length: wider on short books so a novella isn't sliced into tiny calls, narrower on very long books so a single version never covers an oversized slice; versions snap to chapter ends when the book has a usable table of contents, so they read as "up to the end of a chapter"). The confirmation dialog shows the planned checkpoint count and spacing, and "Adjust spacing for this run…" lets you override it for that one run — e.g. denser versions for dense material. After that one dialog, the checkpoints are built in the background one incremental step at a time — the book is read once in total, plus a fixed per-checkpoint overhead, so somewhat more than one full X-Ray run — while you keep reading (the book must stay open; you can cancel anytime and resume later from where it stopped). As you read past a version's position, it is silently swapped in as your live X-Ray, so the X-Ray follows your reading position with zero waiting; all versions stay browsable under "All versions".
Checkpoints serve two purposes, and both are first-class: spoiler-safe reading (every position gets an X-Ray that never runs ahead of you), and a checkpointed full build — completing a big book's X-Ray in bounded increments instead of one oversized request (a failure keeps the finished versions; resume continues from the highest). If you built them for the second reason and don't want spoiler gating, tap "Switch to complete version (100%) — instant" in the popup's Versions group: it installs the finished 100% version as your live X-Ray for free (no merging is ever needed — each checkpoint already contains everything below it), with a notice that the other checkpoints can be safely deleted (keeping them is fine too; they stay browsable). The switch is not a one-way door: while the checkpoints are kept, "Switch back to your position (NN%) — instant" re-installs the version at or below where you're reading, and position-tracking (promotion as you read) resumes — both switches are free and reversible. Useful before a re-read, for book clubs, or to give a book spoiler-safe X-Rays for its whole length up front.
Section X-Rays: focused X-Rays for individual chapters, parts, or sections of a book. Unlike the main X-Ray (which covers the whole document), Section X-Rays analyze only a specific page range chosen from the book's table of contents. You can have multiple Section X-Rays per book alongside the main X-Ray, each is independent and stored separately.
How to create a Section X-Ray:
Section ranges: "Generate for a section range…" (same popup group) asks for two TOC picks — the first and last section — and produces ONE Section X-Ray spanning everything between them (e.g. chapters 3–7 as a single artifact). Picks work in either order; the name defaults to "First – Last". One request instead of building each chapter separately and merging.
How to browse Section X-Rays:
Section X-Ray browsing differences:
Font-size independence: Section X-Rays store XPointers (stable document positions) alongside page numbers. When you change font size and reopen the book, page ranges in the section list and browser automatically update to reflect the new layout.
Tip: Section X-Rays are ideal when the full document is too large for a single detailed analysis, or when chapters cover disparate topics (as in many textbooks, academic works, or the Quran surah-by-surah). Rather than trimming the document globally with Hidden Flows, sections let you run deep analyses on specific parts while keeping the full document intact for other actions. Also useful for pivotal scenes in novels, individual essays in collections, or introductory sections you want to reference independently. For trimming away content you never want analyzed (bibliography, indices, notes, apparatus), use Hidden Flows instead: the two approaches are complementary. Section scoping is also available for other text-extraction actions, see Section support below.
Full Document Actions (Document Analysis, Document Summary, Extract Insights, Key Arguments, Discussion Questions, Quiz, Explain in Context, Analyze in Context, Thematic Connection): These actions use the entire document context. Document Analysis and Document Summary require text extraction: they block generation when it's disabled, like X-Ray. Actions with source selection (Key Arguments, Discussion Questions, Quiz, Extract Insights, Explain in Context, Analyze in Context, Thematic Connection) let you choose between full text, a cached summary, or AI knowledge only, see Source selection. They adapt to your content type and work especially well with Domains. For example, with a "Linguistics" domain active, analyzing a linguistics paper will naturally focus on relevant aspects.
Section support: Most text-extraction book actions can be focused on a specific chapter or part instead of the full document. Scope and source are combined in a single unified popup: tap "Pick section…" to choose via a hierarchical TOC picker, or "Pick section range…" / "From section… (to current position)" for multi-section spans. For X-Ray, the action's own popup offers section options (see Section X-Rays). Section artifacts are stored independently (e.g., "Section Summary: Chapter 5") and appear as groups in the Artifact Browser. When you're reading within a section's page range, a quick-access "View" button for that section appears directly in the action popup. Naming a section with the same page range as an existing one replaces the old entry. Supported actions: Document Summary, Document Analysis, Key Arguments, Discussion Questions, Quiz, Extract Key Insights (plus X-Ray via Section X-Rays above). Section scoping respects KOReader's custom/handmade TOC: create custom chapter boundaries to define your own scopes.
Tip: Create specialized versions for your workflow. Copy a built-in action, customize the prompt for your field (e.g., "Focus on methodology and statistical claims" for scientific papers), and pair it with a matching domain. Disable built-ins you don't use via Action Manager (tap to toggle). See Custom Actions for details.
Artifact Caching: All artifact actions cache results per book. For incremental X-Rays with a partial cache, a popup lets you View the cached result (with coverage and age), Update it to your current position, or Update to 100%. Complete X-Rays and incremental caches at 100% go directly to the browser viewer, Redo is available in the options menu. Updating or redoing an X-Ray archives the version it replaces (see X-Ray version history). See Document Artifacts for details.
Reading Mode vs File Browser:
Book actions work in two contexts: reading mode (book is open) and file browser (long-press a book in your library).
Reading-only actions (hidden in file browser): X-Ray, Recap, Document Analysis, Document Summary, these require live document text extraction or source selection that isn't available until you open the book.
Sidecar-eligible actions (available in file browser): X-Ray (Simple), Analyze Notes, Suggest from Library, and other actions that only need highlights, annotations, notebook, or reading progress. These read data from the book's sidecar files on disk without requiring an open document.
Custom actions using placeholders like {book_text}, {full_document}, or {page_text} require reading mode. Placeholders like {reading_progress}, {highlights}, {annotations}, and {notebook} work in both contexts via sidecar fallback. The Action Manager shows a [reading] indicator for reading-only actions.
Access: Quick Settings → Library Chat/Action, or Settings menu → Library Chat/Action, or via gesture. Opens directly to an input dialog with all library actions available. File browser multi-select also works: select multiple documents → tap any → "Compare with KOAssistant".
The library dialog splits actions into two zones with their own management buttons:
Library Scan zone: scan-based actions with a Library Scan ▾ button for folder management (enable/disable permanent folders, add on-the-fly folders for this session). Always visible by default so users can discover scan actions, but actions are grayed out until library scanning is enabled with folders configured. Tapping the Library Scan ▾ button when scanning is not enabled shows a setup prompt. To hide this zone entirely, use the gear menu → Hide Library Scan Actions:
| Action | Description |
|---|---|
| Next Read | What to read next from your library, including books worth revisiting or picking back up. Based on reading patterns, what you've finished, and what's been sitting unread. With Advanced Stats enabled, includes engagement context (stalled reads, briefly started books) |
| Discover New | Suggests new books based on your library, identifies your taste and recommends works you don't have, including a few picks outside your comfort zone ("Expand your horizons"). With Advanced Stats enabled, includes deep reads and recently finished books for better taste inference |
| Analyze Library | Analyzes your library to identify genres and authors you gravitate toward, completion patterns, and gaps in your collection. With Advanced Stats enabled, includes full engagement data for richer pattern analysis |
| Challenge My Taste | Critiques your reading pattern rather than celebrating it: where your library is one-sided, which voices are missing, and what a sharp critic of your shelf would say — ending with a few books that would argue with it. With Advanced Stats enabled, includes engagement patterns |
Items zone: selection-based actions with an Items ▾ button for book management (presets, browse history, add folder, clear). Require 2+ books selected:
| Action | Description |
|---|---|
| Compare | What makes each work distinct: contrasts, not just similarities |
| Find Common Themes | Shared DNA: recurring themes, influences, connections |
| Analyze Collection | What this selection reveals about the reader's interests |
| Quick Summaries | Brief summary of each work |
| Reading Order | Suggest optimal order based on dependencies, difficulty, themes |
| Recommend | Suggests 5-8 new works based on patterns across your selected works. When library scanning is enabled, notes which recommendations you already own and prioritizes unread books |
| Analyze Notes | Analyzes highlights, annotations, and notes across selected books: patterns in what you mark, what you write, and how your thinking connects across works ⚠️ Requires: Allow Highlights or Allow Annotation Notes |
Selection-based action buttons are grayed out (disabled) until 2+ books are added. Long-press any grayed-out button to see what it does. Tap Items ▾ to select books via presets (Currently Reading, Recently Finished, On Hold, Last 5 from History), Browse History, or Browse Folder. The book picker supports source switching: once inside, use the hamburger menu to switch between history and folder sources without closing. Selections persist across source switches. The title bar shows the count of selected items.
Freeform chat also works: type a question and tap Send. When library scanning is enabled with folders configured, the library catalog is included as context. When items are selected, those are included too. The input hint rotates context-sensitive suggestions (e.g., "What should I read next?", "How do these books connect?", "A book I've been neglecting").
What the AI sees: For scan-based actions: library catalog metadata (title, author, series, status, progress, last read date). For selection-based actions: list of selected titles, authors, and identifiers. Actions with sidecar flags (e.g., Analyze Notes) also read per-book highlights, annotations, and notebook entries from sidecar files, with the same privacy double-gating as single-book actions, with annotation degradation. A warning appears when total sidecar data is large. See Privacy & Data for details on library scanning.
Access: Tools → KOAssistant → General Chat/Action, or via gesture (easier)
A free-form conversation without specific document context. If started while a book is open, that "launch context" is saved with the chat (so you know where you launched it from) but doesn't affect the conversation, i.e. the AI doesn't see that you launched it from a specific document, and the chat is saved in General chats
Built-in Actions:
| Action | Description |
|---|---|
| News Update | Get today's top news stories from Al Jazeera with links ⚠️ Requires: Web Search |
Tip: General-context actions can now see their own recent saved results via the
{previous_results_section}placeholder. This lets you build "repeating" actions that continue from where they left off (e.g., a running journal or a rolling news digest). It reads the assistant turns of your most recent saved general chats for that same action — so you need to have saved chats for it. See Utility Placeholders.
All input dialogs (highlight, book, library, general) show a configurable set of actions that you can customize per context, plus a session chips row above the input field for controlling this chat only. The title bar has a close X on the right and a gear icon on the left. Below the chips come the action buttons in rows of 2, then Send. Long-press any action button to see its description.
The old fixed top row ([Web ON/OFF] [Domain] [Send]) and the pile of checkboxes have been replaced by a single row of tappable chips, followed by Send. Each chip controls one aspect of the request. The canonical order is fixed — Domain · Web · Tools · Quick · Scope · Attach · Spoiler — but you choose which chips are shown. Most chips follow the same pattern: tap toggles/changes the value for this chat, and long-press opens the persistent (per-book / global) defaults picker behind it.
| Chip | Tap | Long-press |
|---|---|---|
| Domain 🏛️ | Opens the domain picker (subject expertise) for this chat | (same picker; choose "For this book" / "Global") |
| Web 🌐 | Toggles web search for this chat (session-only — it no longer changes your saved global setting). If your provider can't search, tapping explains instead of toggling | Opens the For-this-book / Global web-search picker |
| Tools 🔍 | Toggles AI Book Tools for this chat | Opens the tools posture picker (Off / Manual / Auto, For-this-book or Global) |
| Quick ⚡ | Toggles the one-shot Quick Answer posture for this chat | Opens the Quick controls menu (one-shot reasoning / model override, "Quick answer default…" for the per-book/global starting state, plus "Preset settings…") |
| Scope 🎯 | Book chats: pick a text range to attach; highlight chats: set the surrounding-context mode for this chat | Book chats: same picker; highlight chats: opens the persistent per-book/global surrounding-context default picker (different from the tap menu) |
| Attach 📎 | Stage extra material (notebook / artifact / chat / file / note) for this chat | Manage the staged attachments |
| Spoiler | Toggles spoiler-free mode for this chat | Opens the For-this-book / Global spoiler-free picker |
Details on each:
.txt/.md file), and Note… (a free-text note, e.g. "this is the 2nd edition" or "I'm reading this for a course"). The label shows the count. Long-press manages/removes staged items. Works in every input context, including X-Ray chat.Tip: Quick Answer & its preset. Tapping the ⚡ Quick chip applies a configurable bundle for that chat: a concise-answer nudge, reasoning off, web search off, and book tools off (each part can be turned off in the preset). You can also switch models just for Quick Answer chats. Long-press the chip for one-shot Reasoning (Follow / Off / On) and Model (provider → model, filtered to providers you have keys for) overrides, for "Quick answer default…" (the per-book/global setting for whether the chip starts ON), and for Preset settings…. Configure the preset in Settings → Chat & Export Settings → Quick Answer Preset (Quick Answer On by Default, Concise Answer Nudge, Turn Reasoning Off, Turn Web Search Off, Turn Book Tools Off, and the model mode: Keep current / Fastest for provider / a tier / a pinned model). A one-shot pick from the chip's menu always overrides the preset for that chat.
Tip: Choosing which chips appear. Tap the gear icon → Toolbar Buttons… to toggle which chips are shown. Only membership is configurable — the order is fixed. Your choice persists in
features.session_chips. Chips that don't apply to the current context are hidden automatically (e.g. Tools/Scope/Spoiler need a book open).
Default actions per context:
| Context | Default Actions |
|---|---|
| Highlight | Translate, Explain, ELI5, Elaborate, Summarize, Connect, Fact Check, Counterpoint, Explain in Context |
| Book | About, X-Ray (Simple), Find Similar, Key Arguments, Counterarguments, Extract Key Insights, Discussion Questions, About Author, Reviews |
| Book (file browser) | About, X-Ray (Simple), Find Similar, Analyze Notes, Related Thinkers, About Author, Historical Context, Reviews, Suggest from Library |
| X-Ray Chat | Explain, Elaborate, ELI5, Fact Check, Connect |
| General | (none, use Send button for freeform chat) |
All defaults are customizable: add, remove, or reorder actions for each context independently. Remaining enabled actions are always accessible via "Show More Actions" in the grid or the gear icon → "More Actions".
Customizing which actions appear:
The general input dialog shows only actions you've explicitly added. By default, it starts empty (use the Send button for freeform chat). To add actions:
Actions like News Update that require web search are available in the gesture menu by default but not in the input dialog. This avoids showing web-dependent actions to users who haven't configured a web-search-capable provider. Add them to the input dialog (Manage Actions -> long press a general context action -> Add to General Input) if you use Anthropic, Gemini, OpenAI, xAI, Perplexity, or OpenRouter.
Tip: News Update demonstrates per-action web search override (
enable_web_search = true). Even if web search is globally disabled, this action will use it. See Web Search for more on per-action overrides.
*[Searched the web]* marker rather than being discarded. The Sources and Reasoning viewers support text selection, Copy, and Export like the main chat.Prevents the AI from revealing events beyond your current reading position when chatting about books.
How it works: When enabled, a spoiler prevention instruction is injected into the system prompt for freeform chat (the Send button) in book and highlight contexts. The instruction tells the AI your exact reading progress (e.g., "The reader is currently at 42% of this book") and forbids discussing anything beyond that point. When reading progress is unavailable, a generic variant is used ("The reader has not finished this book").
With AI Book Tools enabled, this setting also controls the tools' reading scope structurally: spoiler-free on → the tools can only read up to your current page (the AI physically cannot read ahead); off → they can read the whole document. That's a stronger guarantee than the prompt instruction alone.
How to turn it on:
Reading progress source:
What's covered:
What's intentionally excluded:
For custom actions: Use the {spoiler_free_nudge} placeholder in your action prompts to add spoiler awareness. The placeholder resolves to the spoiler instruction when active, or to nothing when inactive. See Utility Placeholders.
Save AI responses directly to your KOReader highlights.
When working with highlighted text, the Save to Note button lets you save the AI response as a native KOReader note attached to that highlight. This integrates AI explanations, translations, and analysis directly into your reading annotations.
How it works:
Key features:
Use cases:
Note: The Save to Note button only appears for highlight context chats (where you've selected text). It's not available for book, library, or general chat contexts.
KOAssistant can turn a passage you highlight into an AI-generated image — visualize a character, a described setting, a diagram, or a scene straight from the text you are reading.
Tip: Image generation is a paid feature that uses your own provider API key, just like chat. Each image costs whatever the provider charges per image (this is separate from, and usually more expensive than, text generation), so use it deliberately.
The Generate Image button only appears when the resolved image provider is one that supports image generation and you have an API key configured for it. If no supported provider is available, the button is hidden.
more like this
Claude Code & Desktop launchers for 11+ third-party LLM backends (DeepSeek, Qwen, Kimi, GLM, MiniMax, Doubao, LongCat,…
search projects, people, and tags