ckeditor5-rails
🚀 CKEditor 5 Ruby Gem – a powerful WYSIWYG editor for Rails! Smooth integration with web components and helper methods…
Ruby★ 52
CKEditor 5 for Phoenix - rich text editor for Elixir apps! Easy setup, supports live-view data binding, dynamic loadin…
 Mati365
CKEditor 5 integration library for Phoenix (Elixir) applications. Provides web components and helper functions for seamless editor integration with support for classic, inline, balloon, and decoupled editor types.
Important
This package is unofficial and not maintained by CKSource. For official CKEditor 5 documentation, visit ckeditor.com. If you encounter any issues in the editor, please report them on the GitHub repository.
Choose between two installation methods based on your needs. Both approaches provide the same functionality but differ in how CKEditor 5 assets are loaded and managed.
| CKEditor 5 Version | Integration Version |
|---|---|
| 43.x – 47.x | <= 1.26.0 |
| >= 48.0 | >= 1.27.0 |
Bundle CKEditor 5 with your application for full control over assets, custom builds, and offline support. This method is recommended for advanced users or production applications with specific requirements. It's also GPL-compliant.
Complete setup:
Add dependency to your mix.exs:
def deps do
  [
    {:ckeditor5_phoenix, "~> 1.28.2"}
  ]
end
Install CKEditor 5
mix ckeditor5.install # --premium --version 48.2.0
# ... or: npm install ckeditor5 --prefix assets
Add ckeditor5.install to assets.setup in mix.exs (if using Mix installer):
"assets.setup": ["ckeditor5.install", ... ]
Register JavaScript hook in your app.js:
import { Hooks } from 'ckeditor5_phoenix';

const liveSocket = new LiveSocket('/live', Socket, {
  hooks: Hooks,
});
Import styles in your assets/css/app.css:
@import "../../deps/ckeditor5/dist/ckeditor5.css";
/* ... or: @import "../node_modules/ckeditor5/dist/ckeditor5.css"; */
Import module in View
defmodule MyAppWeb.PageHTML do
  # ... your other uses
  use CKEditor5
end
Use in templates (no CDN assets needed):
<.ckeditor id="editor" type="classic" value="<p>Hello world!</p>" />
Load CKEditor 5 directly from CKSource's CDN - no build configuration required. This method is ideal for most users who want quick setup and don't need custom builds.
Complete setup:
Add dependency to your mix.exs:
def deps do
  [
    {:ckeditor5_phoenix, "~> 1.28.2"}
  ]
end
Register JavaScript hook in your app.js:
import { Hooks } from 'ckeditor5_phoenix';

const liveSocket = new LiveSocket('/live', Socket, {
  hooks: Hooks,
});
Exclude CKEditor from bundler in your config/config.exs:
config :my_app, MyAppWeb.Endpoint,
  watchers: [
    esbuild: {Esbuild, :install_and_run, [
      :my_app,
      ~w(--external:ckeditor5 --external:ckeditor5-premium-features)
    ]}
  ]
Add license key (see Providing the License Key 🗝️ section)
Import module in View
defmodule MyAppWeb.PageHTML do
  # ... your other uses
  use CKEditor5
end
Use in templates:
<%!-- Load CDN assets in <head> (based on `default` preset) --%>
<.cke_cloud_assets />

<%!-- or with specific features (overrides `default` preset) --%>
<.cke_cloud_assets translations={["pl", "de", "fr"]} premium />

<%!-- or with specific preset --%>
<.cke_cloud_assets preset="inline" />

<%!-- Use editor anywhere in <body> --%>
<.ckeditor id="editor" type="classic" value="<p>Hello world!</p>" />
That's it! 🎉
Render the <.ckeditor> component anywhere in your template. While most props are optional, setting an explicit id is recommended if you plan to reference the editor instance from JavaScript via the EditorsRegistry (e.g. to read content, attach listeners, or wait for initialization).
<%!-- CDN only: Load assets in <head> --%>
<.cke_cloud_assets />

<.ckeditor
  id="editor"                        <!-- unique ID; auto-generated with "cke-" prefix if omitted -->
  type="classic"                     <!-- classic | inline | balloon | decoupled | multiroot -->
  preset="default"                   <!-- preset name from config, or a %CKEditor5.Preset{} struct -->
  value="<p>Hello world!</p>"        <!-- initial HTML content -->
  editable_height="300px"            <!-- fixed height; editor grows with content if omitted -->
  language="pl"                      <!-- UI language (toolbar, dialogs) -->
  content_language="pl"              <!-- lang attr on the editable area; defaults to `language` -->
  save_debounce_ms={300}             <!-- debounce in ms for syncing content (default: 400) -->
  upload_url="/uploads"              <!-- image upload endpoint; "base64" for inline Base64 adapter -->
  watchdog={true}                    <!-- auto-restart on crash (default: true) -->
  change_event={true}                <!-- push ckeditor5:change to LiveView on content change -->
  root_attrs={%{}}                   <!-- root element attributes -->
  root_model_element="$root"         <!-- root element name (default: $root) -->
  focus_event={true}                 <!-- push ckeditor5:focus to LiveView on focus -->
  blur_event={true}                  <!-- push ckeditor5:blur to LiveView on blur -->
  ready_event={true}                 <!-- push ckeditor5:ready once the editor is initialized -->
  class="my-editor"                  <!-- CSS classes on the outer container -->
  style="border: 1px solid #ccc"    <!-- inline styles on the outer container -->
/>
You can configure the editor presets in your config/config.exs file. The default preset is :default, which provides a basic configuration with a toolbar and essential plugins — you can browse its full definition presets.ex. The preset is a map that contains the editor configuration, including the toolbar items and plugins. There can be multiple presets, and you can switch between them by passing the preset keyword argument to the ckeditor component.
In order to override the default preset or add custom presets, you can add the following configuration to your config/config.exs file:
# config/config.exs
config :ckeditor5_phoenix,
  presets: %{
    minimal: %{
      cloud: %{
        version: "46.0.0",
        premium: true,
        translations: ["pl"],
        ckbox: %{
          version: "1.0.0"
        }
      },
      config: %{
        toolbar: [:bold, :italic, :link],
        plugins: [:Bold, :Italic, :Link, :Essentials, :Paragraph]
      }
    },
    full: %{
      config: %{
        toolbar: [
          :heading, :|, :bold, :italic, :underline, :|,
          :link, :insertImage, :insertTable, :|,
          :bulletedList, :numberedList, :blockQuote
        ],
        plugins: [
          :Heading, :Bold, :Italic, :Underline, :Link,
          :ImageBlock, :ImageUpload, :Table, :List, :BlockQuote,
          :Essentials, :Paragraph
        ]
      }
    }
  }
In template:
<.ckeditor preset="minimal" value="<p>Simple editor</p>" />
You can also create dynamic presets that can be modified at runtime. This is useful if you want to change the editor configuration based on user input or other conditions.
defmodule MyApp.PageLive do
  use MyAppWeb, :live_view
  use CKEditor5

  alias CKEditor5.Preset

  def mount(_params, _session, socket) do
    preset = Preset.Parser.parse!(%{
      config: %{
        toolbar: [:bold, :italic, :link],
        plugins: [:Bold, :Italic, :Link, :Essentials, :Paragraph]
      }
    })

    {:ok, assign(socket, preset: preset)}
  end
end
In template:
<.ckeditor preset={@preset} />
CKEditor 5 requires a license key when using the official CDN or premium features. You can provide the license key in two simple ways:
Environment variable: Set the CKEDITOR5_LICENSE_KEY environment variable before starting your Phoenix app. This is the easiest and most common way.
Preset config: You can also set the license key directly in your preset configuration in config/config.exs:
config :ckeditor5_phoenix,
  presets: %{
    default: %{
      license_key: "your-license-key-here"
    }
  }
If you use CKEditor 5 under the GPL license, you do not need to provide a license key. However, if you choose to set one, it must be set to GPL.
If both are set, the preset config takes priority. For more details, see the CKEditor 5 licensing guide.
You can reference DOM elements directly in your editor configuration using the special { $element: "selector" } format. This is useful when you want to attach the editor's UI parts (like toolbars or editable areas) to specific elements in your HTML.
# config/config.exs
config :ckeditor5_phoenix,
  presets: %{
    # ... other presets
    minimal: %{
      config: %{
        # ... other config
        yourPlugin: %{
          toolbar: %{ $element: "#my-toolbar" },
          editable: %{ $element: "#my-editable" }
        },
      }
    }
  }
This will find the elements with IDs my-toolbar and my-editable in the DOM and use them for the editor's UI. If the element is not found, a warning will be shown in the console.
CKEditor 5 Phoenix supports four distinct editor types, each designed for specific use cases. Choose the one that best fits your application's layout and functionality requirements.
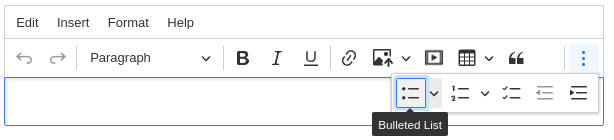
Traditional WYSIWYG editor with a fixed toolbar above the editing area. Best for standard content editing scenarios like blog posts, articles, or forms.
<%!-- CDN assets in <head> --%>
<.cke_cloud_assets />

<%!-- Classic editor in <body> --%>
<.ckeditor
  type="classic"
  value="<p>Initial content here</p>"
  editable_height="300px"
/>
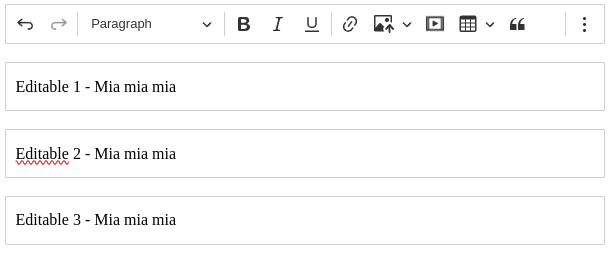
Advanced editor supporting multiple independent editable areas within a single editor instance. Perfect for complex layouts like page builders, newsletters, or multi-section content management.
<%!-- CDN assets in <head> --%>
<.cke_cloud_assets />

<%!-- Editor container --%>
<.ckeditor type="multiroot" />

<%!-- Shared toolbar --%>
<.cke_ui_part name="toolbar" />

<%!-- Multiple editable areas --%>
<div class="flex flex-col gap-4">
  <.cke_editable
    root="header"
    value="<h1>Main Header</h1>"
    class="border border-gray-300"
  />
  <.cke_editable
    root="content"
    value="<p>Main content area</p>"
    class="border border-gray-300"
  />
  <.cke_editable
    root="sidebar"
    value="<p>Sidebar content</p>"
    class="border border-gray-300"
  />
</div>
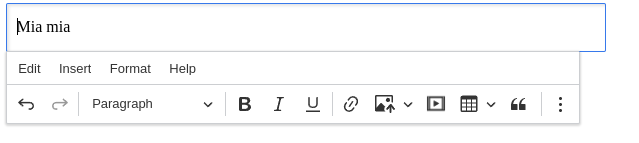
Minimalist editor that appears directly within content when clicked. Ideal for in-place editing scenarios where the editing interface should be invisible until needed.
<%!-- CDN assets in <head> --%>
<.cke_cloud_assets />

<%!-- Inline editor --%>
<.ckeditor
  type="inline"
  value="<p>Click here to edit this content</p>"
  editable_height="300px"
/>
Note: Inline editors don't work with <textarea> elements and may not be suitable for traditional form scenarios.
Contextual editor that shows a floating toolbar near the selected text. Great for editing small content snippets or when you want to minimize UI clutter.

<%!-- CDN assets in <head> --%>
<.cke_cloud_assets />

<%!-- Balloon editor --%>
<.ckeditor
  type="balloon"
  value="<p>Click here to edit this content</p>"
  editable_height="300px"
/>
Flexible editor where toolbar and editing area are completely separated. Provides maximum layout control for custom interfaces and complex applications.
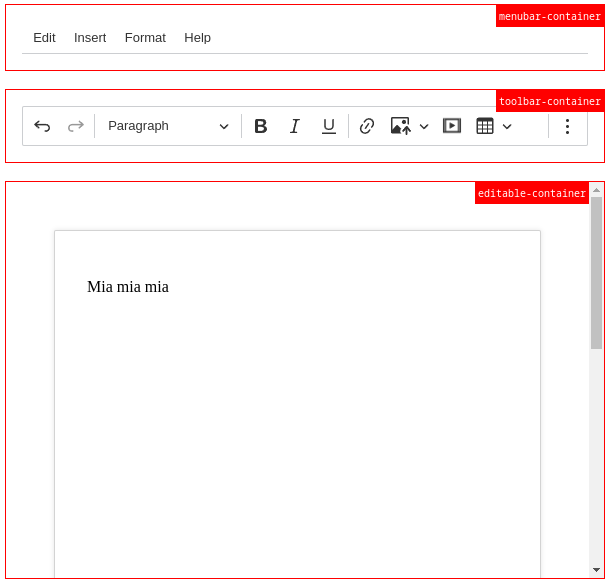
<%!-- CDN assets in <head> --%>
<.cke_cloud_assets />

<%!-- Decoupled editor container --%>
<.ckeditor id="your-editor" type="decoupled">
  <div class="flex flex-col gap-4">
    <%!-- Toolbar can be placed anywhere --%>
    <.cke_ui_part name="toolbar" />

    <%!-- Editable area with custom styling --%>
    <.cke_editable
      value="<p>Initial content here</p>"
      class="p-4 border border-gray-300 rounded"
      editable_height="300px"
    />
  </div>
</.ckeditor>
Paragraph-like editing mode restricts the editor's root to a single block element — by default a <p> — preventing users from inserting multiple top-level block elements (headings, lists, etc.). This is ideal for short-text fields such as article titles, captions, descriptions, or any place where you want the richness of inline formatting (bold, italic, links) but a single-paragraph constraint.
The feature is enabled by setting root_model_element="$inlineRoot" on the editor or editable component. This maps the CKEditor model root to the $inlineRoot schema element, which allows only inline content.
For single-root editor types, set root_model_element directly on <.ckeditor>:
<%!-- CDN assets in <head> --%>
<.cke_cloud_assets />

<%!-- Paragraph-like classic editor — single <p>, inline formatting only --%>
<.ckeditor
  id="title-editor"
  type="classic"
  root_model_element="$inlineRoot"
  value="<p>Article title goes here</p>"
/>
The same attribute works with balloon and inline editor types:
<.ckeditor
  id="caption-editor"
  type="balloon"
  root_model_element="$inlineRoot"
  value="<p>Image caption</p>"
/>
In a multiroot setup each <.cke_editable> can independently decide whether it uses paragraph-like mode. Set root_model_element="$inlineRoot" on the specific editable roots that should be restricted, while leaving others unrestricted:
<%!-- CDN assets in <head> --%>
<.cke_cloud_assets />

<%!-- Multiroot editor container (no root_model_element here) --%>
<.ckeditor type="multiroot" id="page-editor" />

<%!-- Shared toolbar --%>
<.cke_ui_part name="toolbar" class="mb-4" />

<div class="flex flex-col gap-4">
  <%!-- Title root: paragraph-like, only inline content allowed --%>
  <.cke_editable
    root="title"
    root_model_element="$inlineRoot"
    value="<p>Page Title</p>"
    class="text-2xl font-bold border border-gray-300 p-2"
  />

  <%!-- Lead root: paragraph-like, only inline content allowed --%>
  <.cke_editable
    root="lead"
    root_model_element="$inlineRoot"
    value="<p>Short introductory sentence.</p>"
    class="italic border border-gray-300 p-2"
  />

  <%!-- Body root: normal editing, full block content allowed --%>
  <.cke_editable
    root="body"
    value="<p>Full article content with headings, lists, etc.</p>"
    class="border border-gray-300 p-2"
  />
</div>
When the editor initialises, each root whose root_model_element is set to "$inlineRoot" is registered with that model element name. You can verify this at runtime:
import { EditorsRegistry } from 'ckeditor5_phoenix';

EditorsRegistry.the.waitFor('page-editor').then((editor) => {
  // '$inlineRoot' for restricted roots, '$root' for unrestricted ones
  console.log(editor.model.document.getRoot('title')?.name); // '$inlineRoot'
  console.log(editor.model.document.getRoot('body')?.name); // '$root'
});
By default, the <.ckeditor> component uses a built-in watchdog mechanism to automatically restart the editor if it crashes (e.g., due to a JavaScript error). The watchdog periodically saves the editor's content and restores it after a crash, minimizing the risk of data loss for users.
The watchdog is enabled by default. To disable it, set the watchdog prop to false:
<.ckeditor
  type="classic"
  value="<p>Initial content</p>"
  watchdog={false}
/>
You can also fine-tune the watchdog behaviour by setting its parameters in your preset configuration in config/config.exs:
config :ckeditor5_phoenix,
  presets: %{
    default: %{
      watchdog: %{
        # Maximum number of crashes before the watchdog stops restarting the editor.
        # Defaults to 3.
        crashNumberLimit: 5,

        # Minimum time (in ms) that must pass without a crash for the crash counter
        # to be reset. Defaults to 5000 ms.
        minimumNonErrorTimePeriod: 10_000,

        # How often (in ms) the watchdog saves the editor state to restore it
        # after a crash. Defaults to 5000 ms.
        saveInterval: 2_000
      },
      config: %{
        # ... your editor config
      }
    }
  }
Note
These options map directly to the CKEditor 5 Watchdog configuration. Refer to the official docs for the full list of available options.
Support multiple languages in the editor UI and content. Learn how to load translations via CDN or configure them globally.
Use language to set the CKEditor UI language (menus, tooltips, labels) and content_language to set the language of the editable content (lang attribute in the editor area).
<.cke_cloud_assets translations={["pl"]} />

<.ckeditor
  id="article-editor"
  type="classic"
  language="pl"
  content_language="en"
  value="<p>Hello world!</p>"
/>
You can also configure translations globally in your config/config.exs file. This is useful if you want to load translations for multiple languages at once or set a default language for the editor. Keep in mind that this configuration is only used when loading translations via CDN. If you are using self-hosted setup, translations are handled by your bundler automatically.
# config/config.exs
config :ckeditor5_phoenix,
  presets: %{
    default: %{
      cloud: %{
        translations: ["pl", "de", "fr"]  # CDN only
      }
    }
  }
Note: For self-hosted setups, translations are handled by your bundler automatically.
You can also provide custom translations for the editor. This is useful if you want to override existing translations or add new ones. Custom translations can be provided in the preset configuration.
# config/config.exs
config :ckeditor5_phoenix,
  presets: %{
    default: %{
      custom_translations: %{
        en: %{
          Bold: "Custom Bold",
          Italic: "Custom Italic"
        },
        pl: %{
          Bold: "Pogrubiony",
          Italic: "Kursywa"
        }
      }
    }
  }
Beyond static strings, the configuration itself can reference translation keys using the special
$translation object. This is resolved at initialization using the same translation packs
loaded for the editor (including any custom translations) and is particularly handy when
configuring plugin labels, toolbar items or other strings that should adapt to the UI language.
# config/config.exs
config :ckeditor5_phoenix,
  presets: %{
    default: %{
      custom_translations: %{
        en: %{CustomPlugin: "Custom Bold"},
        pl: %{CustomPlugin: "Custom Plugin"}
      },
      config: %{
        customPlugin: %{ $translation: "CustomPlugin" }
      }
    }
  }
When the editor/context is created the reference will be replaced with the translated value for
language.ui. If no translation is found for the active locale, null is used and a warning is
logged.
Enable real-time synchronization between the editor and your LiveView. Content changes are automatically sent to the server with configurable debouncing for performance optimization.
CKEditor 5 Phoenix supports bidirectional communication between your LiveView server and the JavaScript editor instance. You can receive updates from the editor and programmatically control its content from your Elixir code.
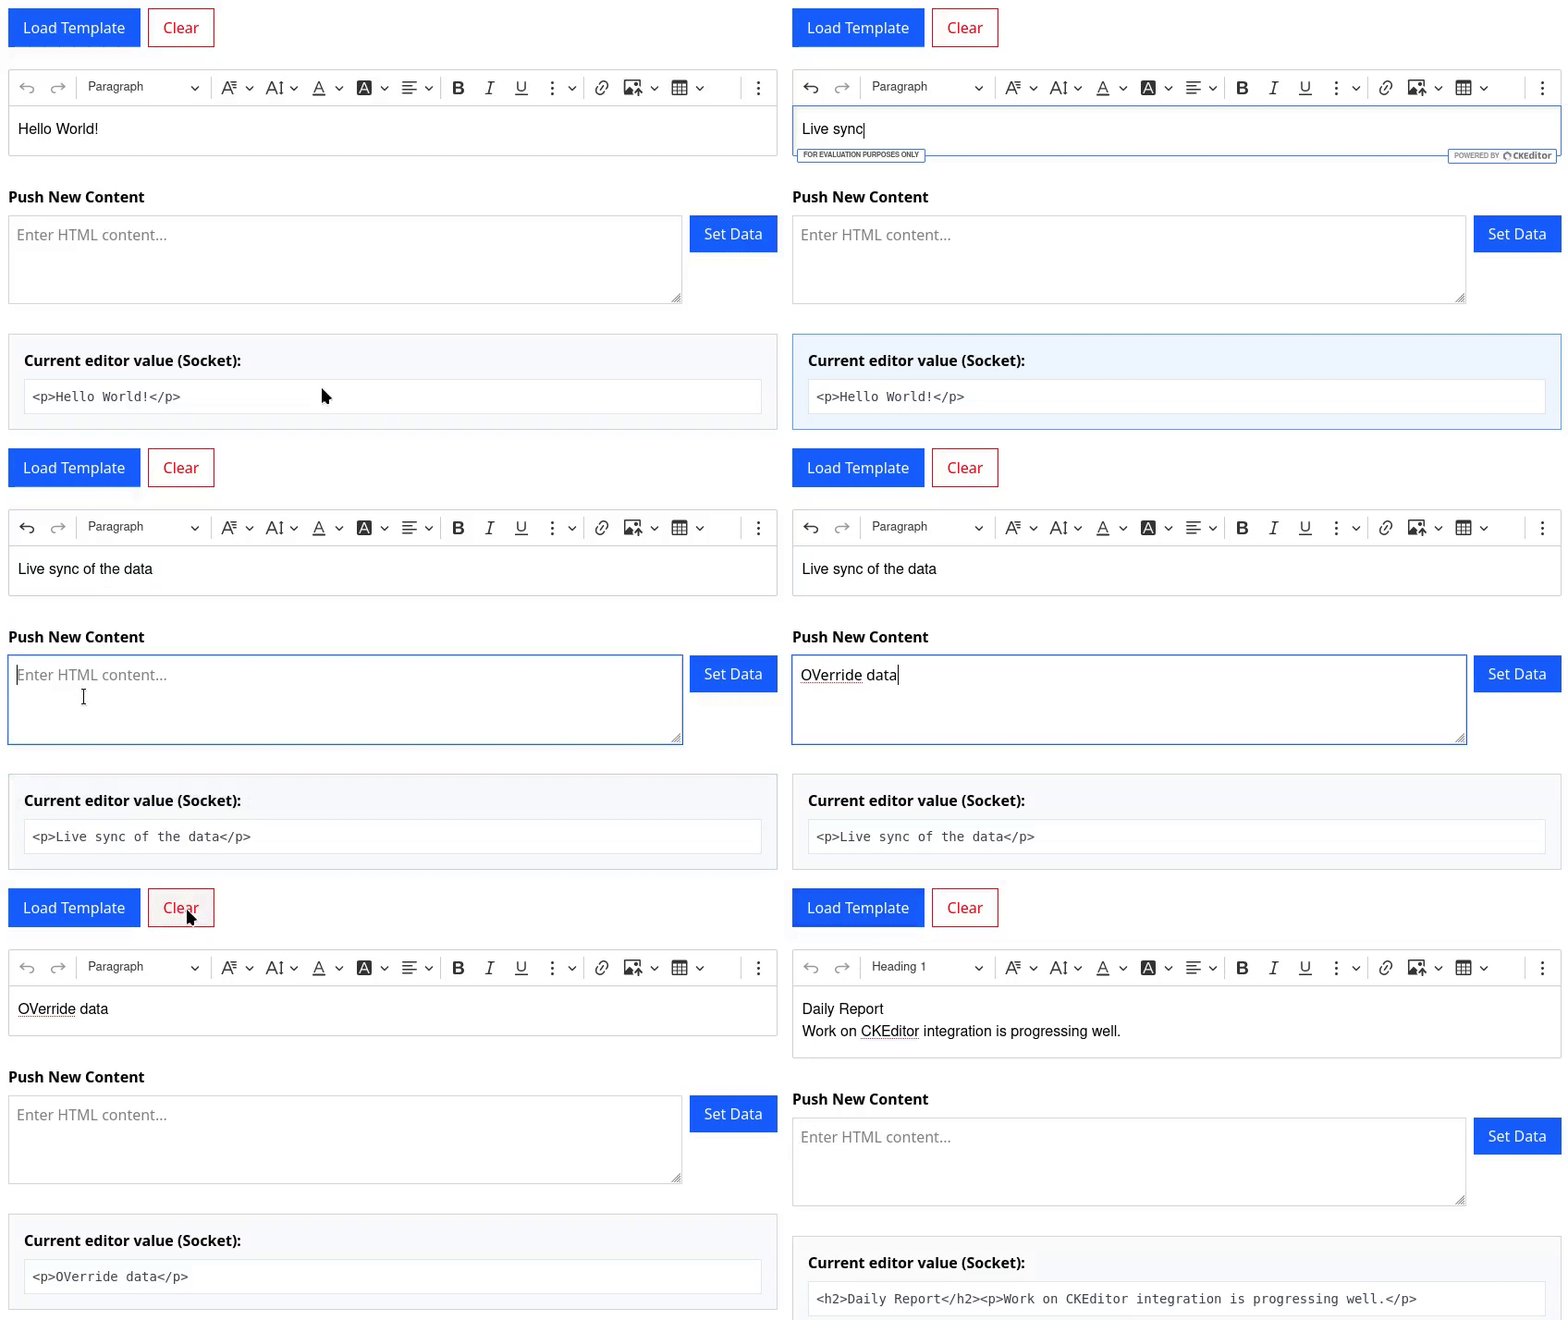
There are two ways to update the editor content from your LiveView server:
Reactive State Update (Recommended) ✨
The simplest way to update the editor is to change the assign bound to the value attribute. LiveView handles the synchronization seamlessly without requiring manual event pushing.
<button phx-click="load_template">Load Template</button>

<.ckeditor id="editor" value={@editor_value} />
defmodule MyAppWeb.EditorLive do
  use MyAppWeb, :live_view
  use CKEditor5

  def mount(_params, _session, socket) do
    {:ok, assign(socket, editor_value: "<h1>Initial Content</h1>")}
  end

  # Reactively updates the editor content by changing the assign
  def handle_event("load_template", _params, socket) do
    {:noreply, assign(socket, editor_value: "<h1>Daily Report</h1><p>Work is progressing well.</p>")}
  end
end
Imperative Update via push_event 🚀
If you prefer not to continuously track the editor's state in your assigns, or if you need to force an update directly, you can push a standard Phoenix event to the client. The integration listens for the ckeditor5:set-data event and requires the editorId and data payload.
<form phx-submit="force_set_data">
  <textarea name="new_content" placeholder="Enter HTML content..."></textarea>
  <button type="submit">Set Data</button>
</form>
def handle_event("force_set_data", %{"new_content" => val}, socket) do
  # Forces an update by pushing an event directly to the specific editor instance
  {:noreply, push_event(socket, "ckeditor5:set-data", %{editorId: "editor", data: val})}
end
By adding the change_event attribute, the editor automatically sends content updates to your LiveView whenever the user types.
<.ckeditor id="editor" value={@content} change_event />
# Receives content updates from the editor
def handle_event("ckeditor5:change", %{"data" => %{"main" => data}}, socket) do
  {:noreply, assign(socket, editor_value: data)}
end
You can use setData event to programmatically update the editor content from JavaScript. It'll be automatically synchronized with Phoenix if change_event is enabled.
document.getElementById('update-button').addEventListener('click', async () => {
  const editor = await EditorsRegistry.the.get('editor');

  editor.setData('<h1>New Content</h1><p>This content was set from JavaScript!</p>');
});
For multiroot editors, reactivity works on a per-root basis. You can iterate over your roots and sync changes accordingly.
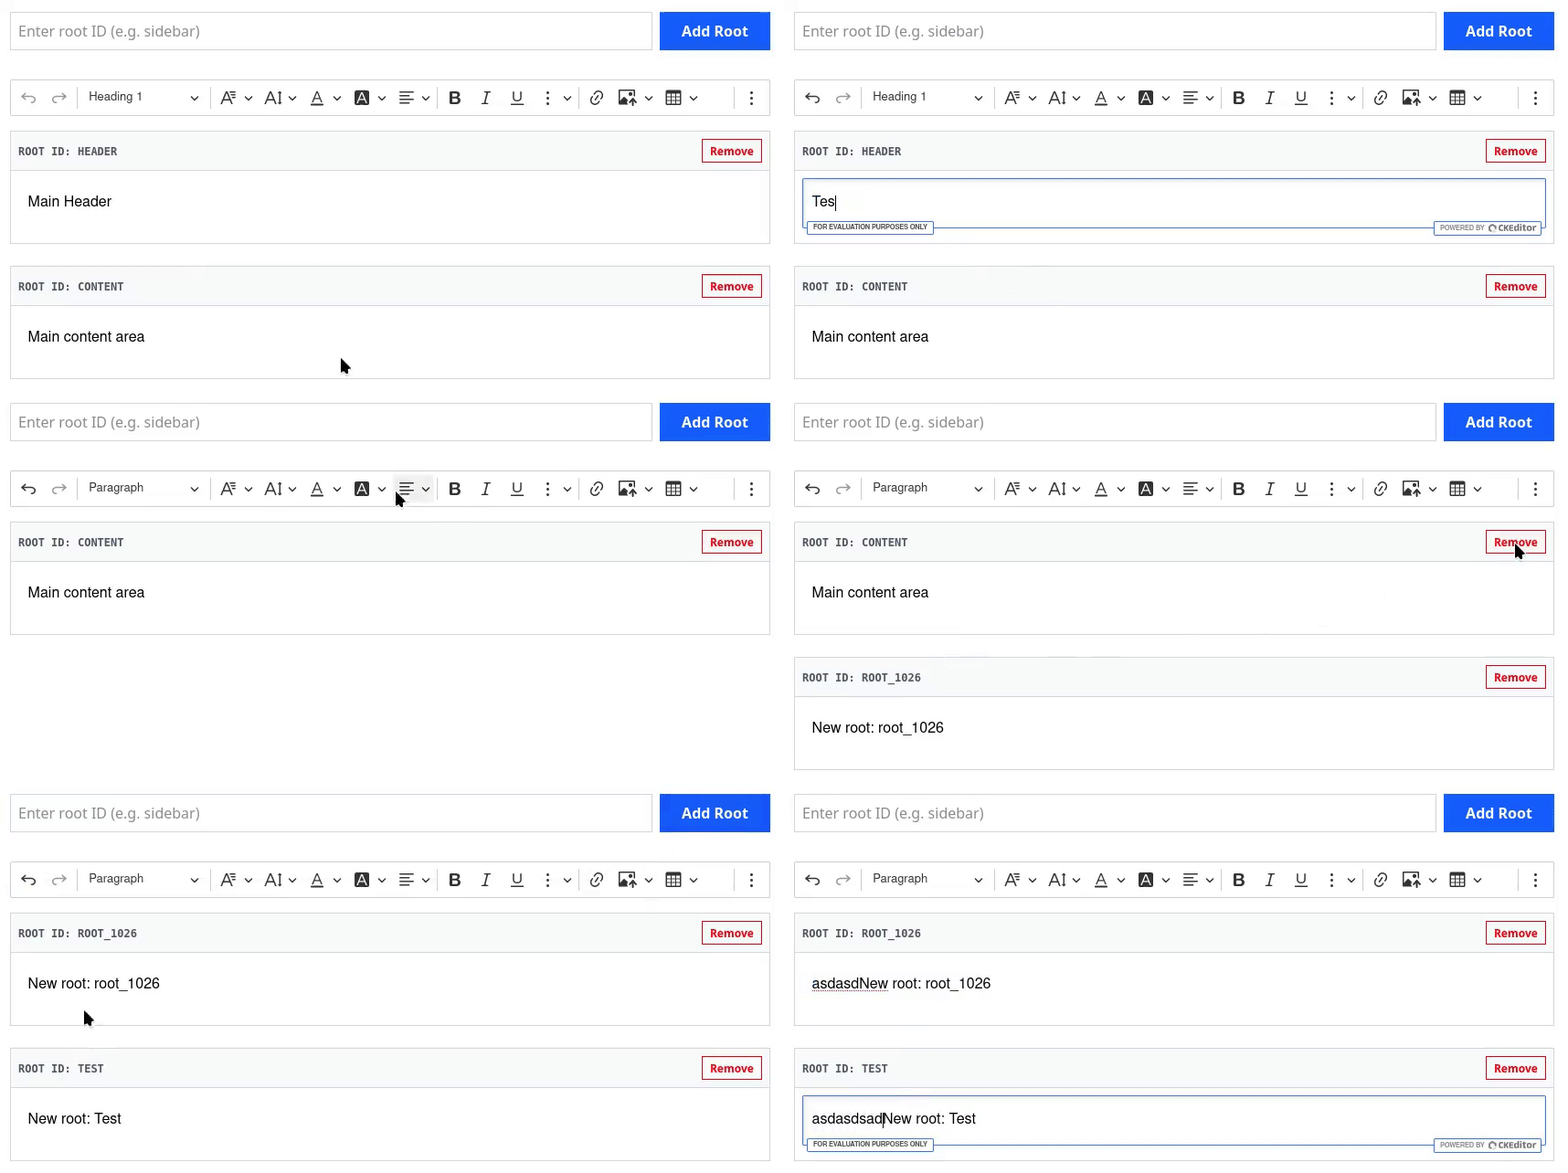
<.ckeditor type="multiroot" change_event />

<.cke_ui_part name="toolbar" class="mb-4" />

<div class="flex flex-col gap-6">
  <%= for root <- @roots do %>
    <.cke_editable root={root.id} value={root.value} />
  <% end %>
</div>
def handle_event("ckeditor5:change", %{"data" => data}, socket) do
  updated_roots =
    Enum.map(socket.assigns.roots, fn root ->
      if Map.has_key?(data, root.id) do
        %{root | value: data[root.id]}
      else
        root
      end
    end)

  {:noreply, assign(socket, roots: updated_roots)}
end
Each <.cke_editable> can carry a root_attrs map that is applied directly to the editor model root element. This means the attributes are part of the editor's internal data layer and can be read, observed, and manipulated through the editor API and custom plugins. This means that they are NOT HTML attributes added to the DOM element, but rather part of the "state" of the editor root that can be used in your custom plugins or configuration. Use it when you want to store some dynamic metadata from Phoenix that needs to be accessible in JavaScript or when you want to configure plugins based on dynamic values.
<.cke_editable
  root={root.id}
  value={root.value}
  root_attrs={%{
    "data-root-counter" => root.counter,
    "data-lang" => "en"
  }}
  class="mb-2 focus:outline-none"
/>
It's also possible to assign root_attributes on <.ckeditor> level, which will apply the attributes to main root by default. This is useful when you don't have multiple roots but still want to use dynamic attributes.
<.ckeditor
  value={@content}
  root_attrs={%{
    "data-content-id" => @content_id
  }}
/>
In order to check if the attributes are updated correctly, you can use CKEditor 5 differ result in your custom plugin.
editor.model.document.registerPostFixer((writer) => {
  const root = editor.model.document.getRoot();
  const changes = root.differ.getChanges();

  for (const change of changes) {
    if (change.type === 'attribute' && change.attributeKey === 'data-root-counter') {
      console.log('Root counter updated:', root.getAttribute('data-root-counter'));
    }
  }
});
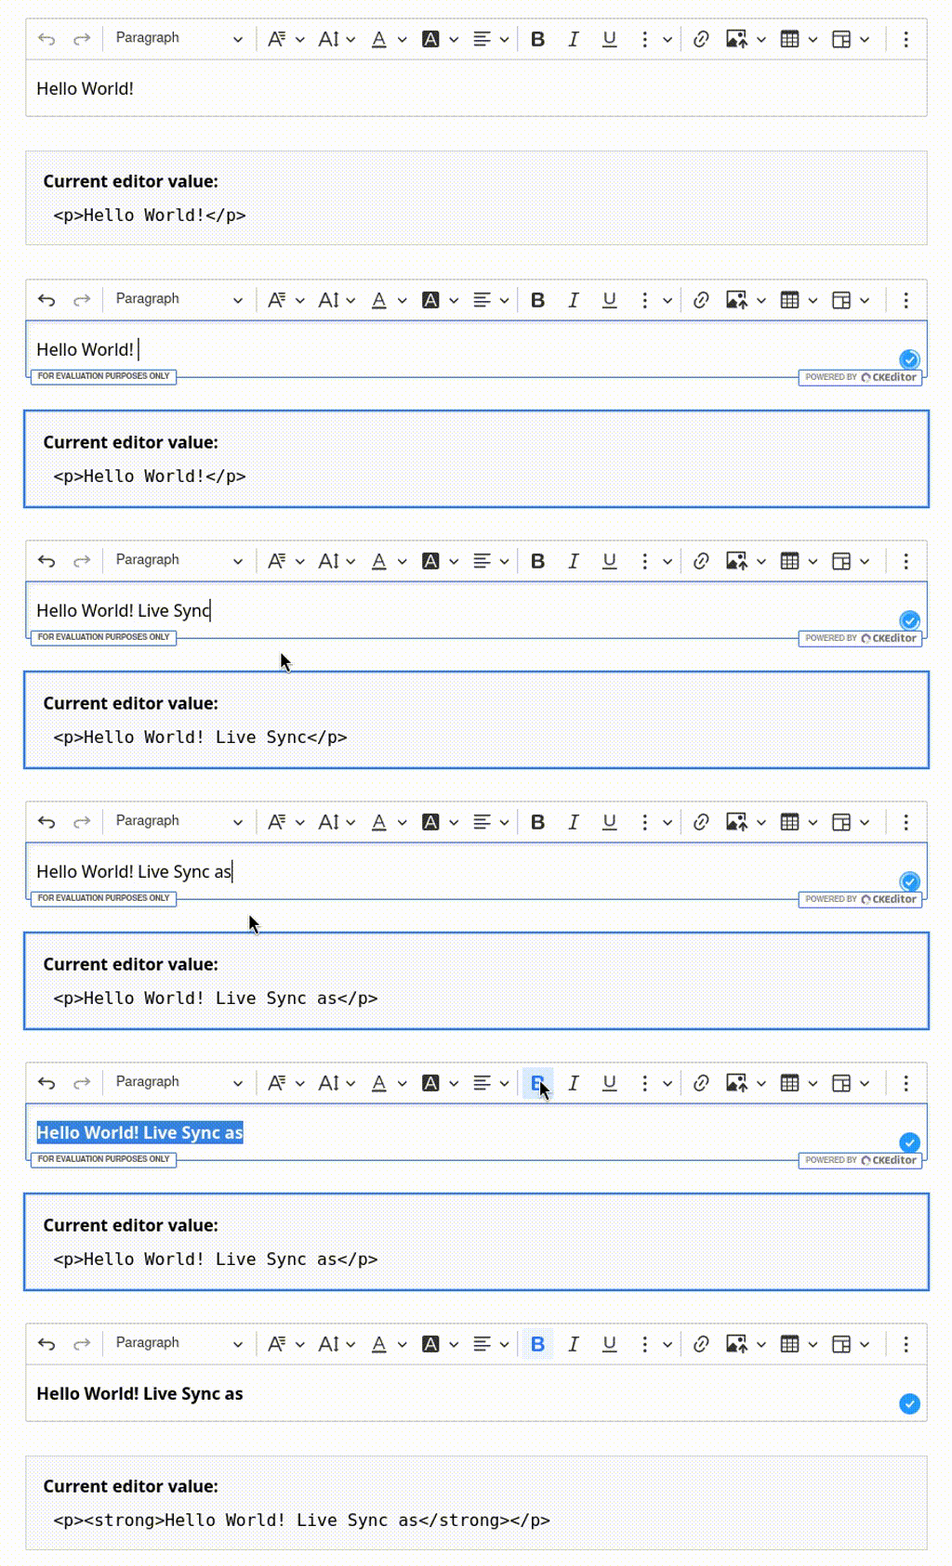
To handle focus and blur events, you can use the focus_event and blur_event attributes in the component. This allows you to capture when the editor gains or loses focus, which can be useful for tracking user interactions or saving content.
<.ckeditor
  id="editor"
  value={@content}
  focus_event
  blur_event
/>
def handle_event("ckeditor5:focus", %{"data" => data}, socket) do
  {:noreply, assign(socket, content: data["main"])}
end

def handle_event("ckeditor5:blur", %{"data" => data}, socket) do
  {:noreply, assign(socket, content: data["main"])}
end
These events are sent immediately when the editor gains or loses focus, allowing you to perform actions like saving content or updating UI elements.
Sometimes you need to know when the editor has finished initializing so you can perform setup work (e.g. enable UI controls or notify the user). The ready_event attribute will make the component push a ckeditor5:ready event once as soon as the editor is ready.
<.ckeditor
  id="editor"
  value={@content}
  ready_event
/>
def handle_event("ckeditor5:ready", %{"data" => data}, socket) do
  # editor is ready – maybe mark a flag in assigns
  {:noreply, assign(socket, editor_ready?: true)}
end
The payload contains the same root data object that change/focus/blur events include. This event is perfect for showing “editor initialized” messages or performing client‑side setup.
Seamlessly integrate CKEditor 5 with Phoenix forms and LiveView for robust content management. Learn how to handle form submissions and real-time updates.
The editor automatically creates hidden input fields for form integration. Content is synchronized with form fields using the field attribute, making it compatible with standard Phoenix form helpers.
<.form for={@form} phx-submit="save">
  <.ckeditor id="content-editor" field={@form[:content]} />

  <button type="submit">Save</button>
</.form>
Complete LiveView integration with event handling for both real-time updates and form processing.
defmodule MyApp.PageLive do
  use MyAppWeb, :live_view
  use CKEditor5  # Adds event handlers

  def mount(_params, _session, socket) do
    form = to_form(%{"content" => ""}, as: :form)
    {:ok, assign(socket, form: form)}
  end

  # Handle real-time content changes
  def handle_event("ckeditor5:change", %{"data" => data}, socket) do
    # Update content in real-time
    updated_params = Map.put(socket.assigns.form.params, "content", data["main"])
    {:noreply, assign(socket, form: to_form(updated_params, as: :form))}
  end

  # Handle form validation
  def handle_event("validate", %{"form" => params}, socket) do
    {:noreply, assign(socket, form: to_form(params, as: :form))}
  end

  # Handle form submission
  def handle_event("save", %{"form" => params}, socket) do
    # Process and save form data
    case save_content(params) do
      {:ok, _} ->
        {:noreply, put_flash(socket, :info, "Content saved successfully!")}
      {:error, _} ->
        {:noreply, put_flash(socket, :error, "Failed to save content")}
    end
  end
end
CKEditor 5 Phoenix includes a dedicated upload adapter that integrates seamlessly with Phoenix applications. It handles image uploads using standard multipart/form-data requests and automatically includes CSRF tokens.
To enable image uploads, simply provide the upload_url prop to the editor component. This URL should point to your Phoenix controller action that handles the file upload.
<.ckeditor
  id="editor"
  upload_url="/api/uploads"
  value="<p>Content with images</p>"
/>
Alternatively, you can configure the upload URL globally in your config/config.exs:
config :ckeditor5_phoenix, :uploads, api_url: "/api/uploads"
When upload_url is configured (either via prop or globally), the editor will automatically:
PhoenixUploadAdapter plugin.SimpleUploadAdapter or Base64UploadAdapter).If you prefer to store images as Base64 strings directly in the content (not recommended for production due to performance impact), you can set upload_url to "base64".
<.ckeditor
  id="editor"
  upload_url="base64"
  value="<p>Content with images</p>"
/>
This will enable the Base64UploadAdapter and disable other upload adapters. It's default behavior if no upload_url is provided nor global configuration exists.
The editor expects the server to return a JSON response containing the URL of the uploaded file:
{
  "url": "https://example.com/images/foo.jpg"
}
In case of an error, return a JSON object with an error message:
{
  "error": {
    "message": "File too big."
  }
}
The package includes a ready-to-use CKEditor5.Upload.Controller that handles local file storage. To use it:
Configure storage location:
config :ckeditor5_phoenix, :uploads,
  folder: "priv/static/uploads",
  api_url: "/api/ckeditor5/uploads",
  url: "/uploads" # Base URL for serving files
Add route in your router.ex:
scope "/api/ckeditor5" do
  pipe_through :api # Ensure this pipeline expects JSON

  post "/upload", CKEditor5.Upload.Controller, :upload
end
If you need custom logic (e.g., uploading to S3), create your own controller. The folder and url config options are not needed in this case. However, make sure api_url is set correctly.
defmodule MyAppWeb.UploadController do
  use MyAppWeb, :controller

  def upload(conn, %{"file" => upload}) do
    # 1. Handle the upload (e.g., store in S3)
    # 2. Return the public URL
    json(conn, %{url: "https://my-bucket.s3.amazonaws.com/..."})
  end
end
The adapter automatically fetches the CSRF token from the meta[name="csrf-token"] tag or _csrf_token cookie and sends it in the X-CSRF-Token header.
However, standard Phoenix :api pipelines often do not include CSRF protection by default. To secure your upload endpoint, ensure your pipeline includes the verification plug:
pipeline :api do
  plug :accepts, ["json"]
  plug :fetch_session  # Required for CSRF protection
  plug :protect_from_forgery
end
To register a custom plugin, use the registerCustomEditorPlugin function. This function takes the plugin name and the plugin reader that returns a class extending Plugin.
import { CustomEditorPluginsRegistry as Registry } from 'ckeditor5_phoenix';

const unregister = Registry.the.register('MyCustomPlugin', async () => {
  // It's recommended to use lazy import to
  // avoid bundling ckeditor code in your application bundle.
  const { Plugin } = await import('ckeditor5');

  return class extends Plugin {
    static get pluginName() {
      return 'MyCustomPlugin';
    }

    init() {
      console.log('MyCustomPlugin initialized');
      // Custom plugin logic here
    }
  };
});
In order to use the plugin you need to extend your config in config/config.exs:
config :ckeditor5_phoenix,
  presets: %{
    default: %{
      config: %{
        plugins: [:MyCustomPlugin, :Essentials, :Paragraph],
        # ... other config options
      }
    }
  }
It must be called before the editor is initialized. You can unregister the plugin later by calling the returned function:
unregister();
// or CustomEditorPluginsRegistry.the.unregister('MyCustomPlugin');
If you want to de-register all registered plugins, you can use the unregisterAll method:
import { CustomEditorPluginsRegistry } from 'ckeditor5_phoenix';

CustomEditorPluginsRegistry.the.unregisterAll();
The context feature is designed to group multiple editor instances together, allowing them to share a common context. This is particularly useful in collaborative editing scenarios, where users can work together in real time. By sharing a context, editors can synchronize features such as comments, track changes, and presence indicators across different editor instances. This enables seamless collaboration and advanced workflows in your Phoenix application.
For more information about the context feature, see the CKEditor 5 Context documentation.
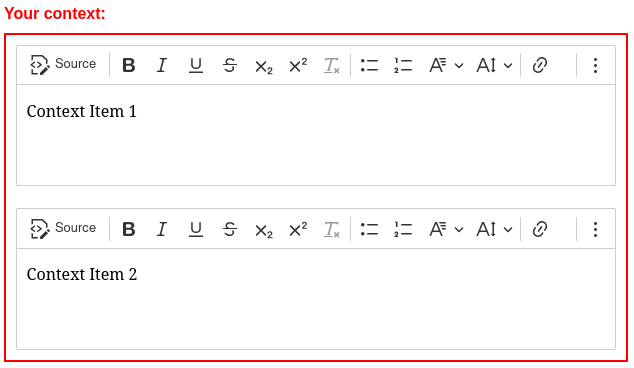
Define your context in configuration:
config :ckeditor5_phoenix,
  contexts: %{
    "your-context" => %{
      config: %{
        plugins: [
          :CustomContextPlugin
        ]
      },
      watchdog: %{
        crashNumberLimit: 20
      }
    }
  },
  presets: %{
    # ...
  }
And use it in your LiveView:
<.cke_context context="your-context">
  <.ckeditor class="mb-6" value="Child A" />
  <.ckeditor value="Child B" />
</.cke_context>
Voila!
Note
The context attribute accepts also CKEditor5.Context structure, so it can be used in LiveView assigns or other dynamic contexts.
Define your custom translations in the configuration:
config :ckeditor5_phoenix,
  contexts: %{
    "custom" => %{
      # ...
      custom_translations: %{
        en: %{
          Bold: "Custom Bold",
          Italic: "Custom Italic"
        },
        pl: %{
          Bold: "Pogrubiony",
          Italic: "Kursywa"
        }
      }
    }
  }
These translations will be used in the context's editors, overriding the default translations. They are available through locale.t plugin in every context plugin.
You can watch the registered editors using the watch function. This is useful if you want to react to changes in the registered editors, for example, to update the UI or perform some actions when an editor is added or removed.
import { EditorsRegistry } from 'ckeditor5_phoenix';

const unregisterWatcher = EditorsRegistry.the.watch((editors) => {
  console.log('Registered editors changed:', editors);
});

// Later, you can unregister the watcher
unregisterWatcher();
You can also wait for a specific editor to be registered using the waitForEditor function. This is useful if you want to perform some actions after a specific editor is registered.
This method can be called before the editor is initialized, and it will resolve when the editor is registered.
import { EditorsRegistry } from 'ckeditor5_phoenix';

EditorsRegistry.the.waitFor('editor1').then((editor) => {
  console.log('Editor "editor1" is registered:', editor);
});

// ... init editor somewhere later
The id of the editor must be used to identify the editor. If the editor is already registered, the promise will resolve immediately.
You can use the mountEffect method to run specific logic every time a particular editor is initialized or restarted. This is the recommended approach for adding integrations that require a fresh setup for each new instance of the editor.
Unlike a one-time promise, this callback is exec
more like this
🚀 CKEditor 5 Ruby Gem – a powerful WYSIWYG editor for Rails! Smooth integration with web components and helper methods…
Home Assistant custom integration for Ecowitt weather stations via local web interface
search projects, people, and tags