moxon-frame-generator
simple generator for 3D-printed frames for a moxon rectangle antenna
OpenSCAD★ 50
ESP32 Cheap Yellow Display (ESP32-2432S028) Home Assistant Touch Panel – LVGL UI + 3D Printed Desk / Under Desk / Wall…
 akuehlewind
git clone https://github.com/akuehlewind/ESPHome-touch-display-mount.gitakuehlewind/ESPHome-touch-display-mount
ESPHome powered Home Assistant control panel using the popular Cheap Yellow Display (ESP32-2432S028).
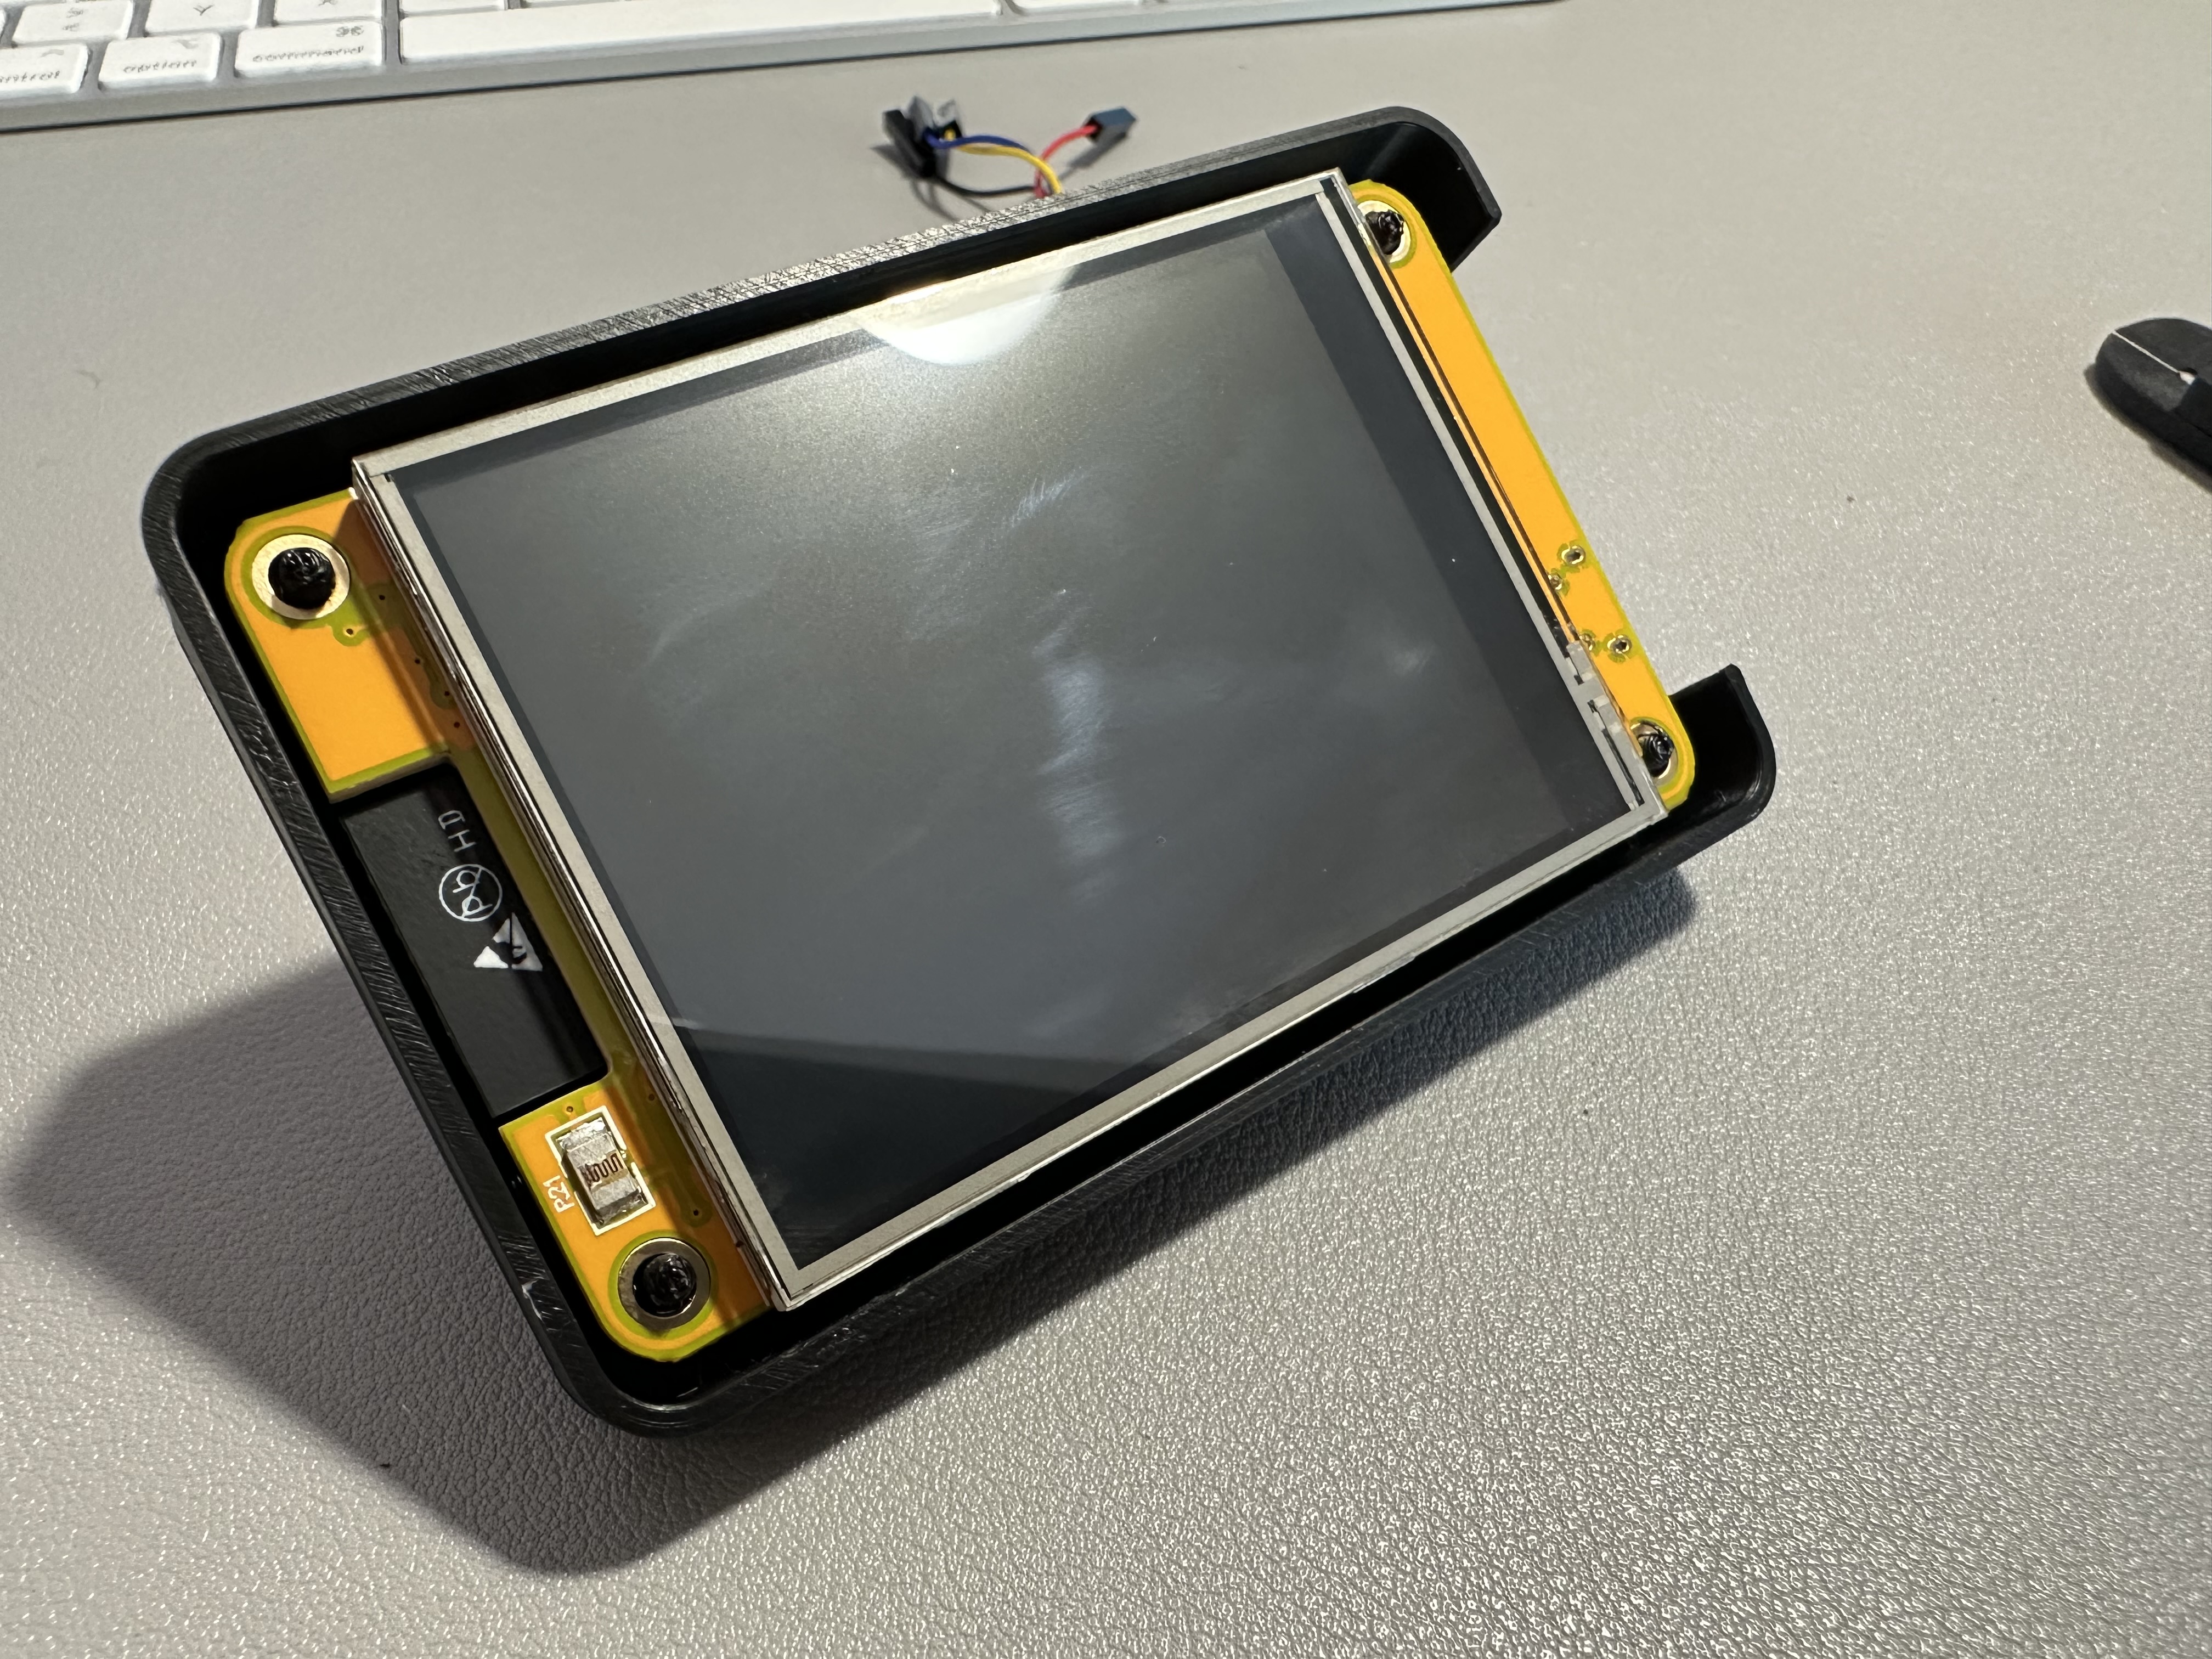
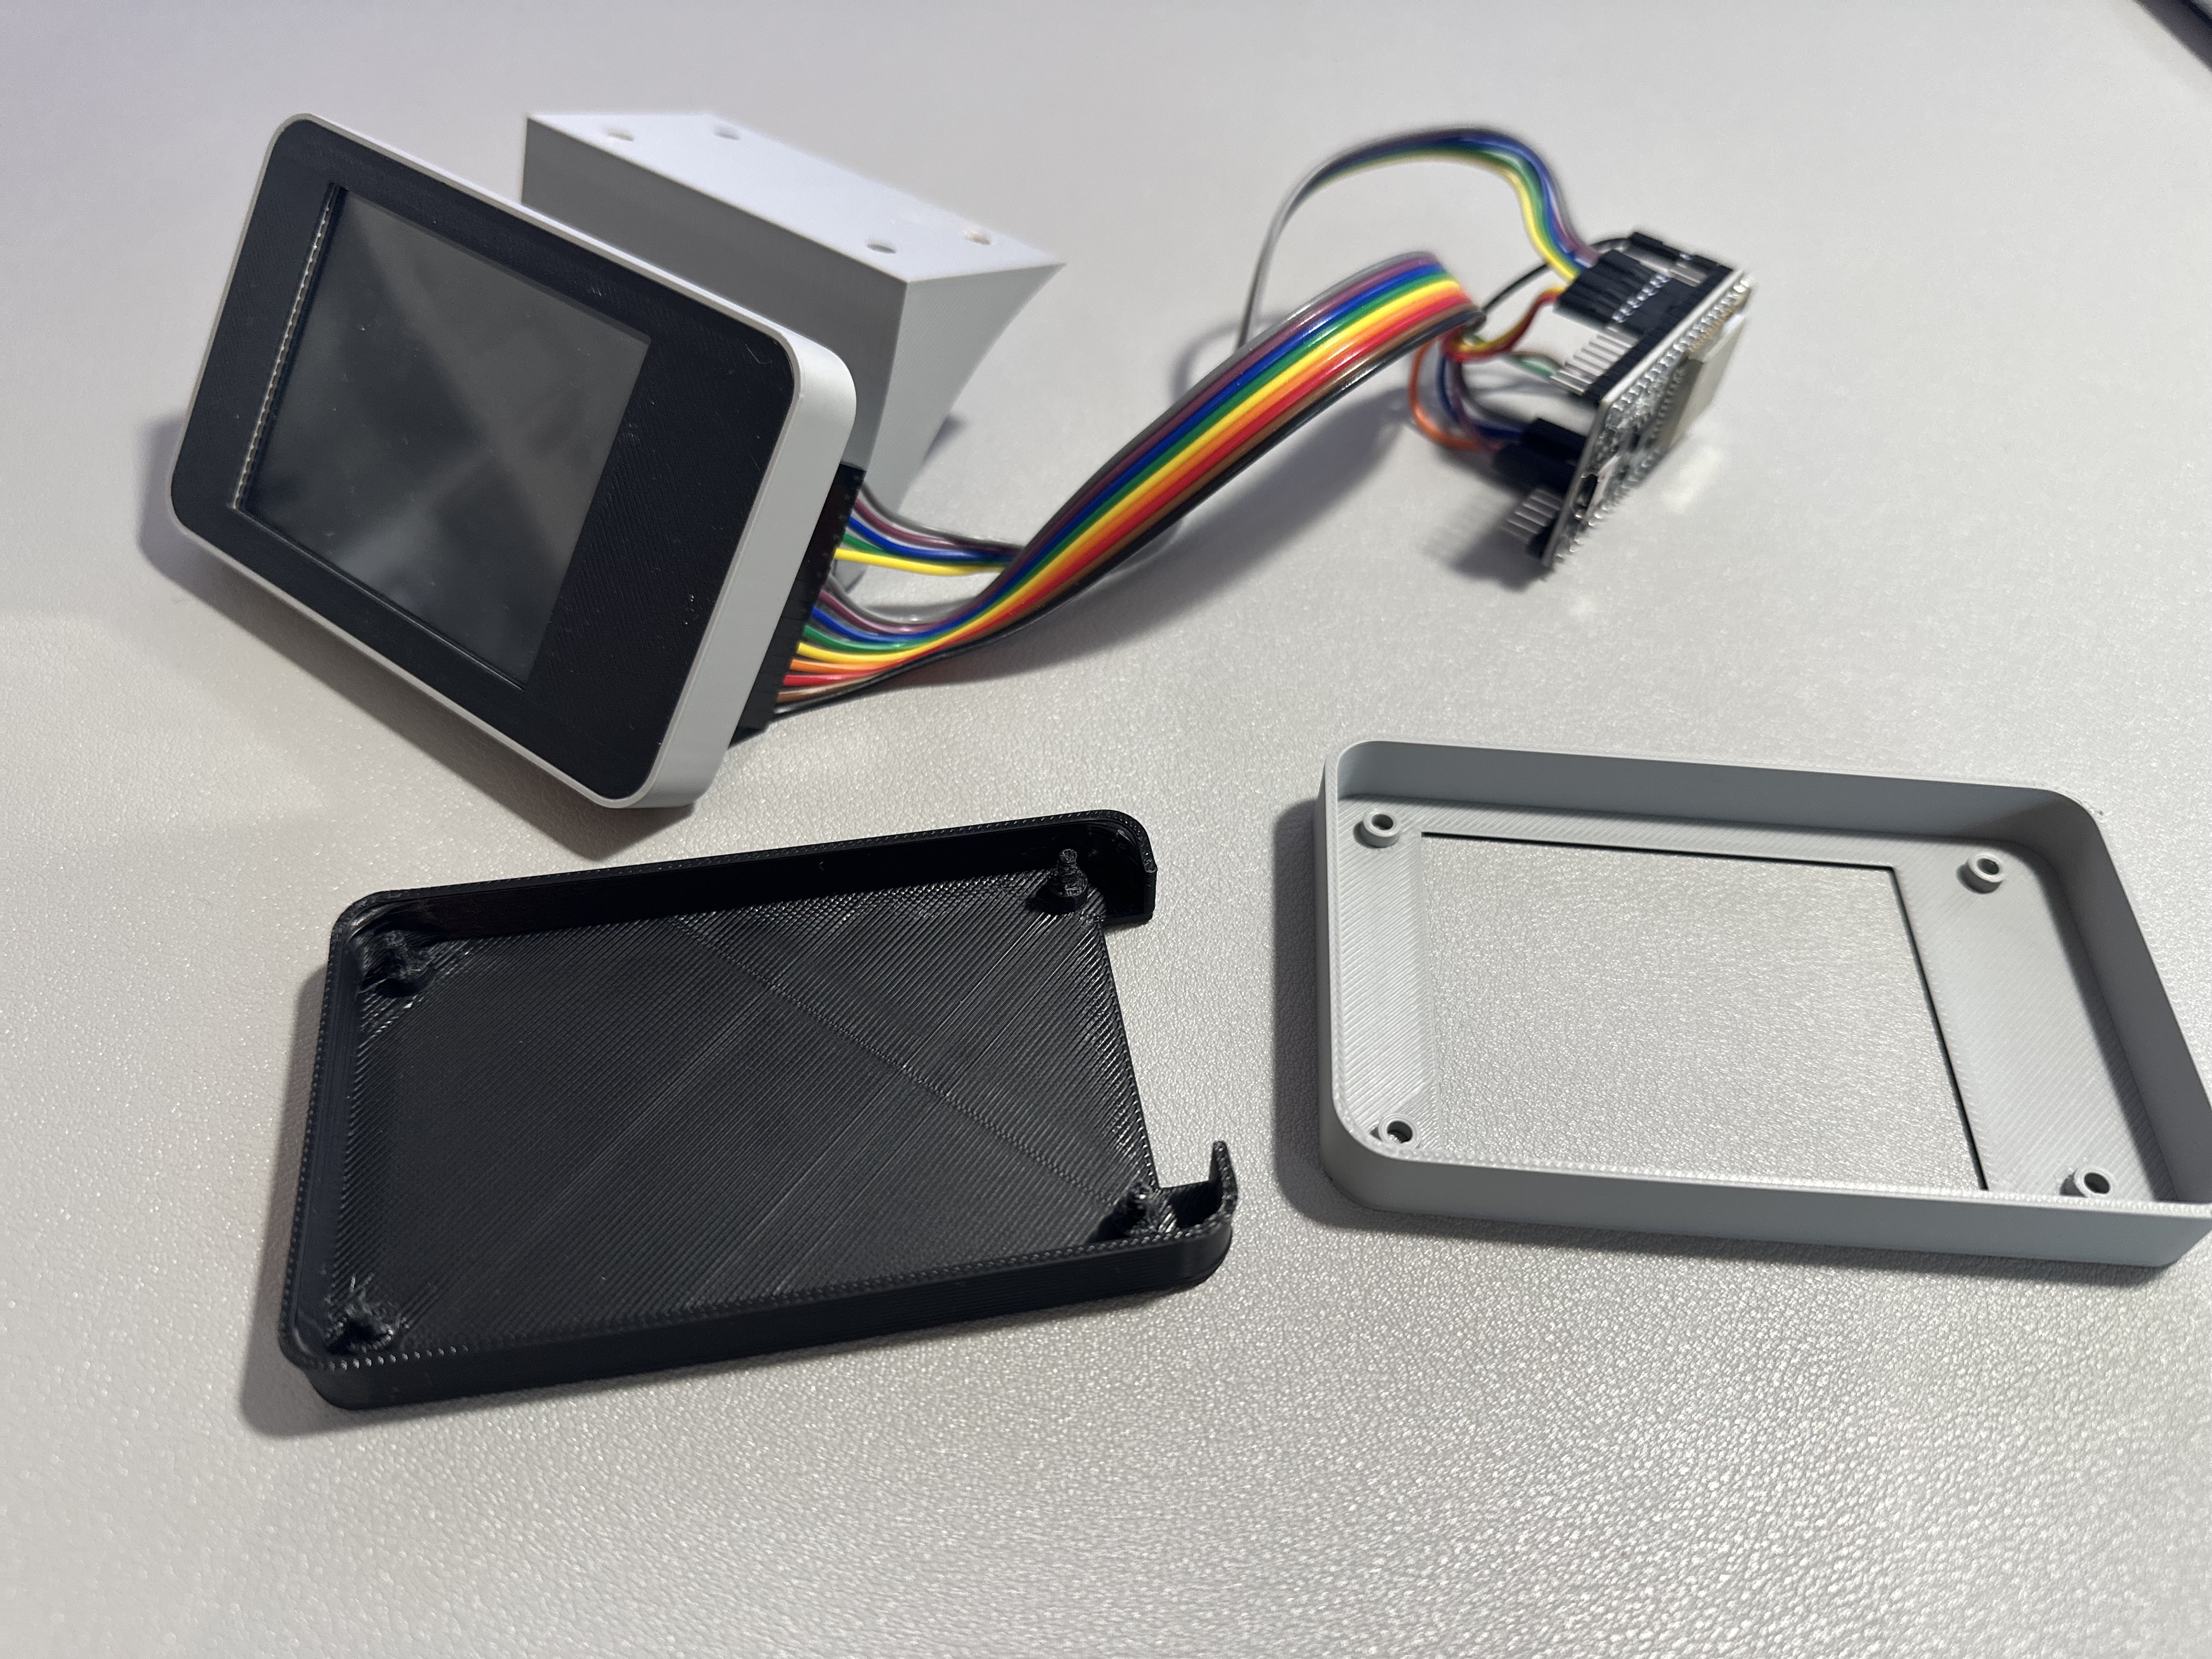
A 3D-printable enclosure with adjustable tilt for an ESP32 2.8" ILI9341 touchscreen, powered by ESPHome + LVGL and integrated with Home Assistant.
Includes ready-to-flash YAML configs for the ESP32-2432S028 (Cheap Yellow Display) and a standalone ILI9341 + external ESP32 wiring variant.
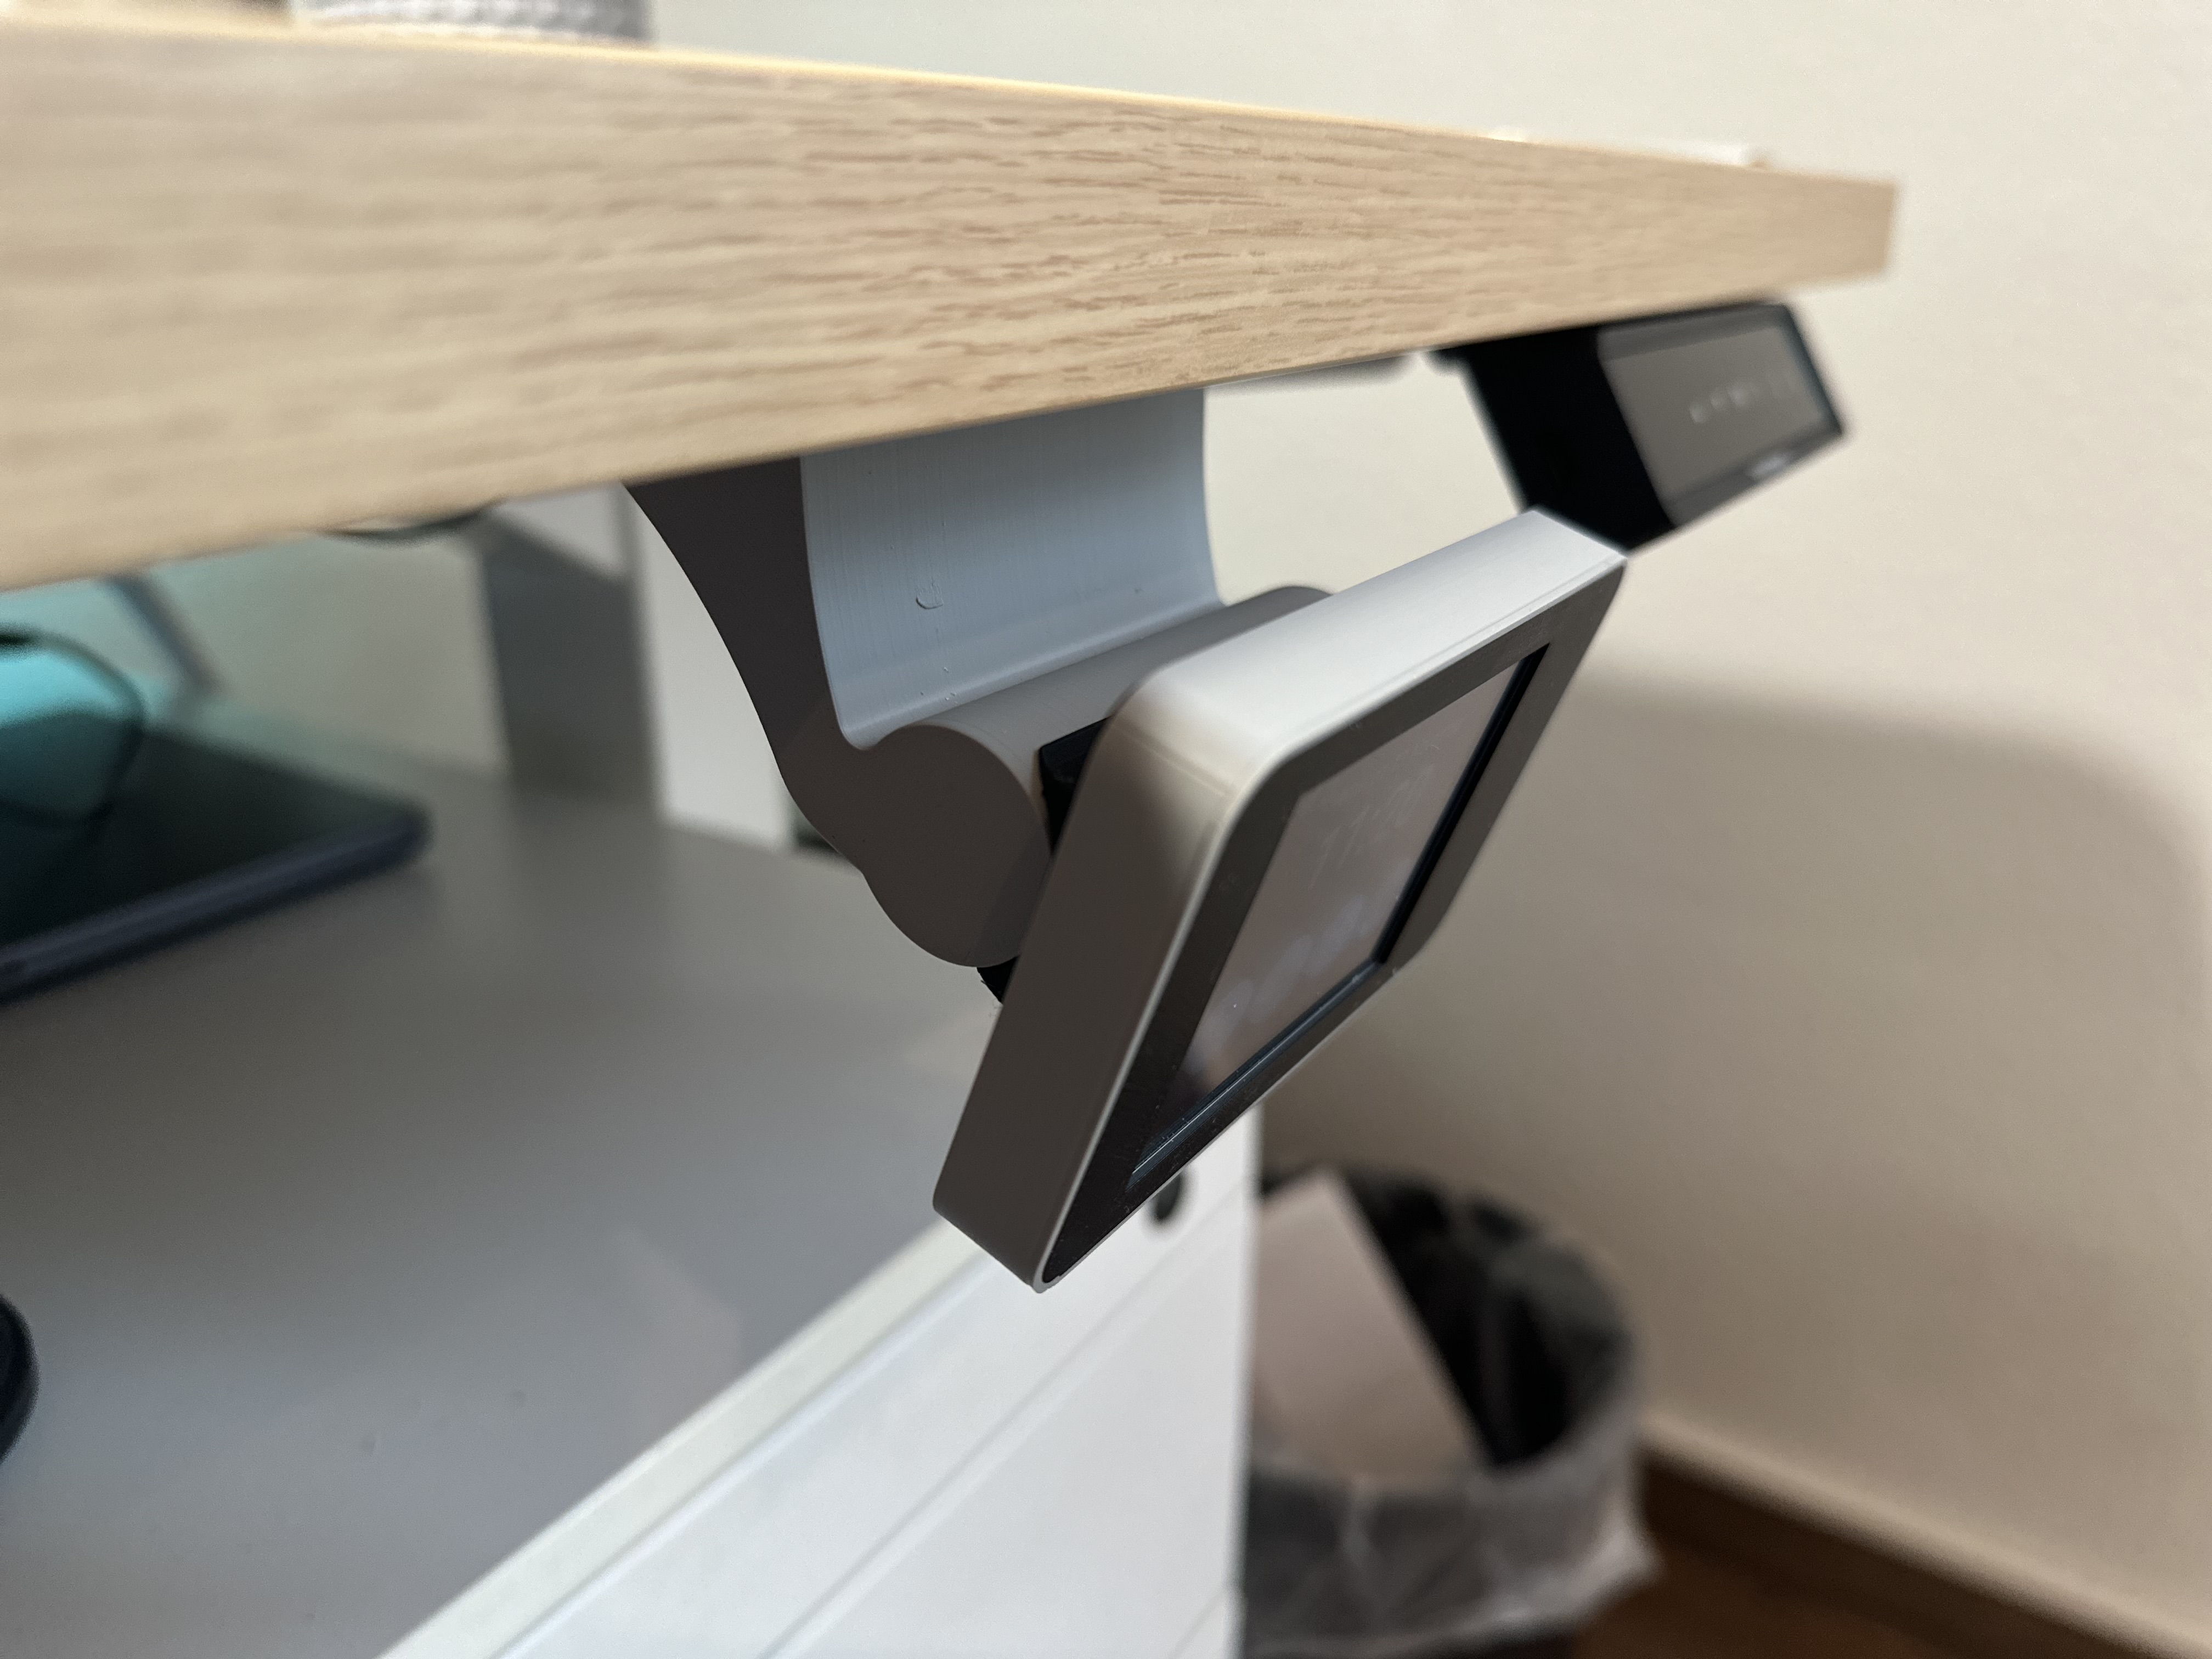
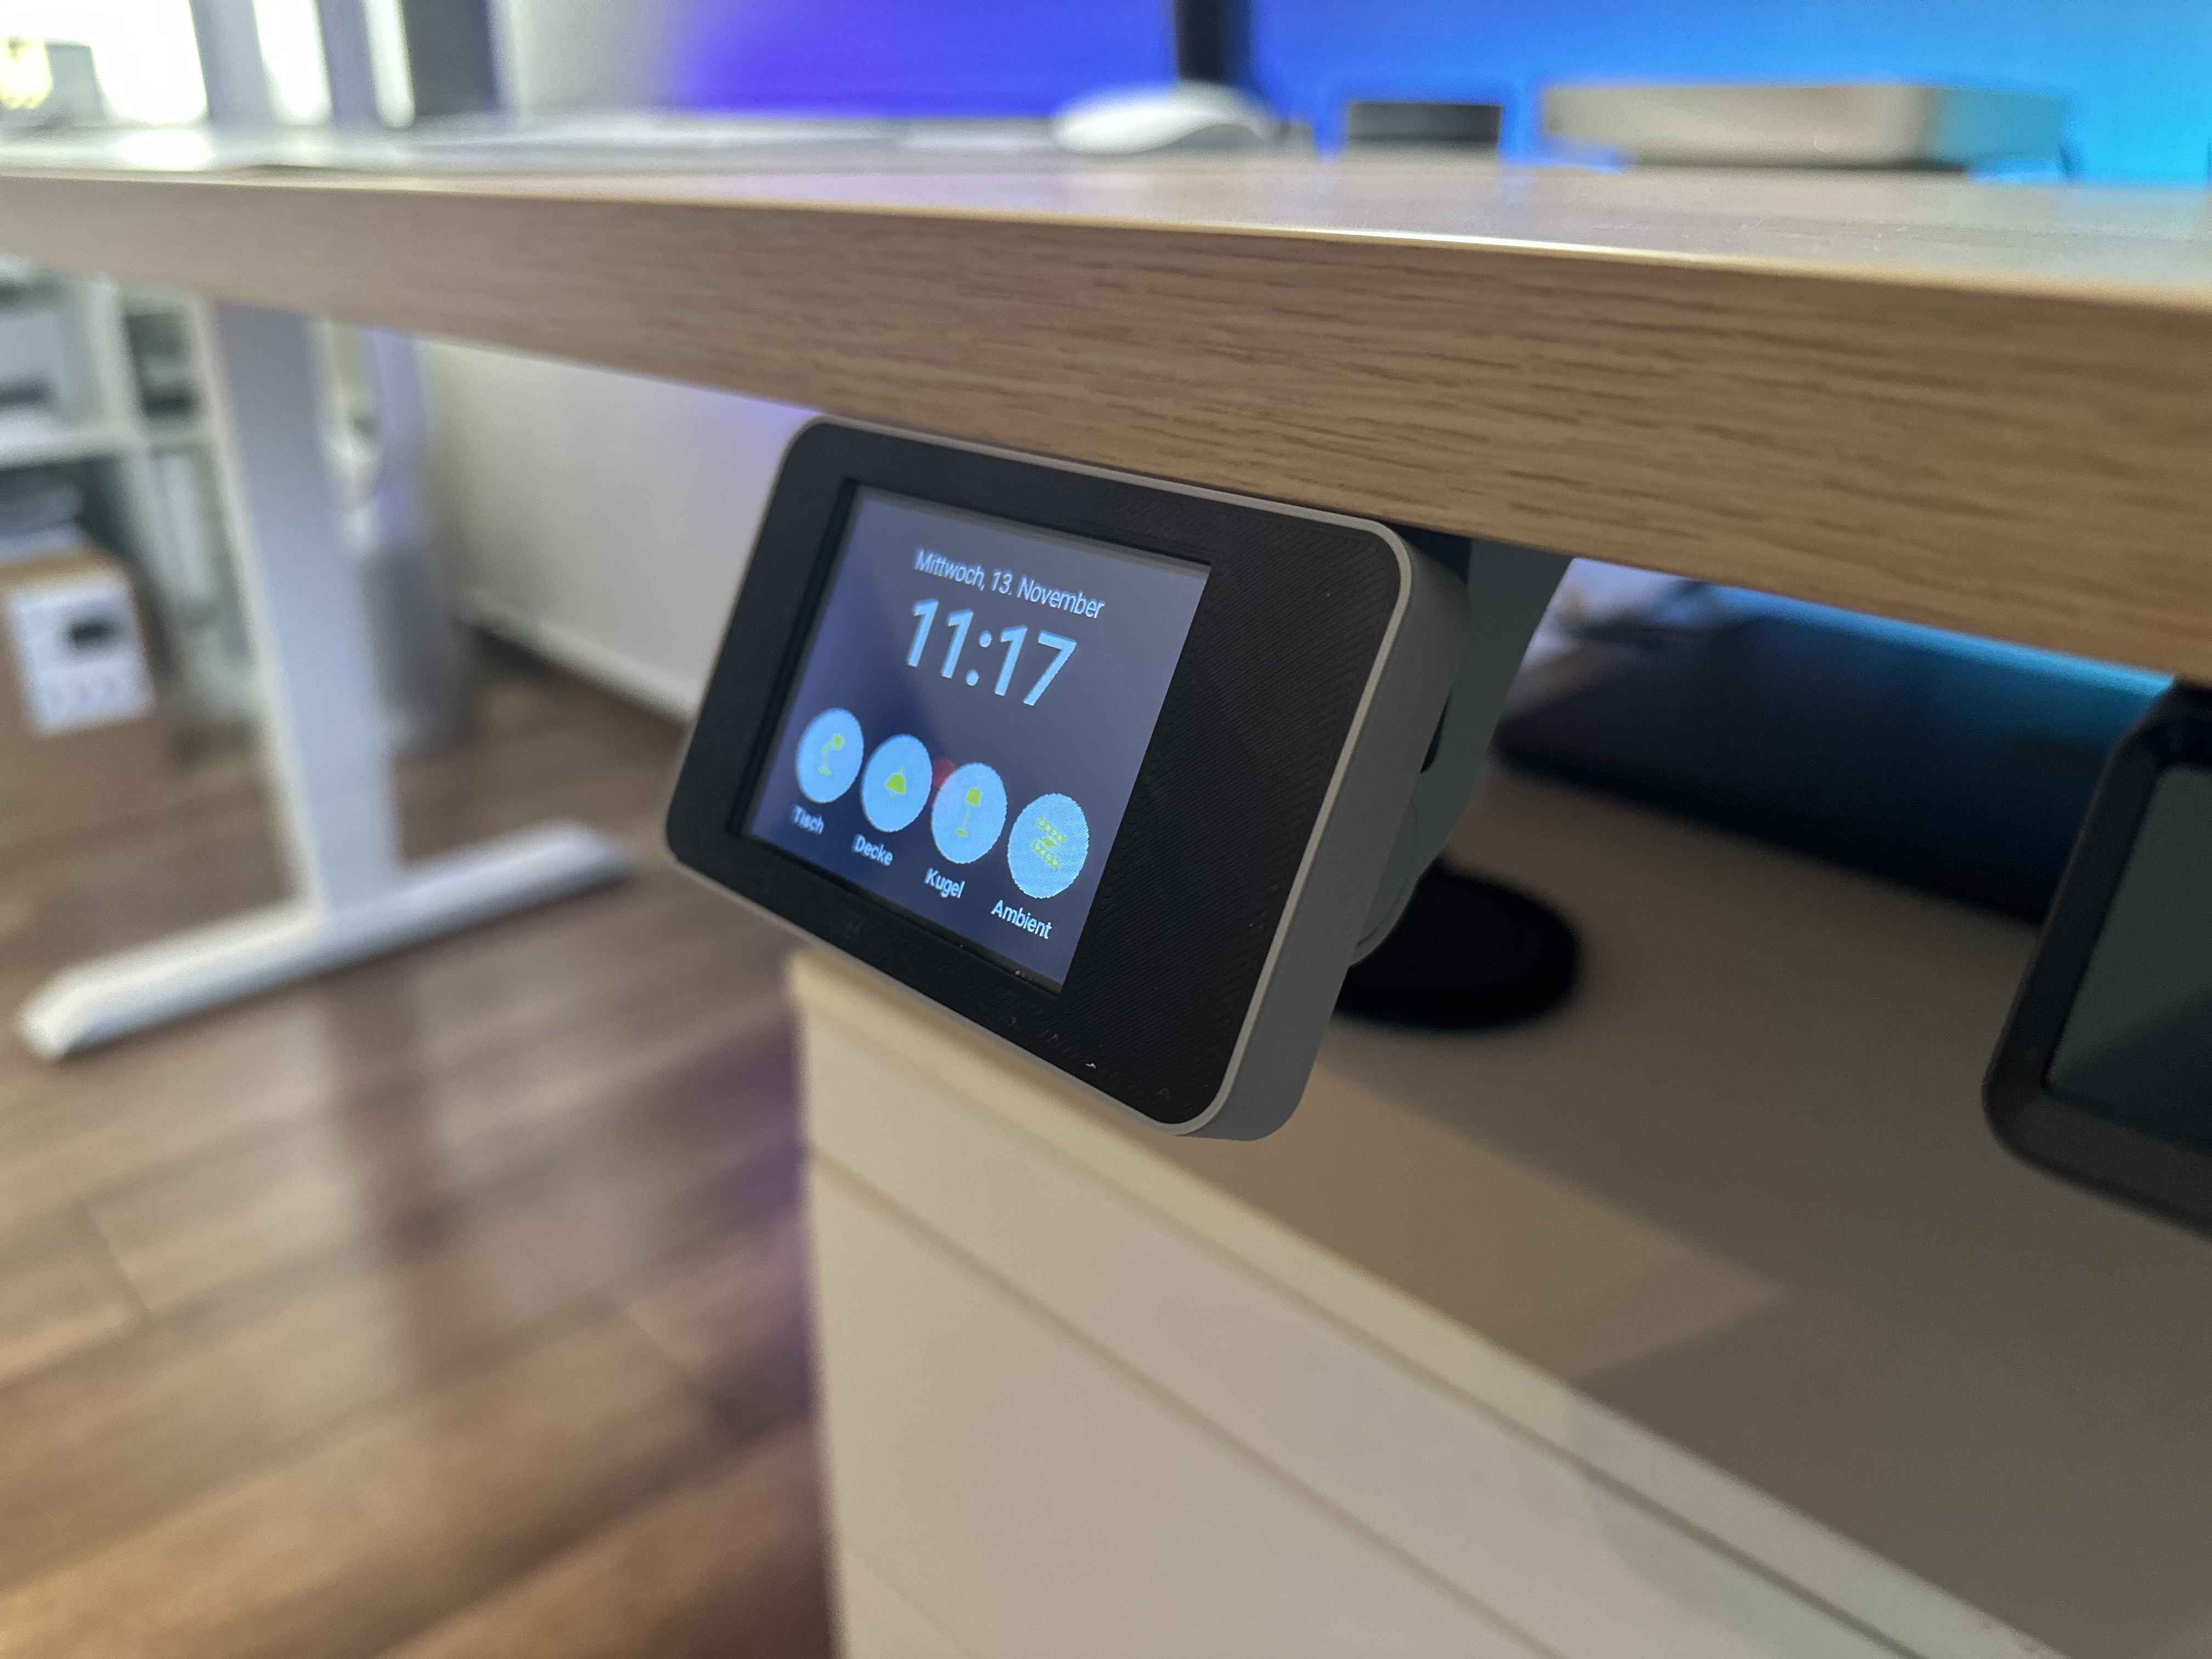
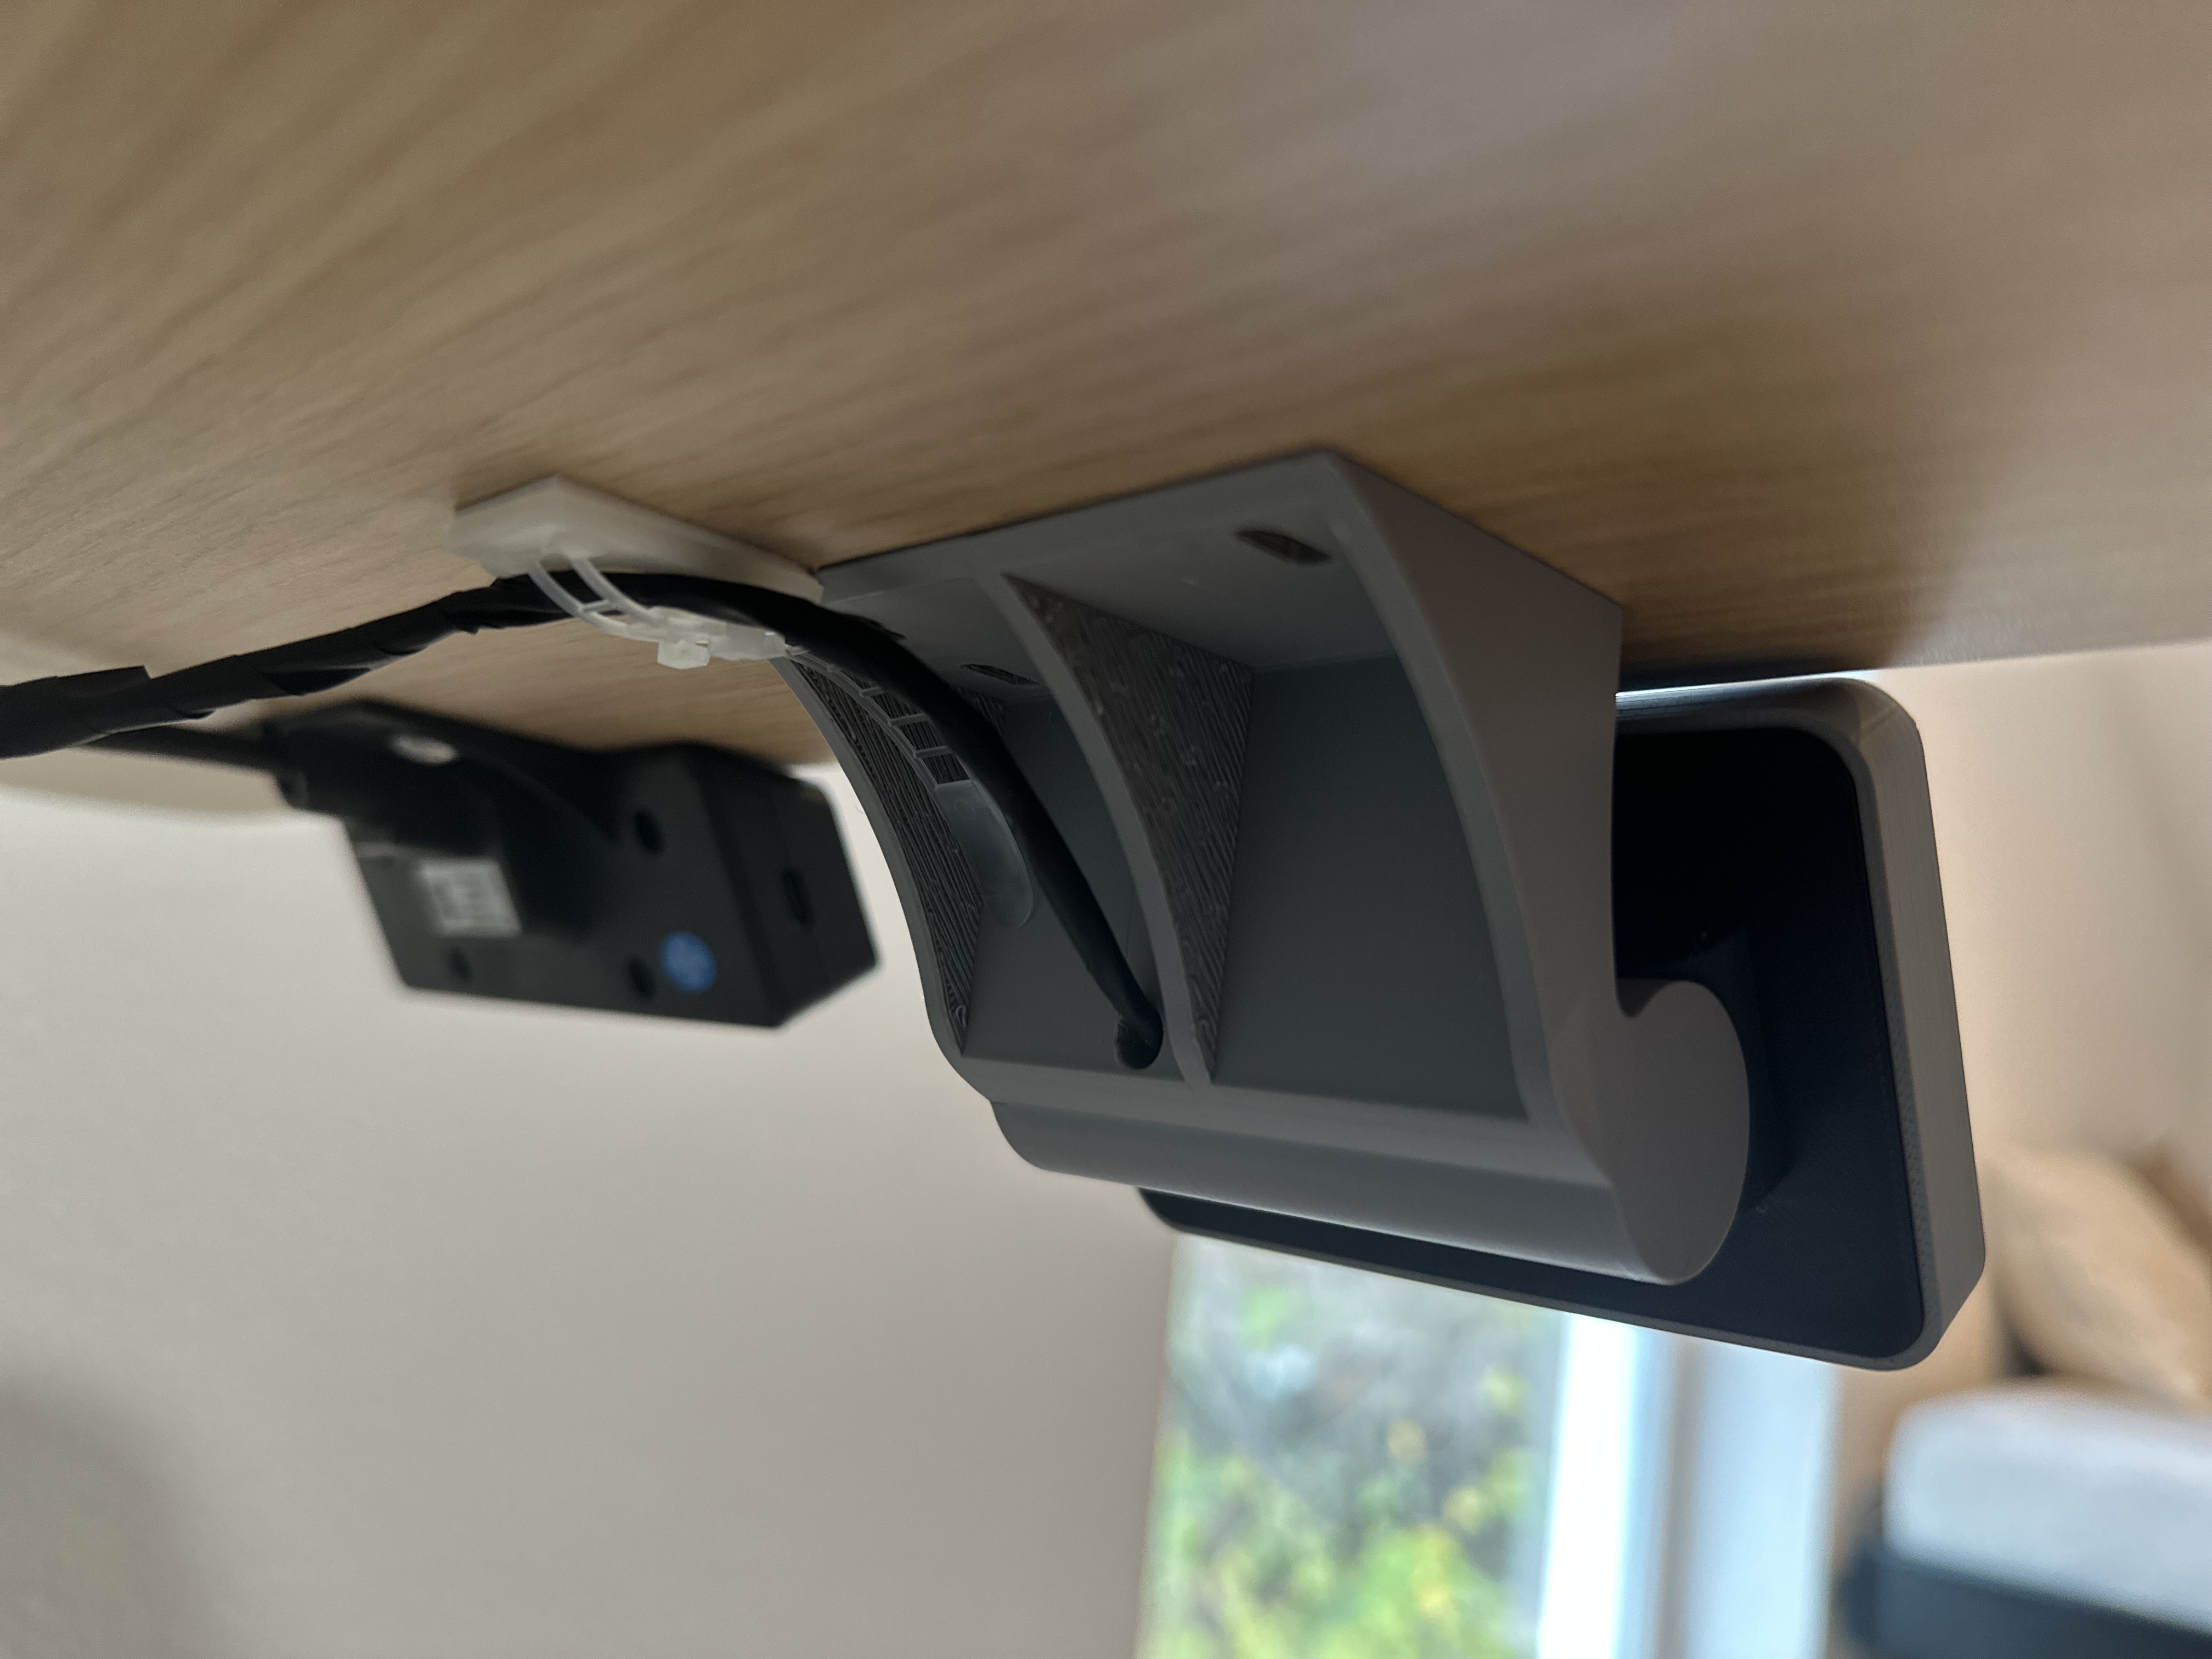
Multiple mounting options are supported:
The enclosure can therefore be used as a compact Home Assistant control panel for desks, walls, or mounted underneath furniture.
The ESP32-2432S028 Cheap Yellow Display is transformed into a tiltable Home Assistant control panel powered by ESPHome and LVGL.
The goal of this project is to create a clean, wall- or desk-mounted smart control panel that integrates seamlessly with Home Assistant.
It features a modern LVGL-based UI, real-time state synchronization, and optional direct Home Assistant service calls.
The enclosure is designed for:
Two hardware variants are supported:
The ESP32-2432S028 integrates the ESP32, ILI9341 display, touchscreen controller, and backlight circuitry on a single board.
It is commonly known as the Cheap Yellow Display (CYD) in the maker community and is the easiest option for this project.
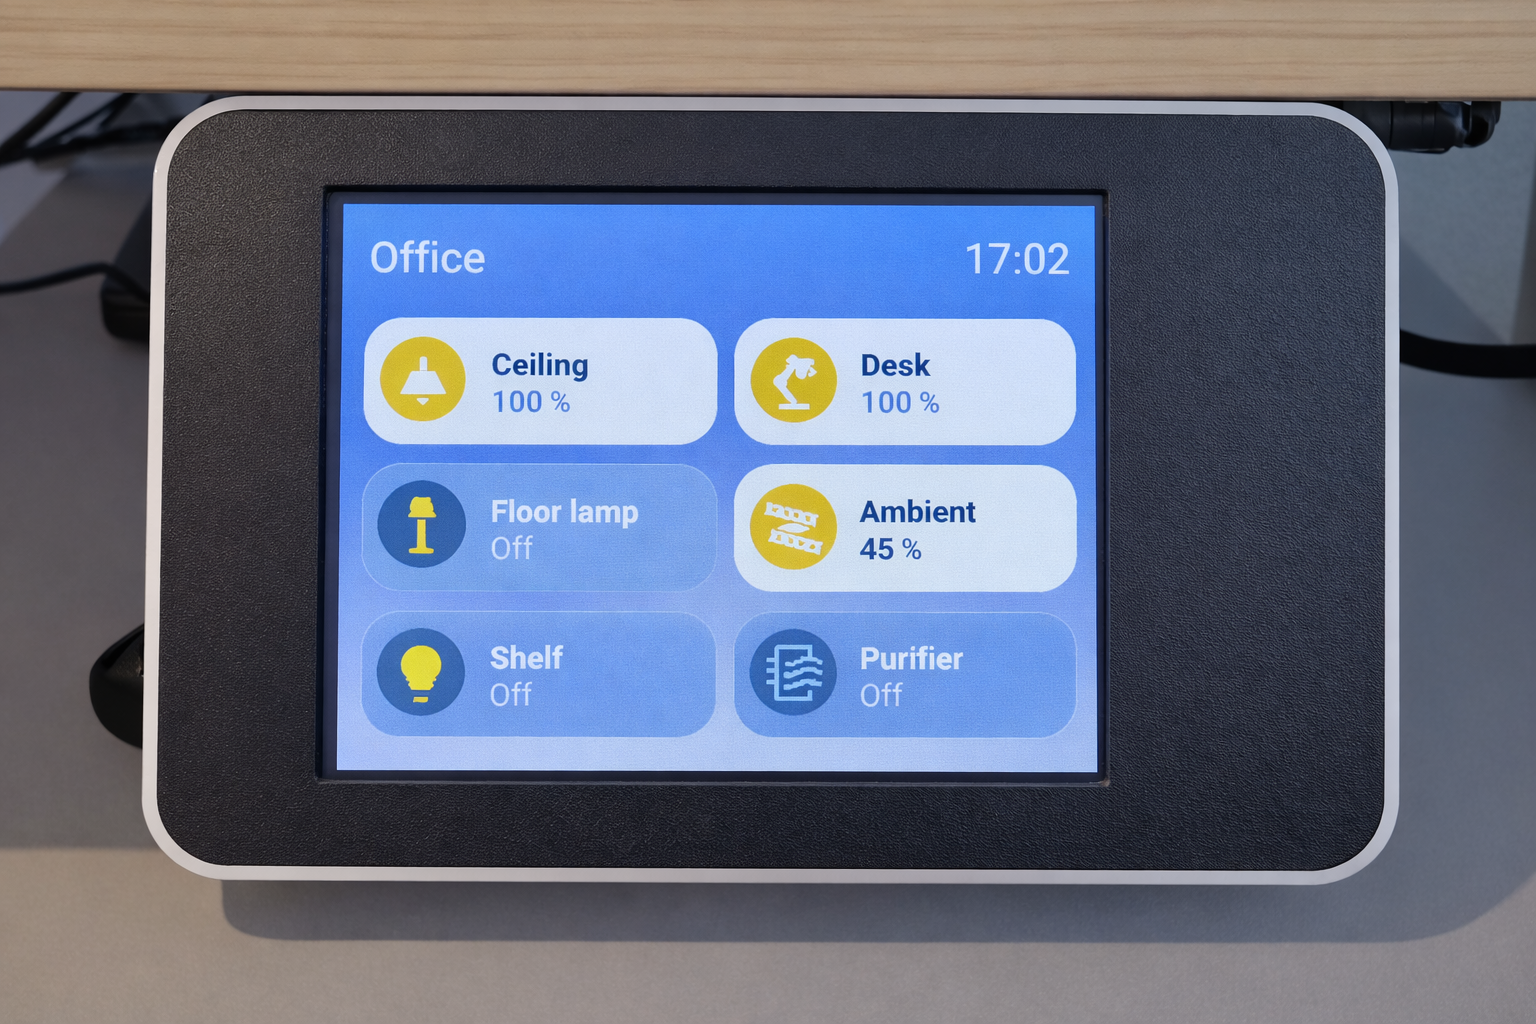
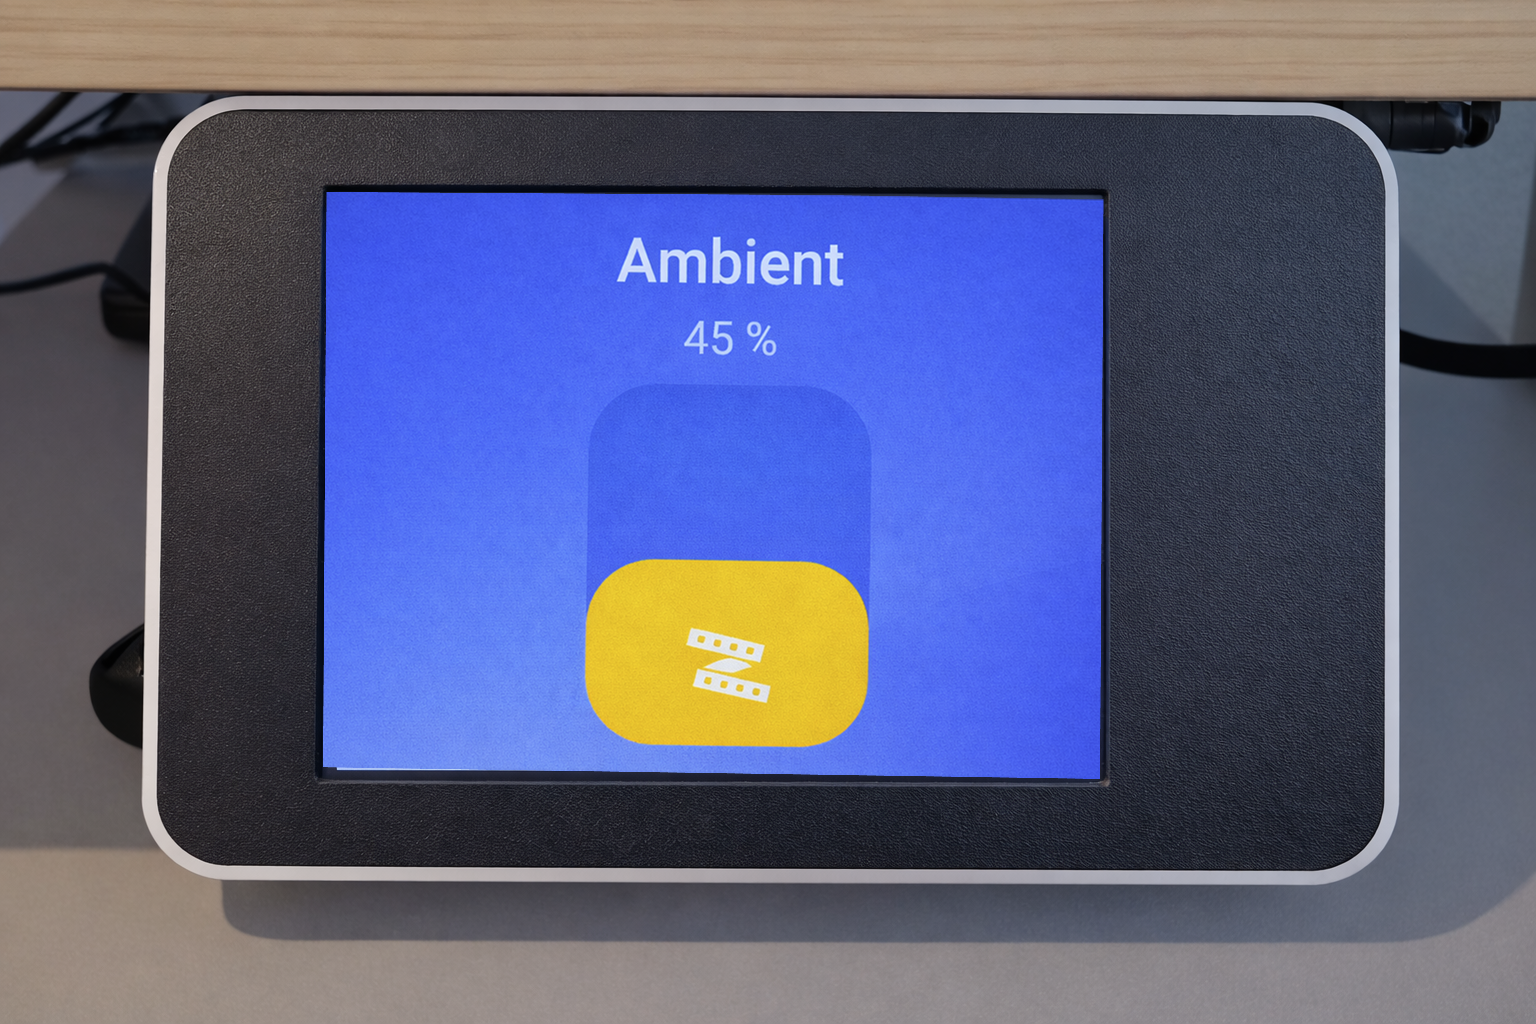
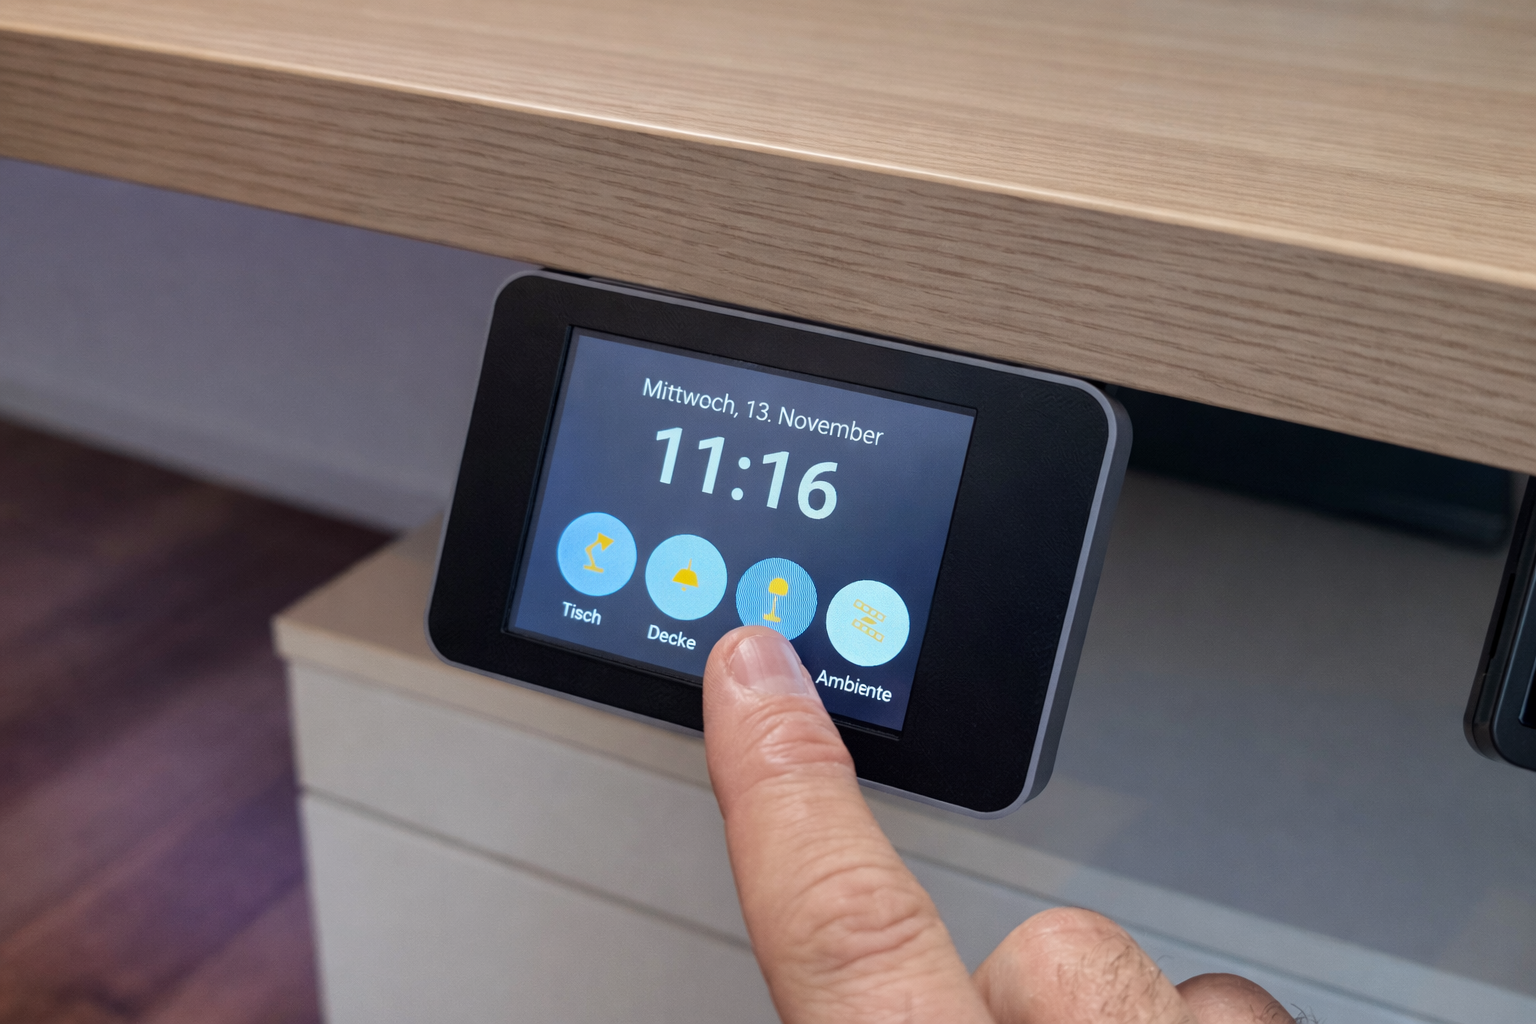
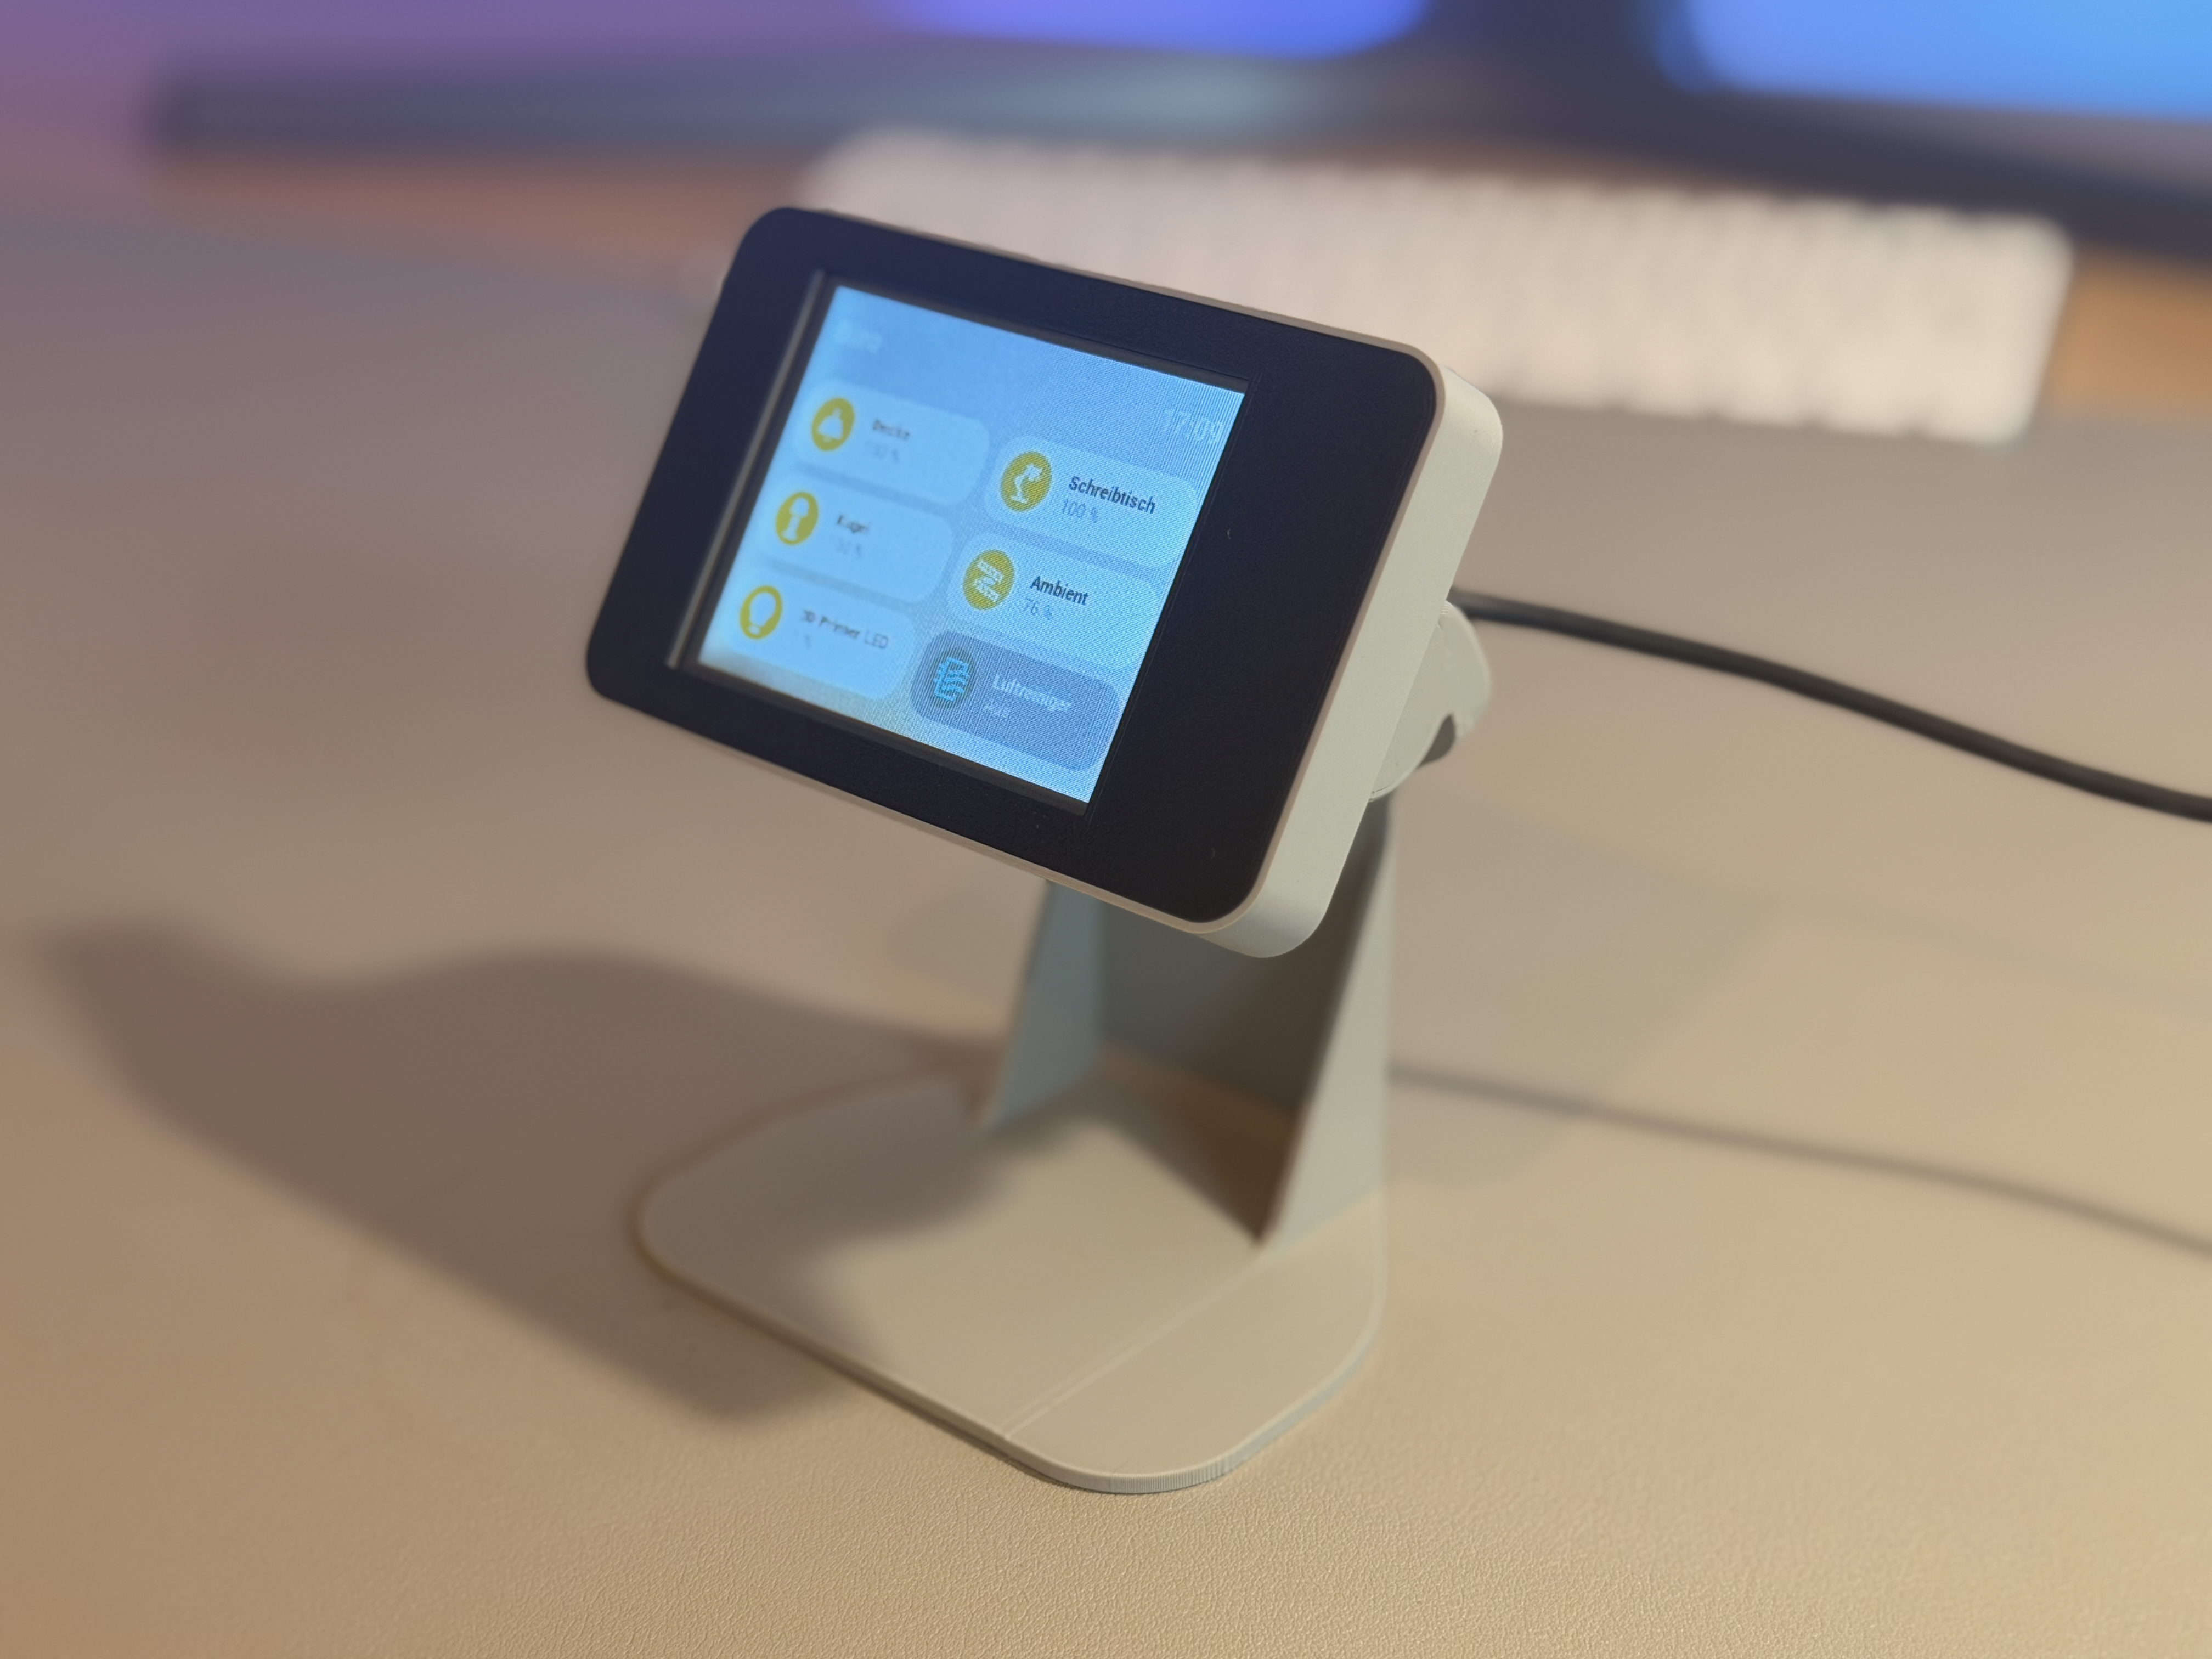
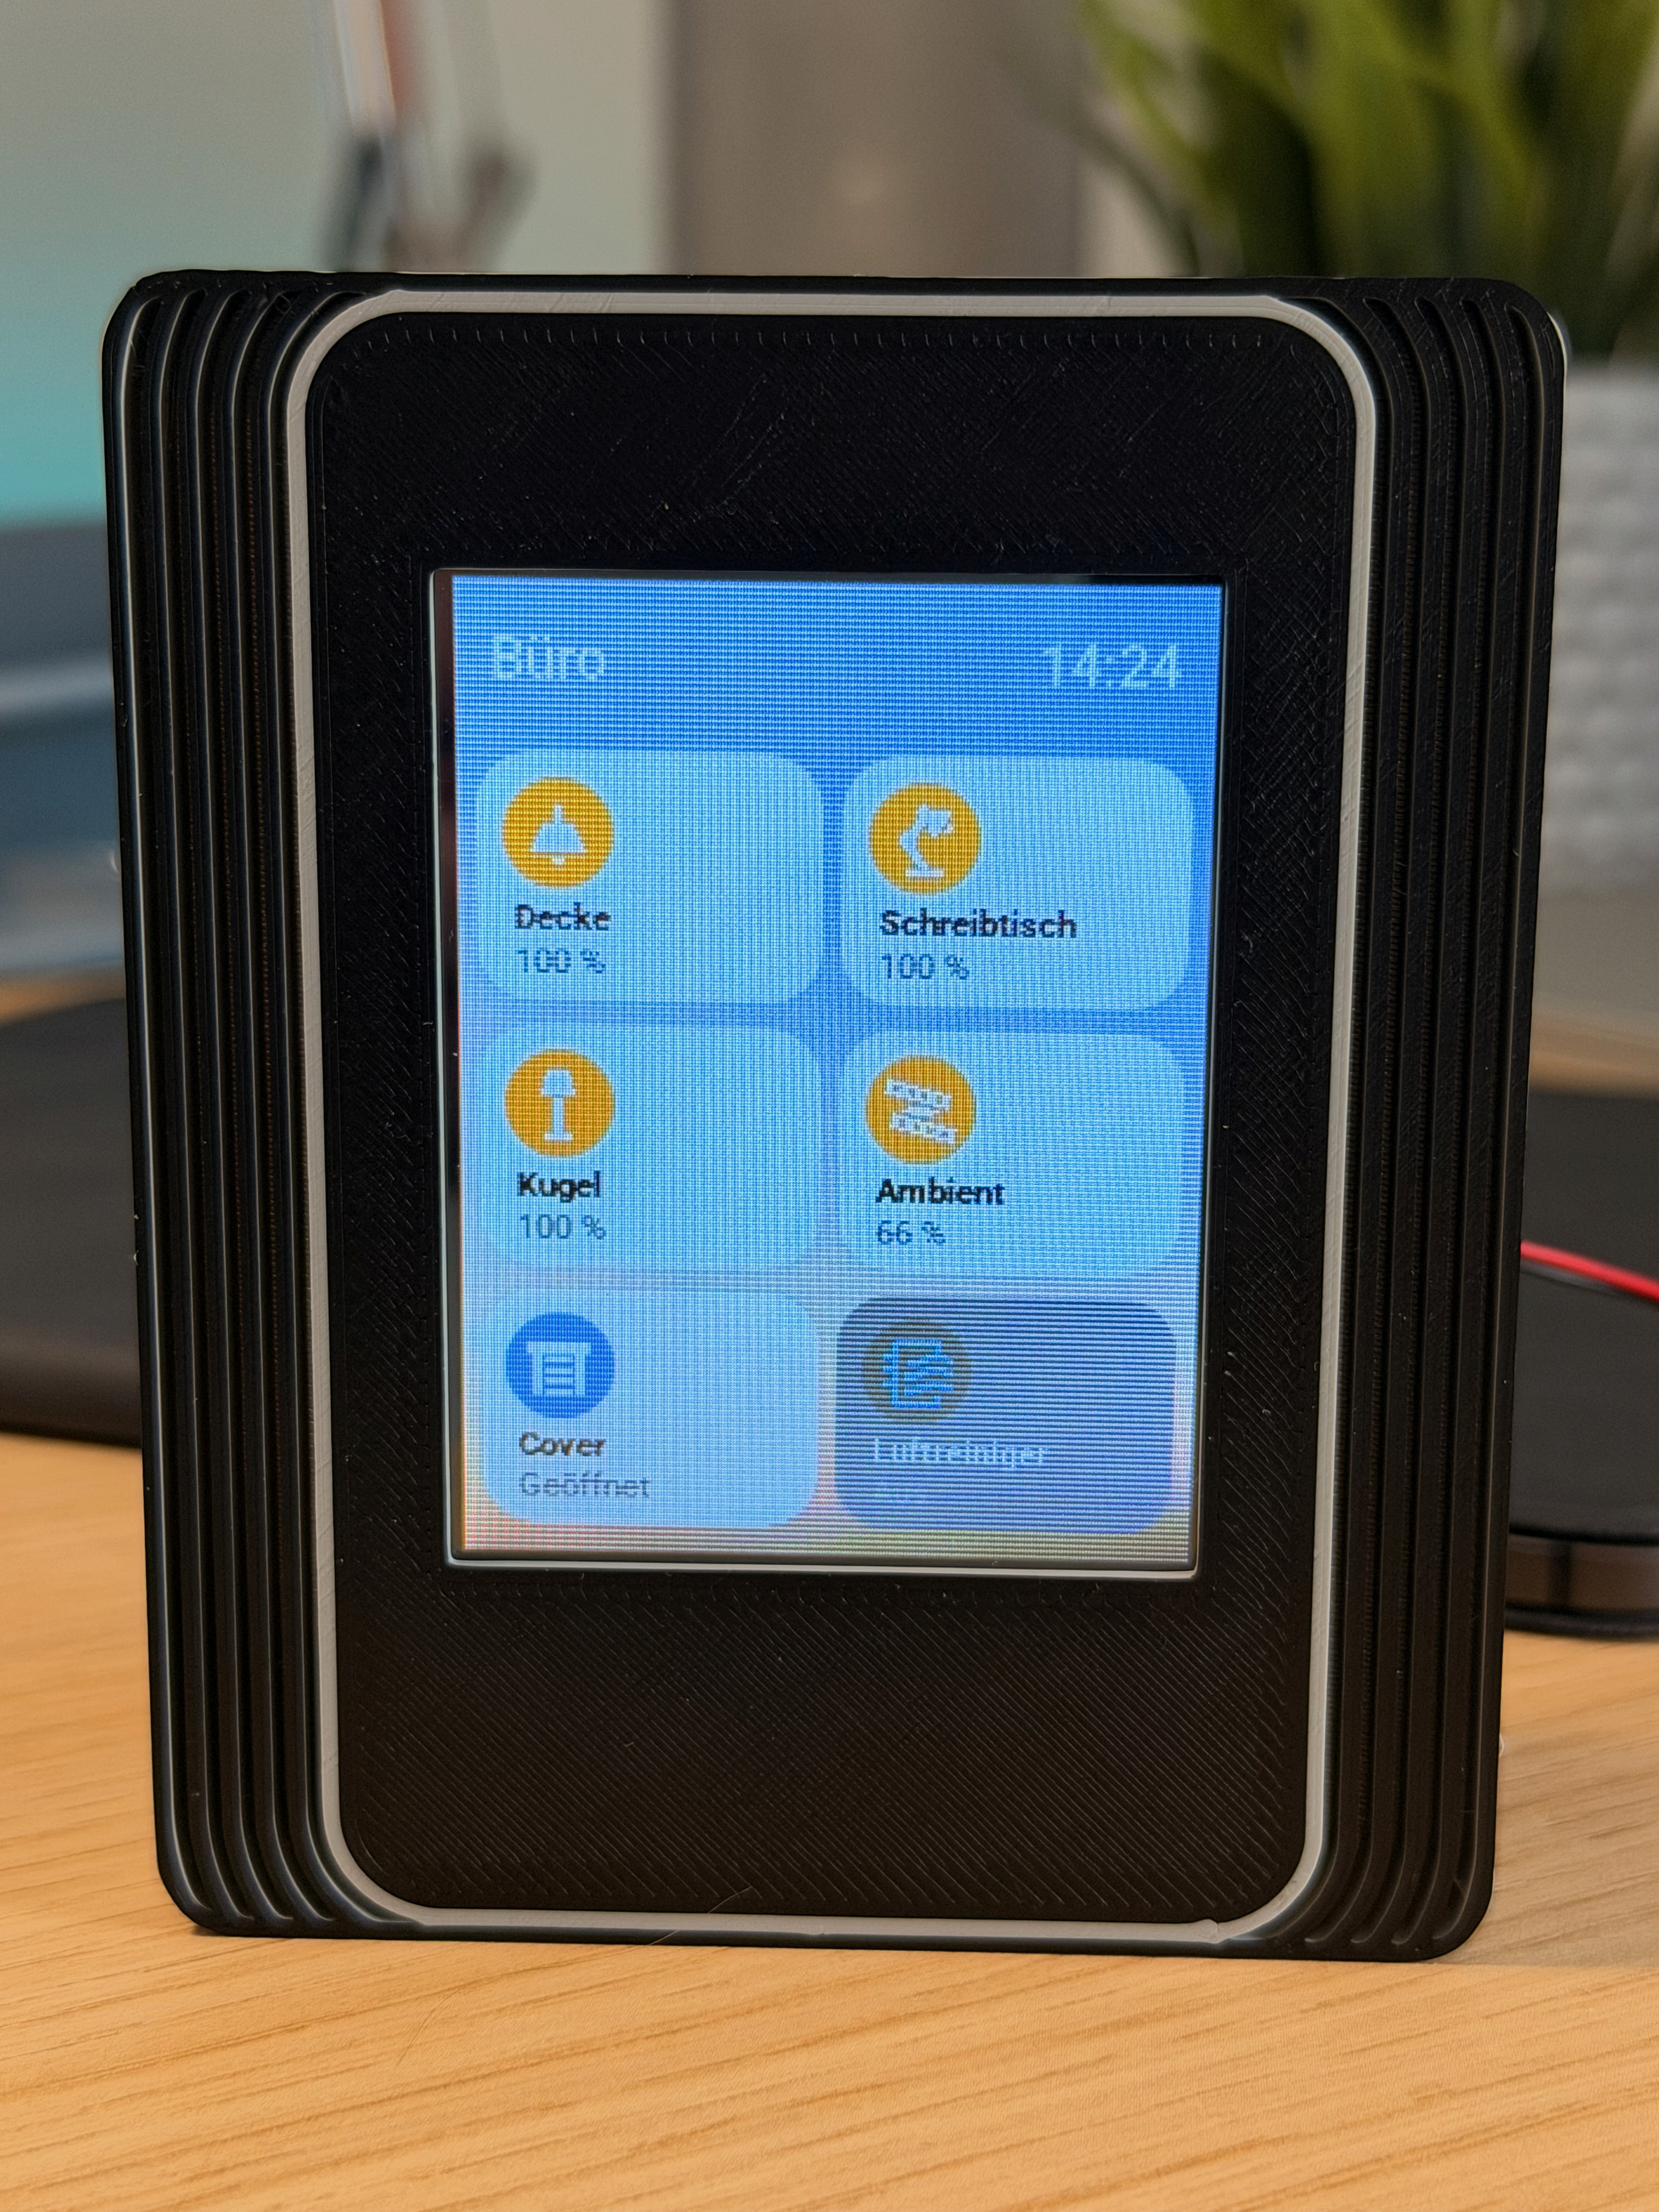
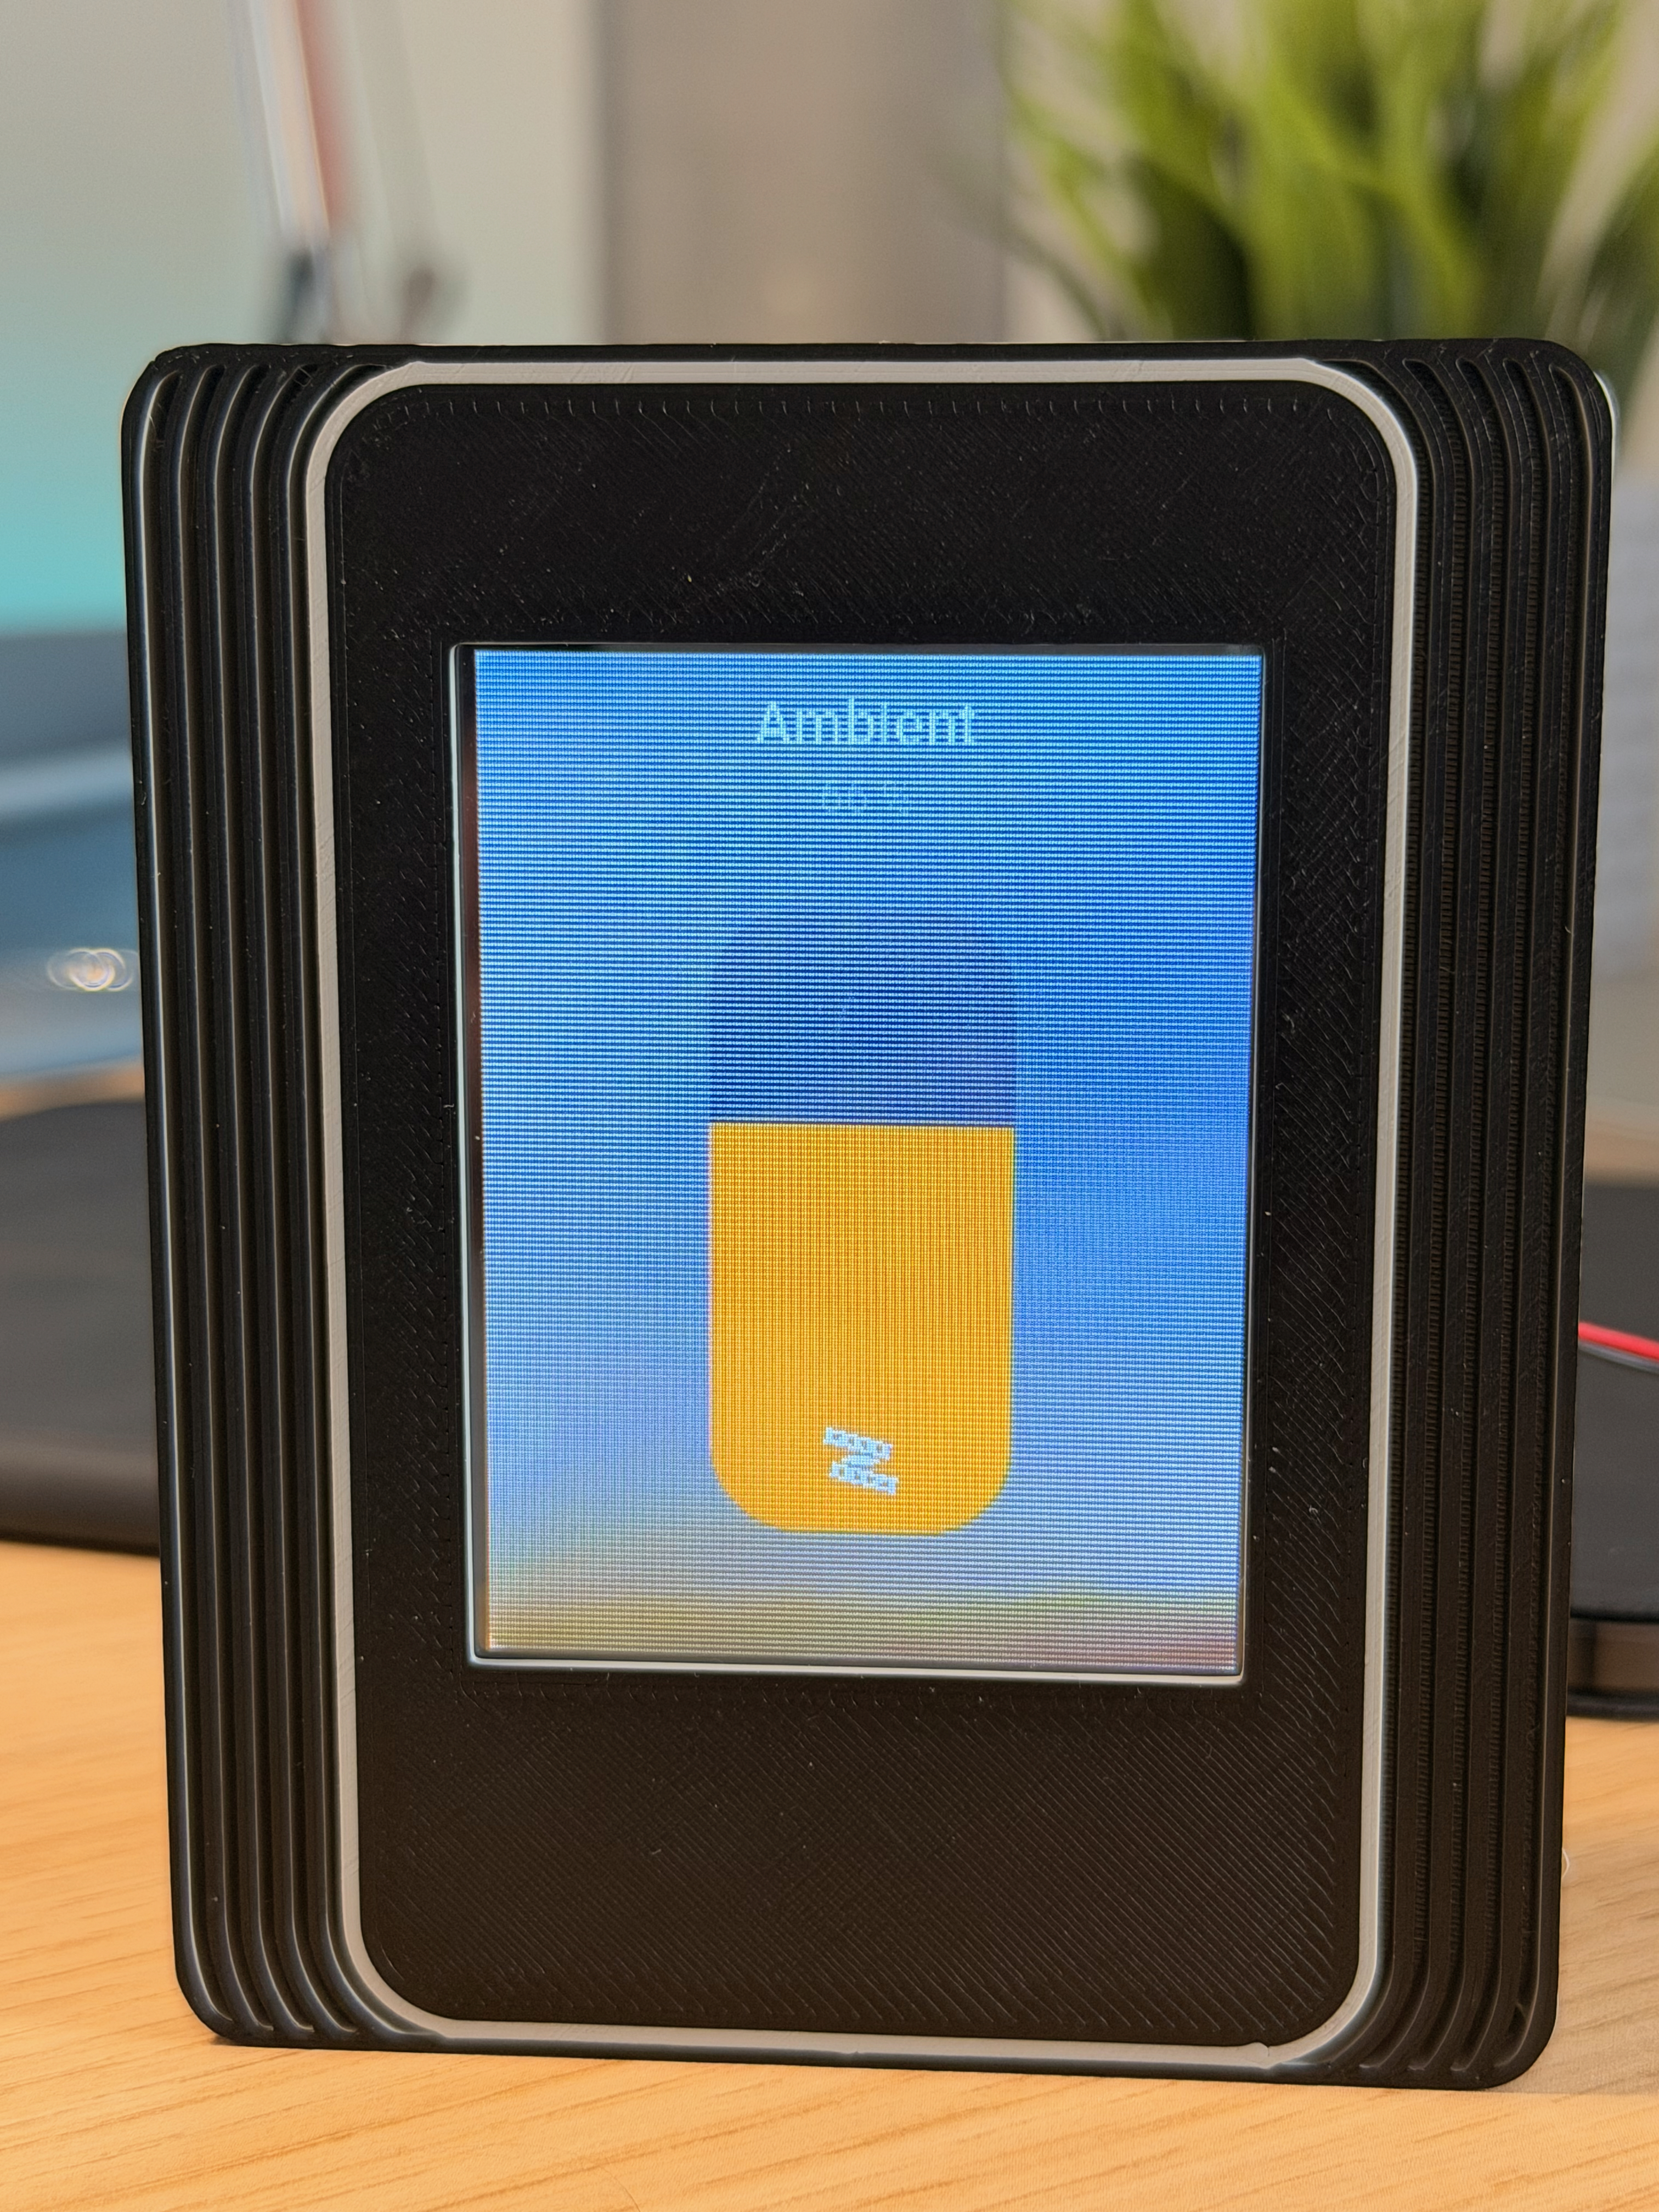
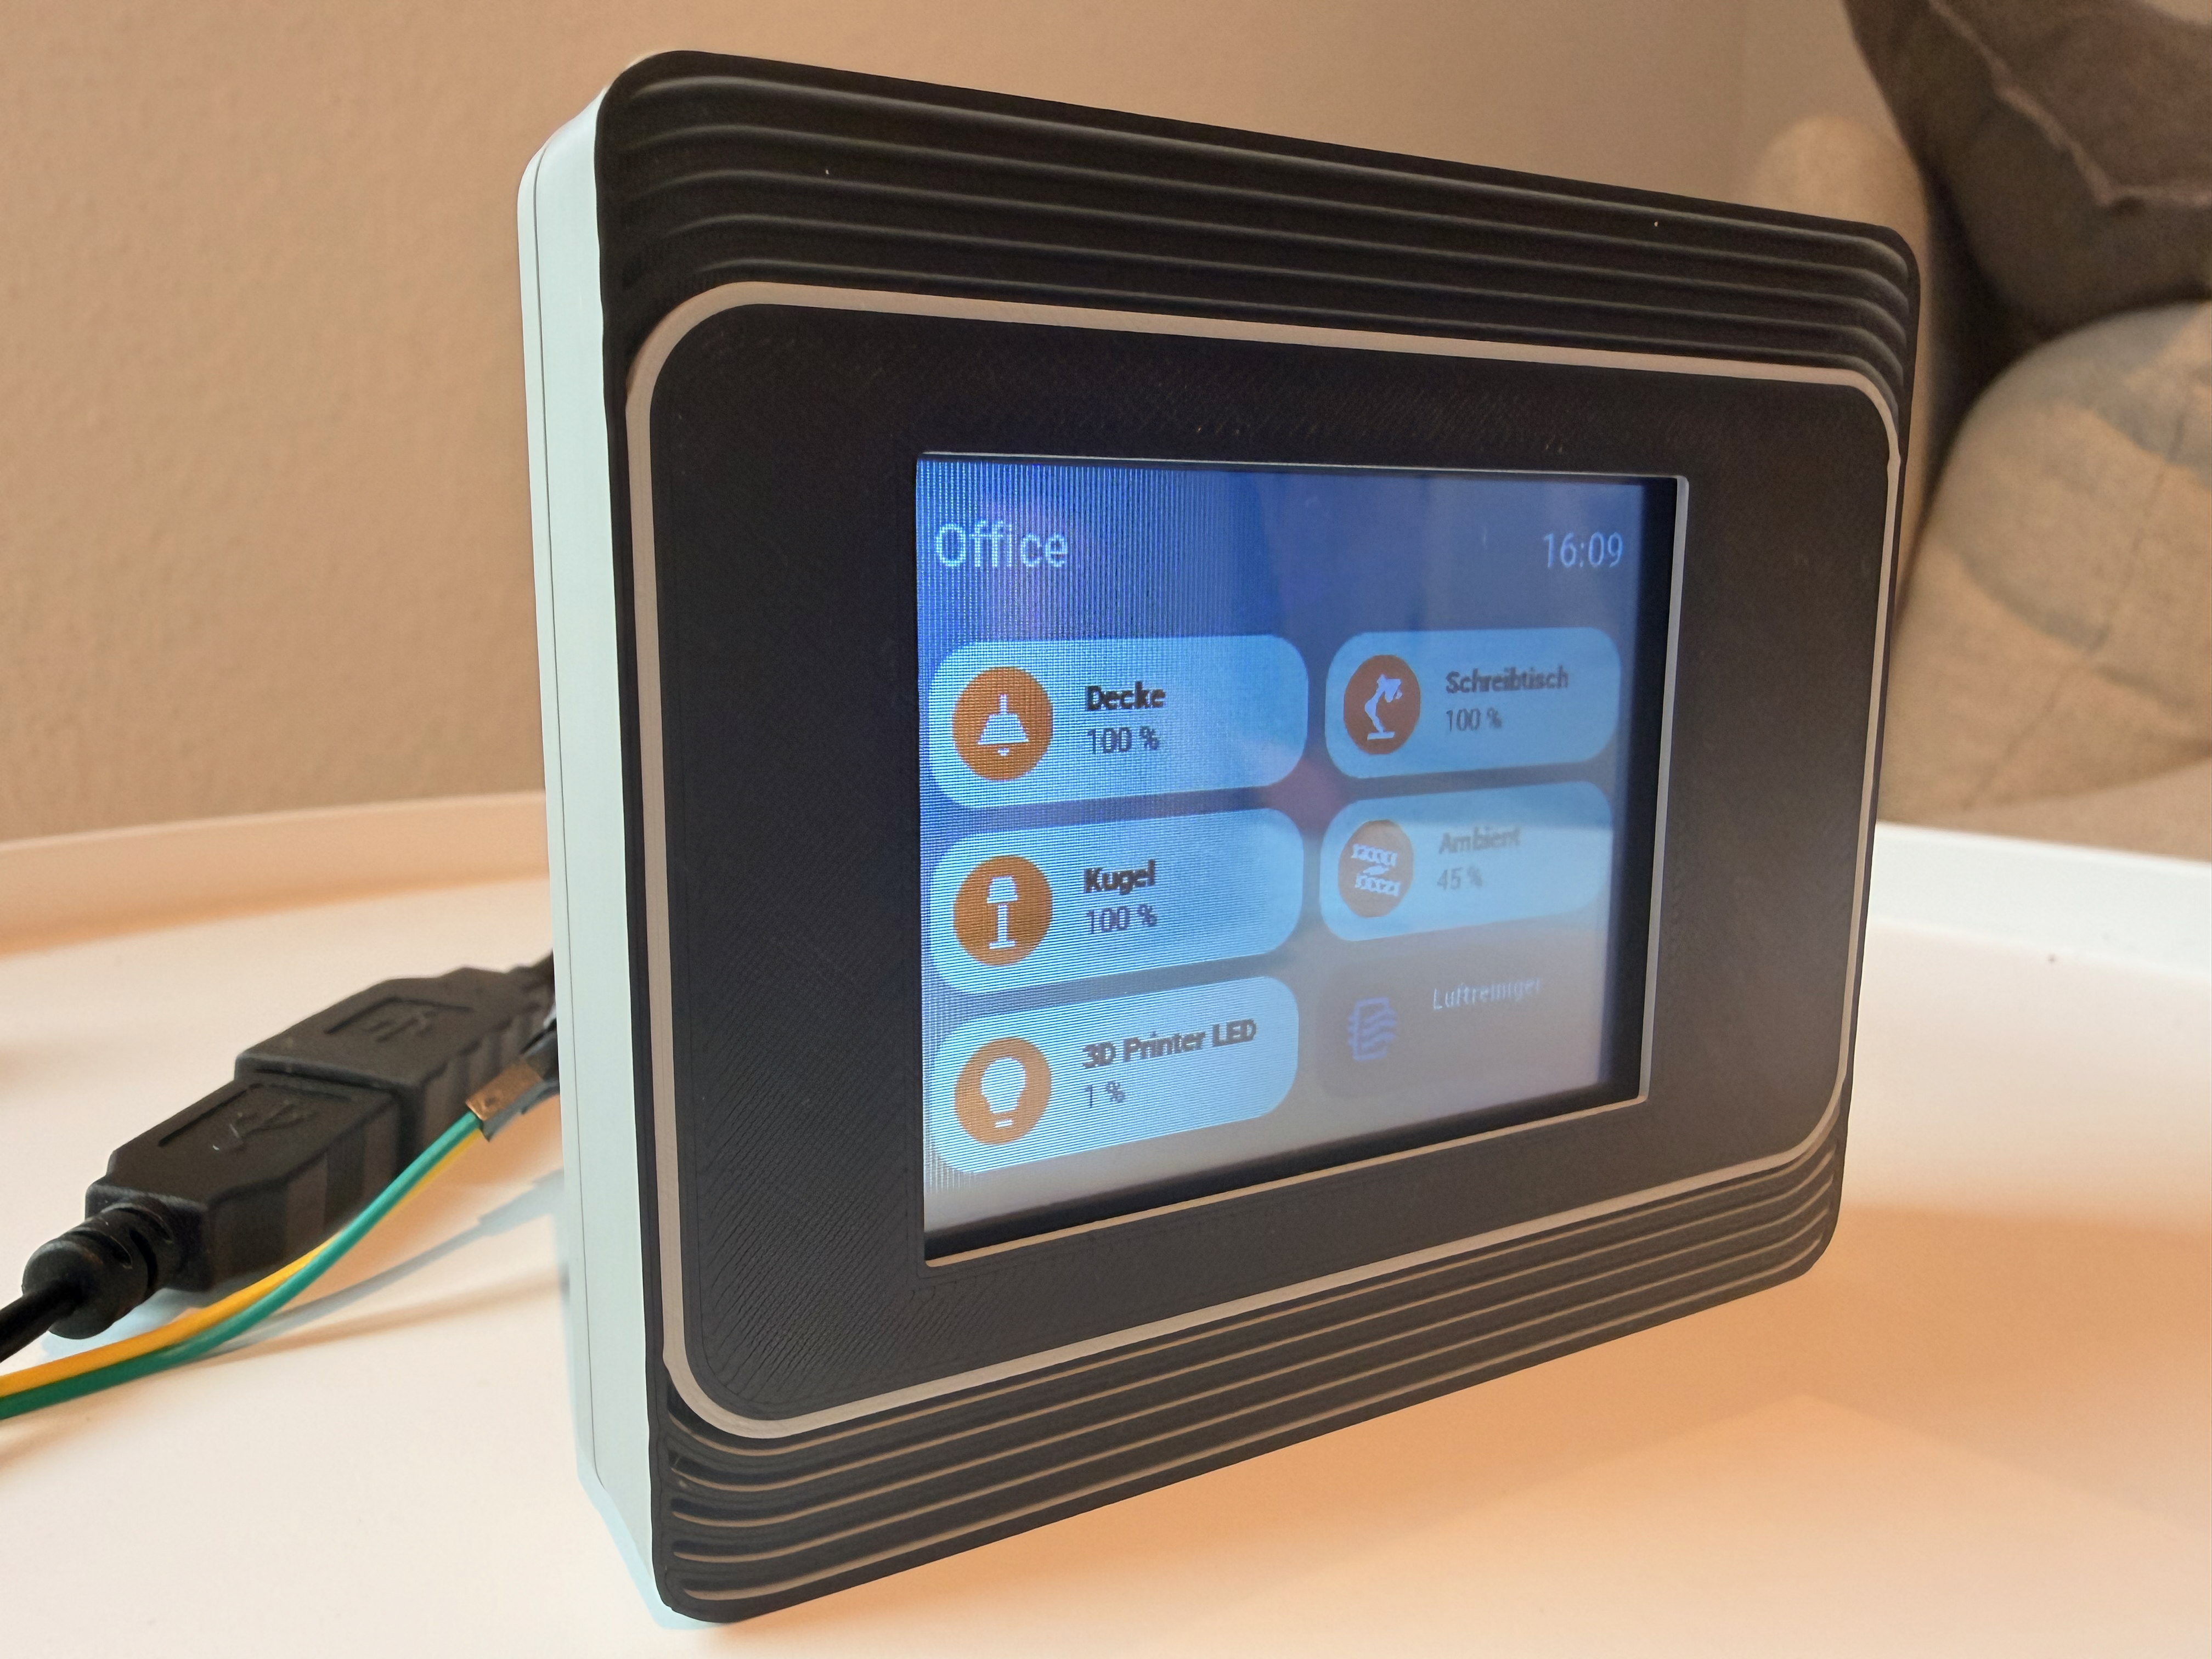
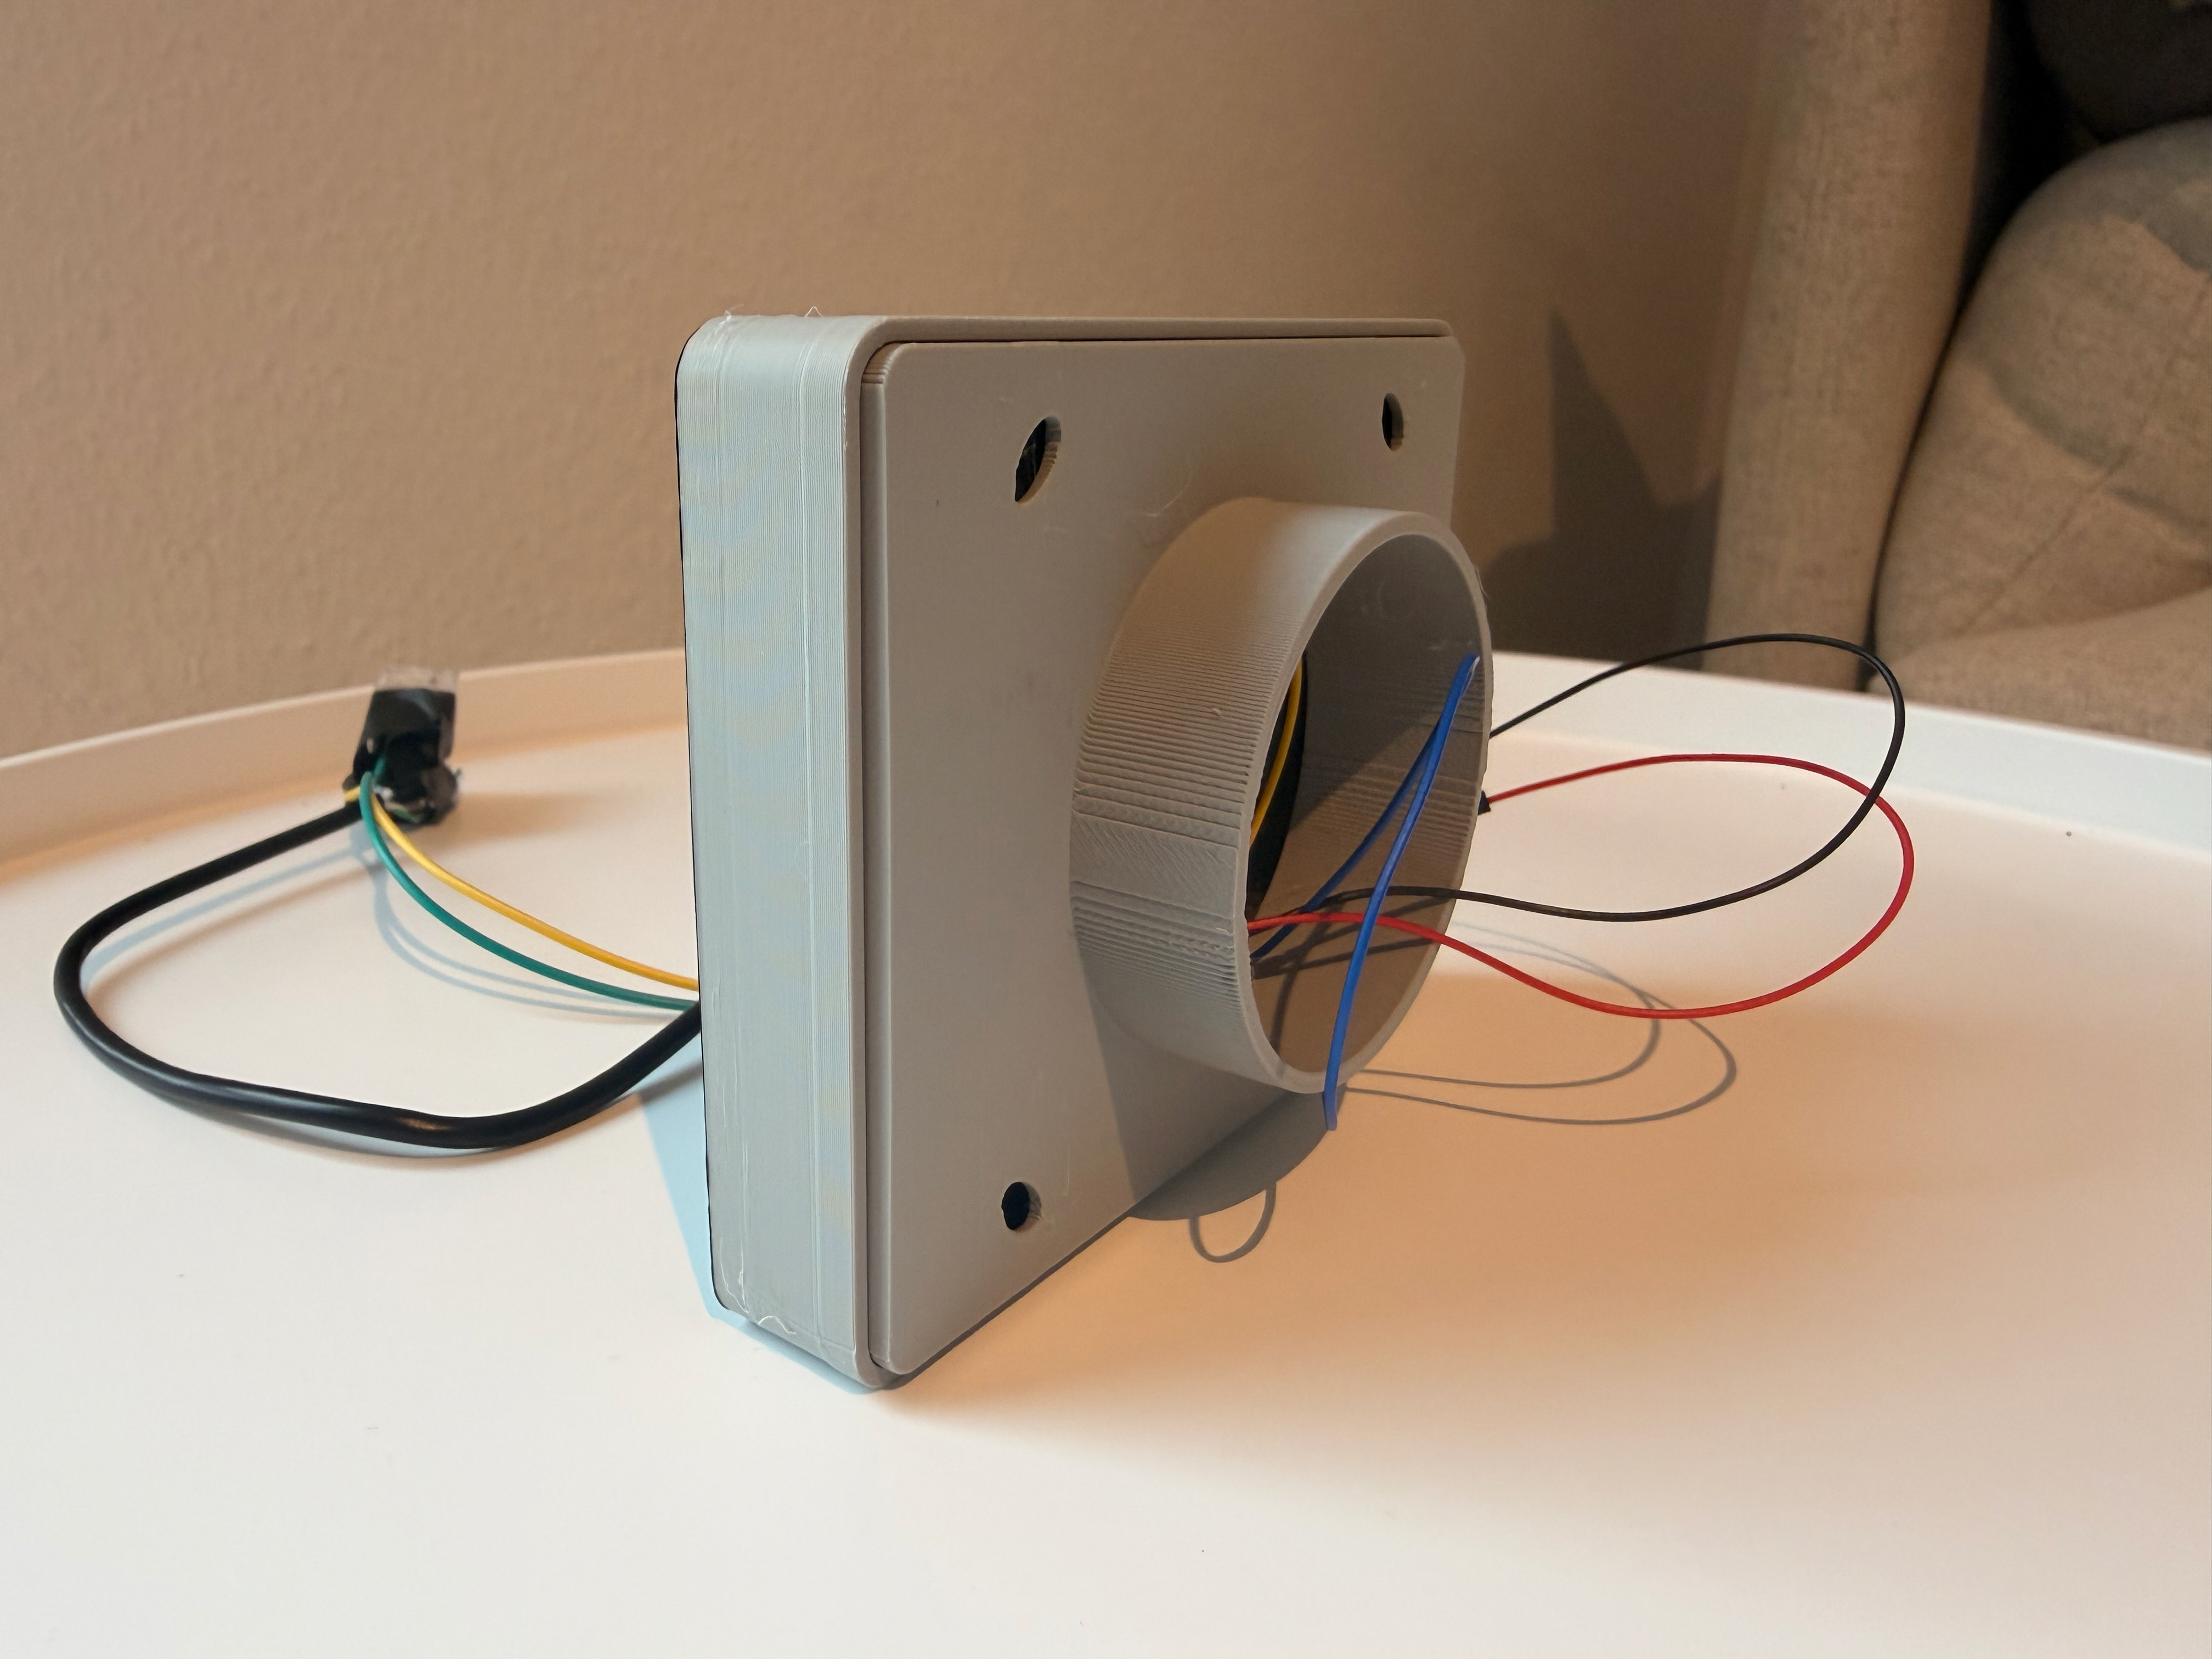
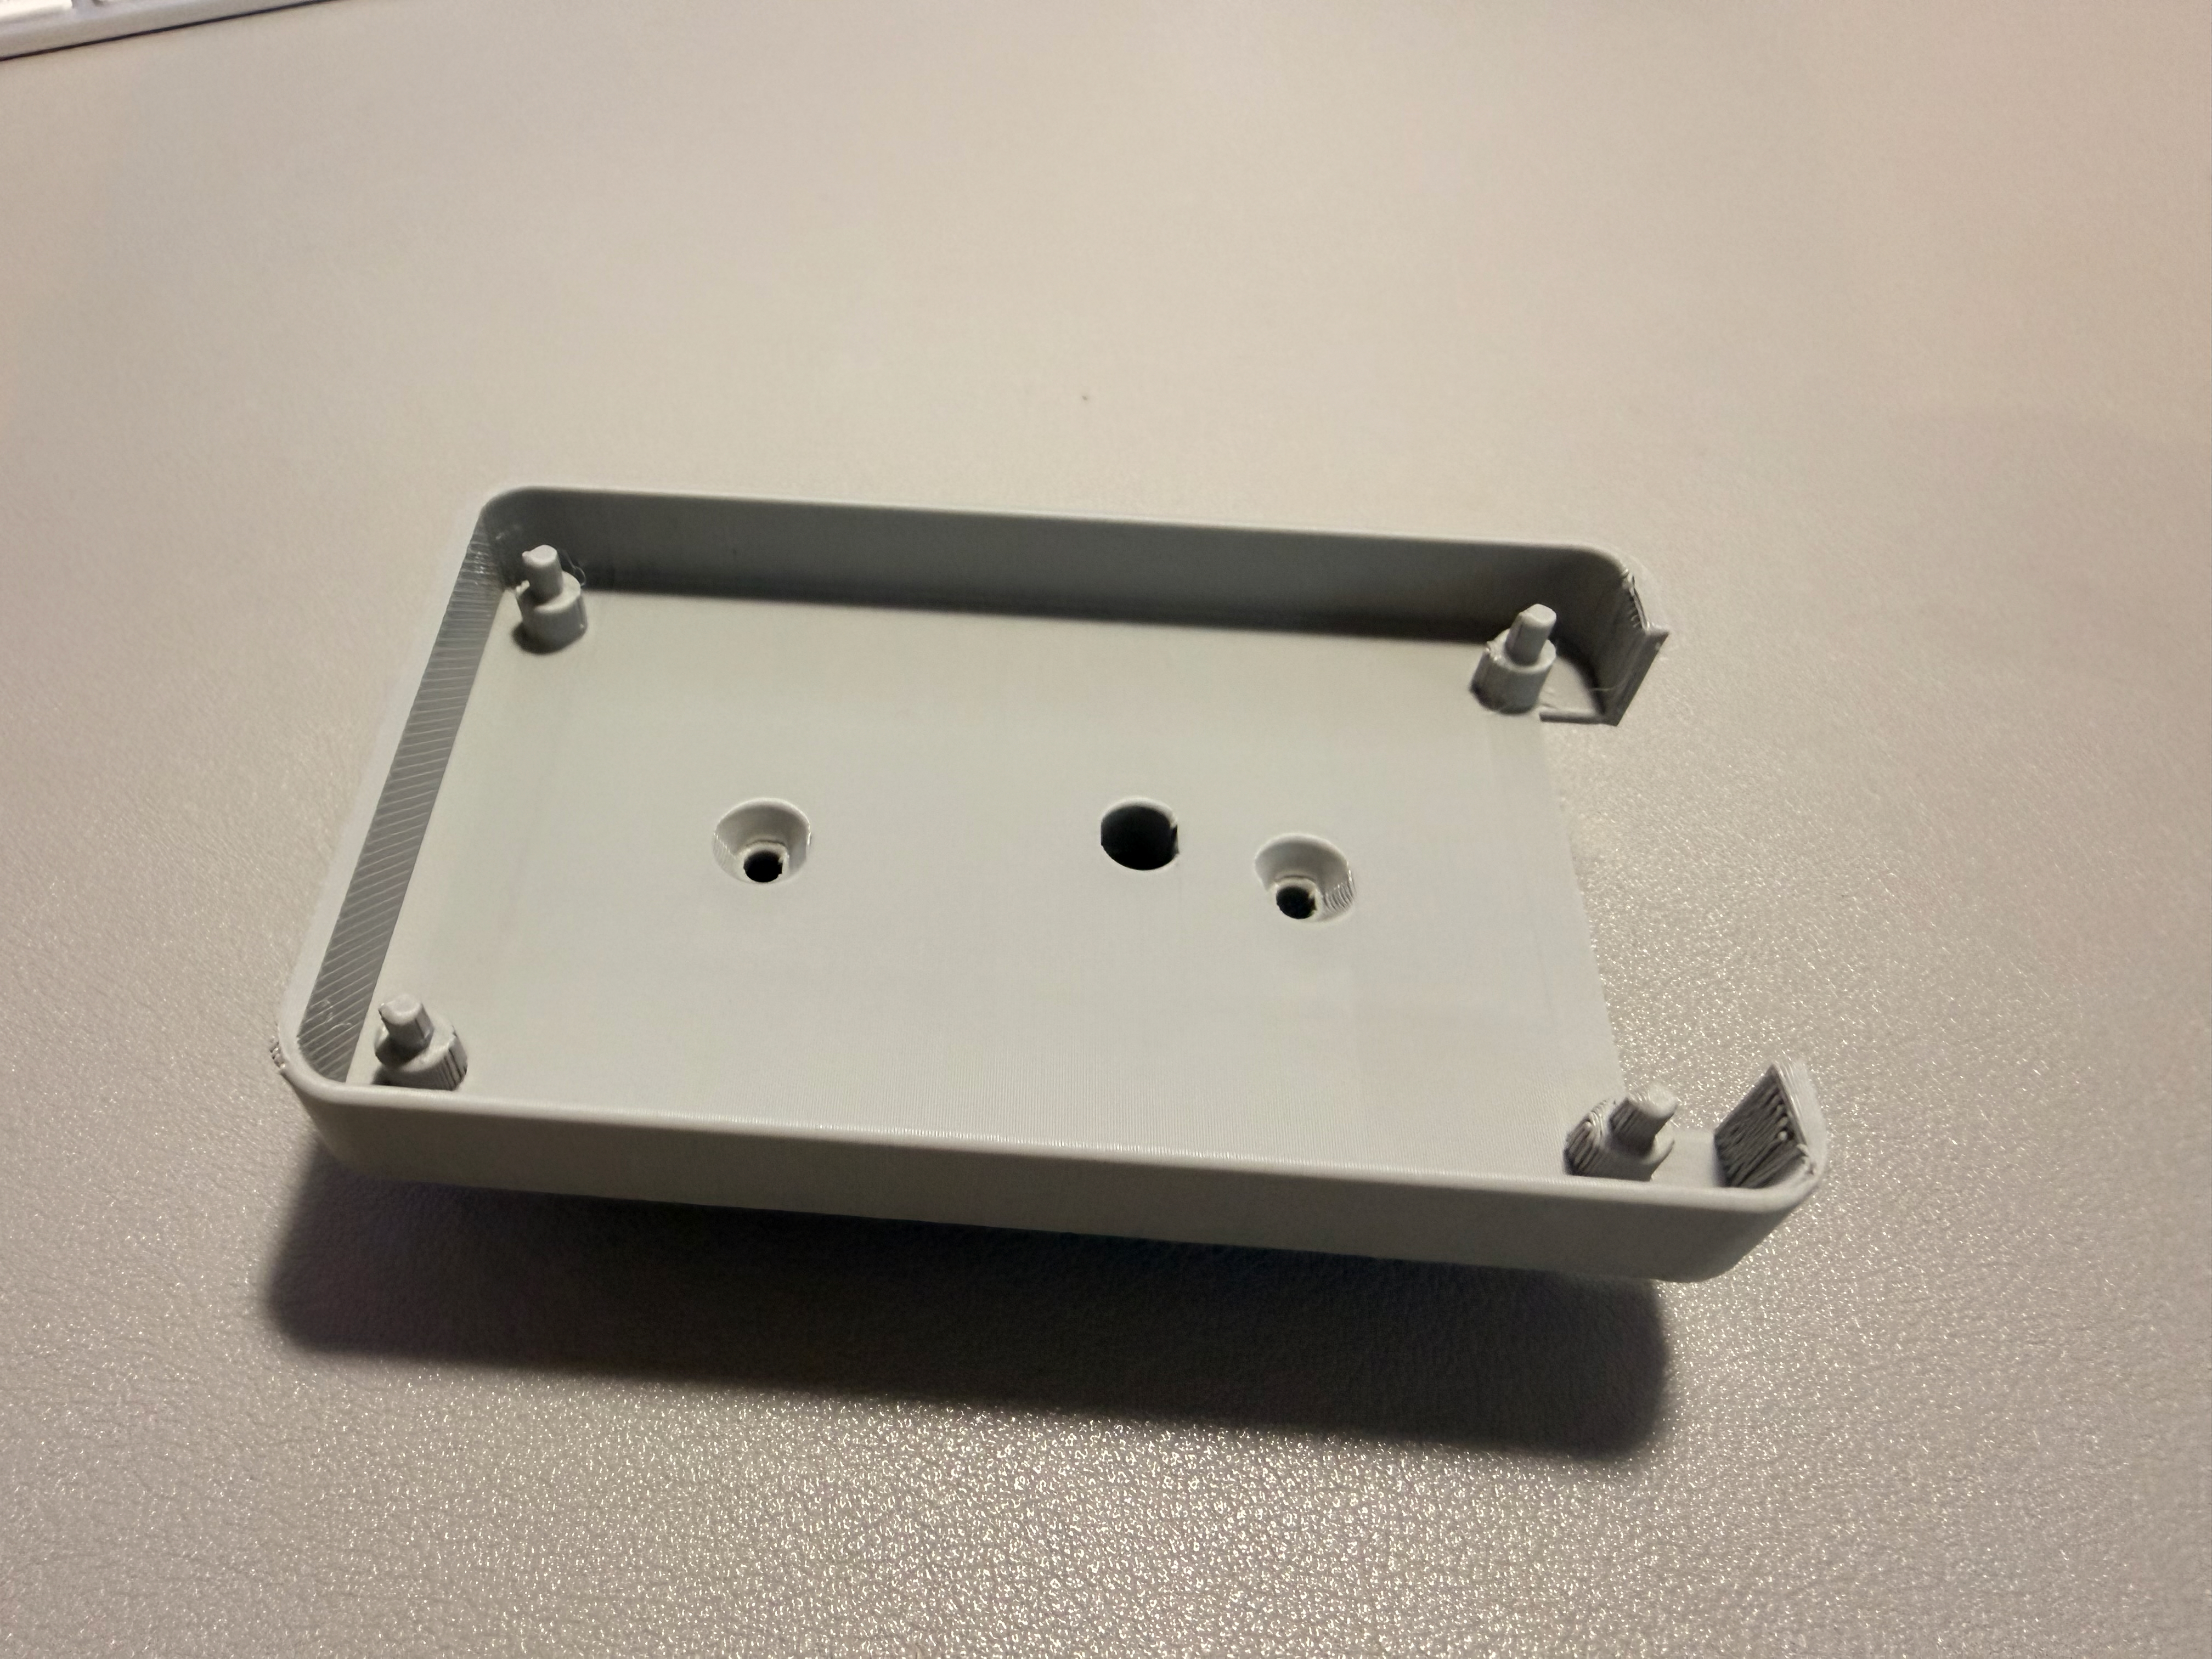
Note: The video quality looks worse than in real life because the display refresh rate interferes with the camera frame rate when filming the screen. In reality the UI looks much smoother and cleaner.
This project uses ESPHome LVGL instead of a classic display lambda approach.
ui_refresh script keeps UI synchronizedIf DIRECT_ACTIONS is set to "true" (default):
light.toggle)No Home Assistant automations required.
If DIRECT_ACTIONS is set to "false":
Trigger example:
Entity: sensor.smartdisplay_action
To: btn1_press
The UI contains a secondary overlay layer used for interactive controls.
When a tile is long-pressed:
This keeps the tile UI clean while still allowing detailed control.
mipi_spi + LVGL-managed rotation) and are validated on 2026.6. On older ESPHome versions you need the adjustments described under Troubleshooting.This project was tested using:
Because this project uses:
homeassistant.action → light.toggle
You must allow the ESPHome device to perform Home Assistant service calls.
"Allow the device to perform Home Assistant actions"
Without this setting, direct control will not work.
| Part | Price | Comment |
|---|---|---|
| ESP32-2432S028 | 15$ | 2.8" ILI9341 with integrated ESP |
| 2x M4 3.5x16 screw (flathead) | 0.10$ | Screws to connect the mount case with the base |
Advantages:
| ESP32-2432S028 | PIN | Comment |
|---|---|---|
| LCD | ||
| clk_pin | GPIO14 | SPI LCD Clock |
| mosi_pin | GPIO13 | SPI LCD MOSI (sometimes also labeled as SDI) |
| miso_pin | GPIO12 | SPI LCD MISO (sometimes also labeled as SDO |
| cs_pin | GPIO15 | Display CS |
| dc_pin | GPIO2 | Display DC |
| Touchscreen | ||
| clk_pin | GPIO25 | SPI Touchscreen Clock |
| mosi_pin | GPIO32 | SPI Touchscreen MOSI (sometimes also labeled as DIN) |
| miso_pin | GPIO39 | SPI Touchscreen MISO (sometimes also labeled as DO) |
| cs_pin | GPIO33 | Touchscreen CS |
| interrupt_pin | GPIO36 | Touchscreen Interrupt |
| LED | ||
| ledc | GPIO21 | Backlight LED display |
| ledc | GPIO4 | Onboard LED (not used for this project) |
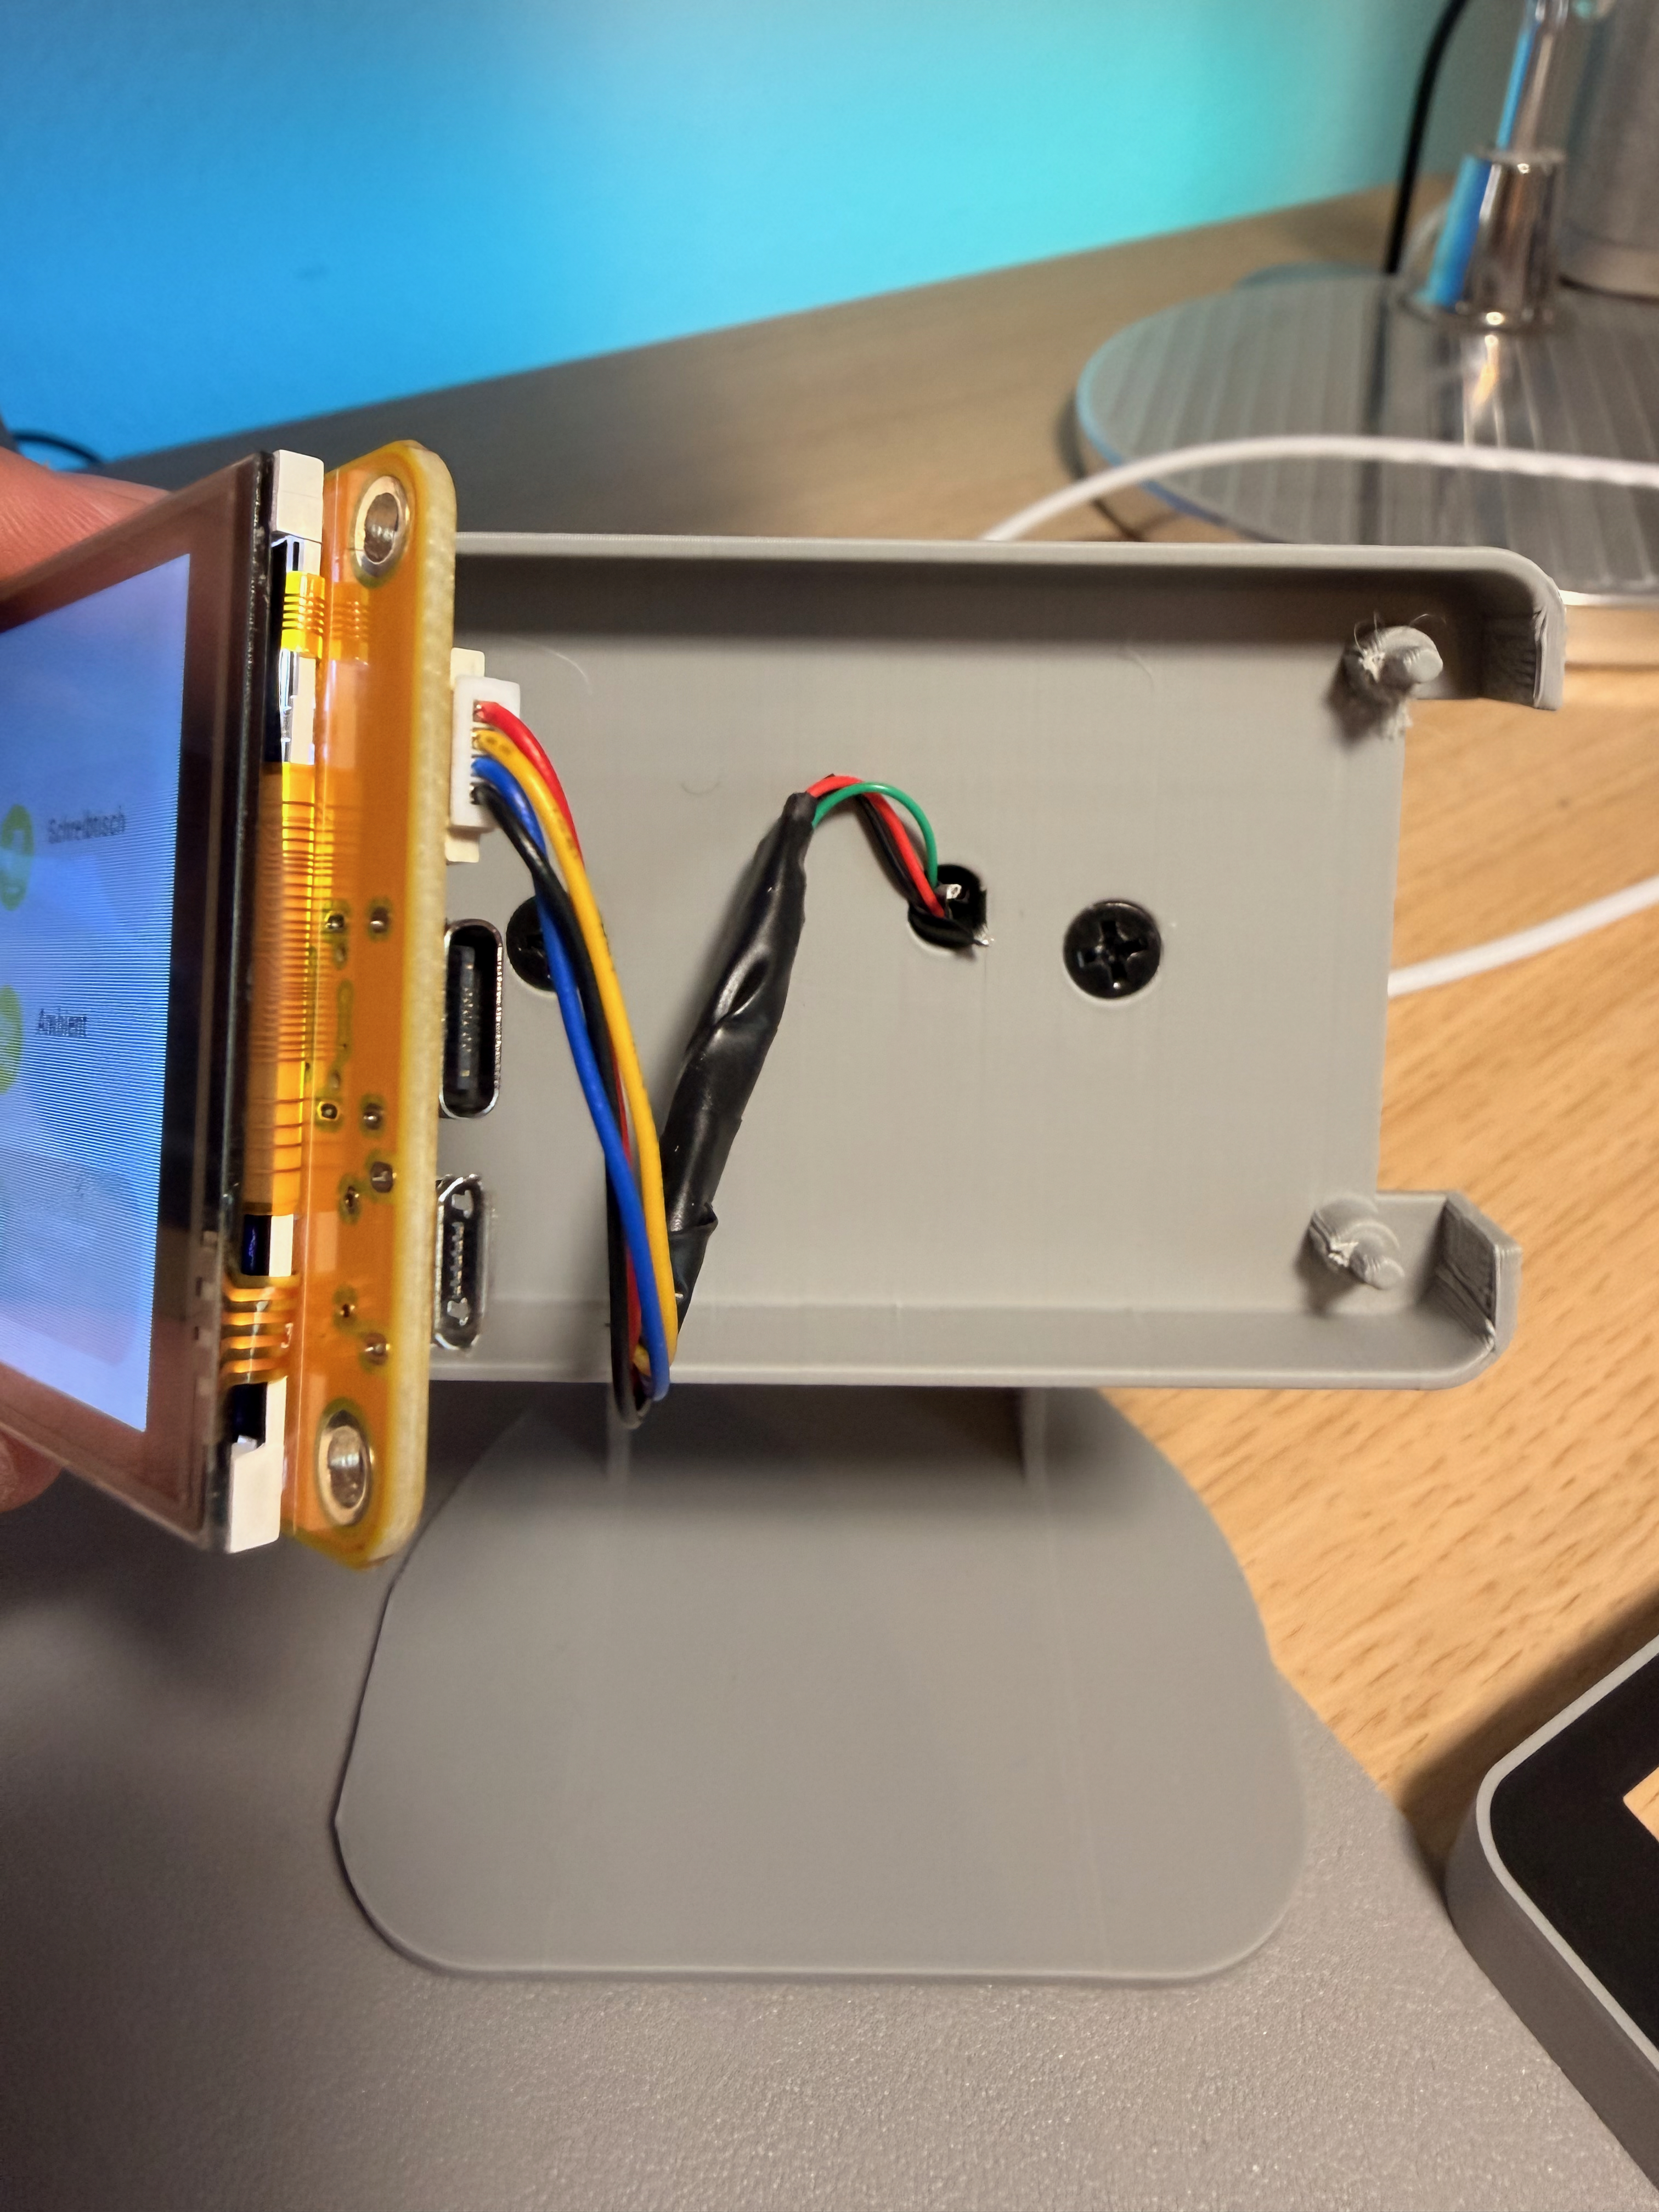
For the mount enclosure the side USB connector of the CYD is not used.
Instead the included power cable can be used.
The red and black wires provide 5V and GND and can easily be connected to an old USB-A cable.
Typical setup:
This keeps the enclosure compact and avoids having a visible or protruding USB connector on the side.
If the USB port was used directly, the enclosure would need to be wider or the connector would remain visible.
⚠️ Important: The CYD often has multiple identical JST connectors, but they do not share the same pinout. Make sure to use the connector labeled VIN / 5V. Other connectors may be labeled 3.3V, and connecting 5V there can damage the board.
| Part | Price | Comment |
|---|---|---|
| 2.8" ILI9341 | 8$ | 2.8" ILI9341 |
| ESP32 Wroom 32D | 8$ | or some ESP32 |
| 2x M4 3.5x16 screw (flathead) | 0.10$ | Screws to connect the mount case with the base |
Requires manual wiring according to the YAML pin configuration.
Use the wiring table below, which shows how to put everything together.
| ILI9341 | PIN ESP32 | Comment |
|---|---|---|
| GND | GND | Ground |
| VCC | 3.3V | Power |
| LCD | ||
| SCK | GPIO18 | SPI LCD Clock |
| SDI (MOSI) | GPIO23 | SPI LCD MOSI (sometimes also labeled as SDI) |
| SDO (MISO) | GPIO19 | SPI LCD MISO (sometimes also labeled as SDO |
| CS | GPIO27 | Display CS |
| D/C | GPIO26 | Display DC |
| RESET | GPIO16 | Display Reset |
| Touchscreen | ||
| T_CLK | GPIO25 | SPI Touchscreen Clock |
| T_DO | GPIO35 | SPI Touchscreen MISO (sometimes also labeled as DO) |
| T_DIN | GPIO32 | SPI Touchscreen MOSI (sometimes also labeled as DIN) |
| T_CS | GPIO33 | Touchscreen CS |
| T_IRQ | GPIO34 | Touchscreen Interrupt |
| LED | ||
| ledc | GPIO4 | Backlight LED display |
esphome/secrets.yaml.example to secrets.yaml and fill in your credentialsAvailable YAML variants (pick one UI for your hardware):
ℹ️ ESPHome version: these configs are written for ESPHome 2026.4+ (display
mipi_spi+ LVGL-managed rotation) and validated on 2026.6. Older versions need the tweaks under Troubleshooting.
esphome/home-like/cyd-2432s028/home-like.yaml – 2x3 “tiles” UI (wallpaper + tiles) — actively maintainedesphome/buttons/cyd-2432s028/buttons.yaml – lockscreen with 4 round buttons (simple / legacy)esphome/home-like/ili9341-external-esp32/home-like.yaml – 2x3 “tiles” UI (wallpaper + tiles) — actively maintainedesphome/buttons/ili9341-external-esp32/buttons.yaml – lockscreen with 4 round buttons (simple / legacy)Tip: The
home-like.yamlfile uses orientation-specific background images located inesphome/home-like/images/. For a full reference of all tile substitutions and copy-paste examples, seeesphome/home-like/TILE_CONFIGURATION.md. Two images are included:
smartdisplay_background.png— used for 0° (landscape) and 180° (landscape flipped)smartdisplay_background_90.png— used for 90° (portrait) and 270° (portrait flipped)The active image is selected via the
BG_IMAGEsubstitution in the ORIENTATION preset block.
materialdesignicons-webfont.ttf is included in each UI variant's fonts/ folder (Apache 2.0 license, sourced from Templarian/MaterialDesign-Webfont).
esphome/home-like/images/smartdisplay_background.png — landscape (0° and 180°), included.esphome/home-like/images/smartdisplay_background_90.png — portrait (90° and 270°), included.BG_IMAGE substitution in the ORIENTATION preset block.Your config choice defines the UI style:
buttons.yaml (lockscreen like buttons)btn1_press .. btn4_pressDIRECT_ACTIONS: "true"): light.toggle on BTN*_ENTITY
home-like.yaml (tiles)tile1_press .. tile6_press (short tap), tile1_long_press .. tile6_long_press (long press)TILE*_LABEL_OFF (e.g. "Off" / "Aus").Each tile's long-press mode is configured via TILE*_LONGPRESS:
| Mode | Behavior |
|---|---|
slider |
Opens a value overlay (brightness / fan speed / cover position / climate temperature) |
action |
Fires a different HA entity than the short tap |
none |
Only publishes the tileN_long_press event, no direct action |
Slider mode — configure with TILE*_LONGPRESS_SLIDER and TILE*_LONGPRESS_OFF_VALUE:
| Tile Type | Overlay Control |
|---|---|
| light | Brightness slider; color/temperature picker when supported by the HA light entity |
| fan | Speed / percentage slider |
| cover | Position slider |
| climate | Thermostat ring for target temperature |
Action mode — configure with TILE*_LONGPRESS_ACTION, TILE*_LONGPRESS_ACTION_TYPE, and optionally TILE*_LONGPRESS_ACTION_SERVICE. The action entity can be a completely different entity than the short tap target — useful for e.g. triggering a scene or script on long press while toggling a light on short press.
In all modes, the tileN_long_press event is always published to sensor.smartdisplay_action so Home Assistant automations can react to it independently.
For most setups, you only need to edit the USER CONFIG / substitutions section in the YAML.
You can also:
light.toggle)If touch alignment is wrong, ensure display.transform and touchscreen.transform
are identical (they must always match).
If the display stays completely white after updating ESPHome but the device still connects to Home Assistant, the cause is a breaking change in ESPHome 2026.4: the ili9xxx display platform was deprecated in favor of mipi_spi.
The YAML configs in this repo already use mipi_spi. If you are on an older ESPHome version (before 2026.4) and mipi_spi is not available yet, change the display platform back to ili9xxx and add color_palette: 8BIT:
display:
  - platform: ili9xxx
    model: ILI9341
    color_palette: 8BIT
    ...
Also re-add miso_pin to the LCD SPI bus:
spi:
  - id: lcd
    clk_pin: GPIO14   # or GPIO18 for the external ESP32 variant
    mosi_pin: GPIO13  # or GPIO23
    miso_pin: GPIO12  # or GPIO19 — add this back for older ESPHome
If the display shows corrupted graphics, horizontal lines, or random pixels, the most common cause is a different display controller on your Cheap Yellow Display.
Most CYD boards use ILI9341, but some variants ship with ST7789 or ILI9342.
If the driver in ESPHome does not match the controller, the display output may look broken.
Try changing the display model in the YAML:
display:
  - platform: mipi_spi
    model: ILI9341
Alternative models that may work depending on your board:
model: ST7789V
or
model: ILI9342
Flashing with a different model is usually the fastest way to identify the correct controller.
Invalid offsets. / won't compile on ESPHome 2026.6+If validation fails on the dimensions: line of the display with:
display.mipi_spi: Invalid offsets.
this is the ESPHome 2026.6 change to mipi_spi: a transform: block on the display combined with swapped (rotated) dimensions: is no longer accepted. The configs in this repo are already fixed for this — rotation is now handled by LVGL:
dimensions: 240 × 320) with no transform: blockLVGL_ROTATION in the chosen ORIENTATION preset, which feeds rotation: in the lvgl: block (LVGL rotates the display and the touch coordinates together)If you copied an older version of the YAML, pull the current one. Simply updating git/your local copy is enough.
If the UI appears rotated, mirrored, or upside down, use the built-in ORIENTATION preset block in the substitutions section at the top of home-like.yaml.
Four presets are provided and documented as comments — uncomment the one matching your desired orientation (0°, 90°, 180°, 270°) and comment out the others. Each preset sets the matching LVGL_ROTATION (0/90/180/270), touch axis correction, grid layout, and background image automatically.
Note: touch calibration values (
TOUCH_CAL_*) are device-specific. The presets include approximate values that may need tuning after flashing.
Since ESPHome 2026.4 LVGL manages rotation for both the display and the touchscreen — you should not add a transform:/rotation: to the display: block. If only the orientation is wrong, change LVGL_ROTATION:
# in the active ORIENTATION preset
LVGL_ROTATION: "90"   # 0 / 90 / 180 / 270
If touch is mirrored or axes are swapped relative to the display, tune the touchscreen axis correction (these only correct the raw XPT2046 vs. the native panel and stay the same across orientations):
TOUCH_SWAP_XY: "false"
TOUCH_MIRROR_X: "false"
TOUCH_MIRROR_Y: "true"
On ESPHome before 2026.4 the
lvgl: rotation:option is not available. In that case removerotation:from thelvgl:block and instead rotate on the display via atransform:block (swap_xy/mirror_x/mirror_y) with thedimensions:set to the final rotated size — and keepdisplay.transformandtouchscreen.transformin sync.
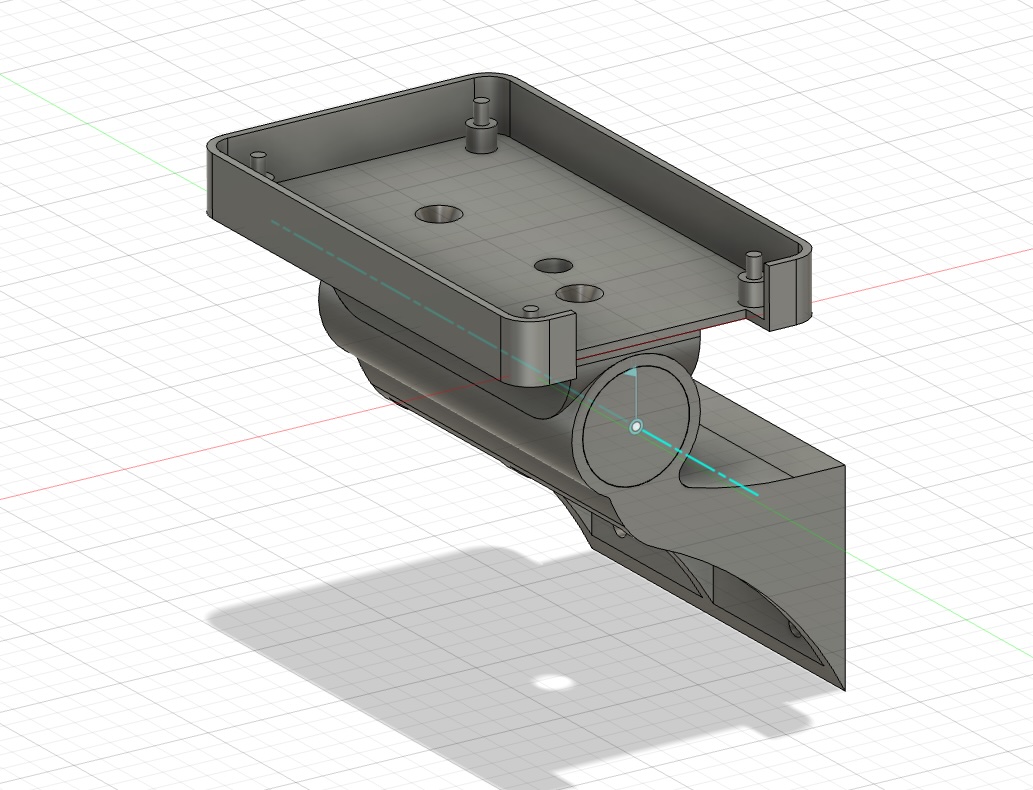
See the /3d_print folder for STL files and Fusion 360 source files.
Multiple mount options are available:
Desk mount and Under-Desk mount use the same enclosure parts and adjustable tilt mechanism.
Print the main enclosure parts and choose one mount type depending on your setup.
Designed for:
This is a hobby project and considered work-in-progress.
Feel free to fork, remix and improve it.
Looking for more cool projects using this display? Check out the LoctekMotion Touch Display GitHub repository! This awesome project takes the same 2.8" ILI9341 touchscreen setup and repurposes it—not for lights, but for controlling a height-adjustable Flexispot desk with ease. If you're into smart home automation and custom builds, it's definitely worth a look!
more like this
simple generator for 3D-printed frames for a moxon rectangle antenna
GPX 轨迹转 3D 可打印地形模型 | Hiking trail to 3D printable terrain | Electron + Vue。 一款面向户外爱好者与 3D 打印玩家的 Web 工具。将 GPX 徒步/骑行轨迹一键转…
Install and monitor KlipperScreen on Android via DroidKlipp APK, USB ADB forwarding, and WiFi fallback
search projects, people, and tags