Scythe
SCYTHE is a lightweight, C#-based game engine focused on modifiability and rapid iteration using Raylib.
C#★ 50
Standalone node editor in raylib
 gk646
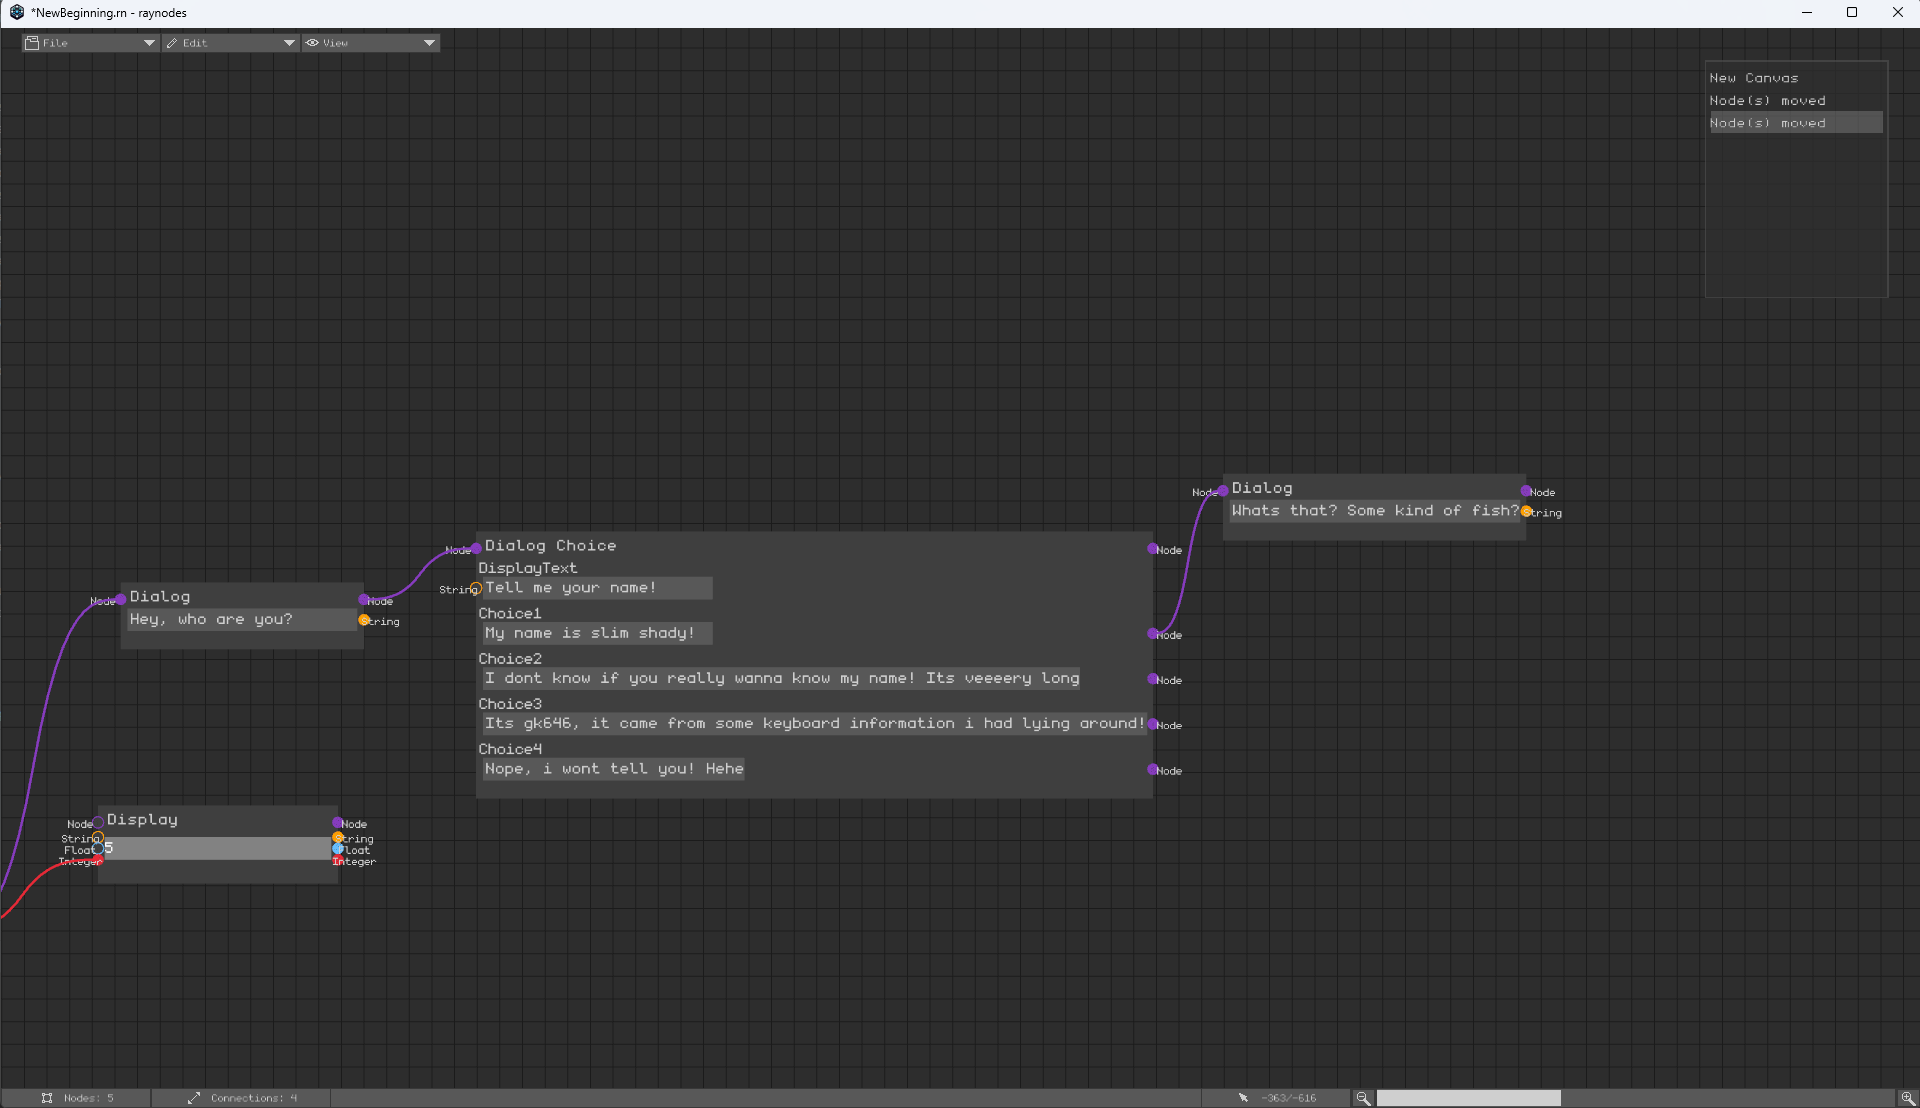
gk646git clone https://github.com/gk646/raynodes.gitgk646/raynodesraynodes is a standalone 2D node editor made using raylib
and raygui with a focus
extensibility. It aims to be an attractive tool for any node based task, and supports being integrated into
bigger projects like games, editors...
In many cases it comes close to being a node-editor SDK of sorts.
A small showcase of its major features:
For more infos on the design choices go to Software Design
For more information on how to use the editor look at the raynodes-wiki.
The other dependencies
are cxstructs, tinyfiledialogs
for file dialogs and catch2 for testing.
1. Installation
2. Editor Features
3. Components!
4. Plugins
5. Nodes!
6. Software Design
Just download the .zip for your operating system from the most recent release in
the release page.
Unzip and start the executable! Have fun using raynodes.
This project uses CMake as buildsystem!
To build the project locally you just need to do 4 simple steps:
cmake ..makeAll external dependencies are included in the source! This model is chosen based on their combined low size (only 14mb) and the provided simplicity for sharing and integrated testing.
raynodes can be passed a path which it will try to open over the commandline.
Files starting with . (dot) will be interpreted as relative paths:
./raynodes.exe ./MyRelativePathFile.rn
Else it will be interpreted as absolute path:
./raynodes.exe C:\Users\Me\Documents\MyAbsoluteFile.rn
On Windows you can also set it as the default executable for ".rn" files, then double click to open any such file!
raynodes has supports all common shortcuts. For a comprehensive list check out
the shortcuts page in the wiki!.
The user interface takes inspiration from other editors like paint.net. For a comprehensive list checkout the user-interface page of the wiki!
raynodes gives you the ability to create your own nodes without even interacting with the source code!
Open the Node Creator window via the button on the left and add a new node by clicking +Add. For more in-depth
information check out the User-Created-Nodes page of the
wiki!
Components are the second level of customization you can achieve. For that you can implement the Component interface inside your own plugin. For the most part a component is a simple struct that is drawn and updated inside the node. Inside the update function you have full write and read access to the context and design and draw complex components.
This is a glimpse at the interface but the Component.h header has a lot more and is self documenting! Check it out!
  //-----------CORE-----------//
  // Necessary to copy the component
  virtual Component* clone() = 0;
  // IMPORTANT: Only called when its bounds are visible on the screen!
  virtual void draw(EditorContext& ec, Node& parent) = 0;
  // Guaranteed to be called once per tick (on the main thread) (not just when focused)
  virtual void update(EditorContext& ec, Node& parent) = 0;
  // Use the symmetric helpers : io_save(file,myFloat)...
  virtual void save(FILE* file) {}
  //Use the symmetric helpers : io_load(file,myFloat)...
  virtual void load(FILE* file) {}

  //-----------EVENTS-----------//
  // All called once, guaranteed before update() is called
  virtual void onMouseEnter(EditorContext& ec) {}
  virtual void onMouseLeave(EditorContext& ec) {}
  virtual void onFocusGain(EditorContext& ec) {}
  virtual void onFocusLoss(EditorContext& ec) {}

  //-----------LIFE CYCLE-----------//
  // Called once at creation time after the constructor
  virtual void onCreate(EditorContext& ec, Node& parent) {}
  // IMPORTANT: Only called once when the node is finally destroyed (only happens after its delete action is destroyed)
  // This may happen very delayed or even never!
  virtual void onDestruction(Node& parent) {}
  // Called whenever component is removed from the screen (delete/cut)
  virtual void onRemovedFromScreen(EditorContext& ec, Node& parent) {}
  // Called whenever component is added to the screen (paste)
  virtual void onAddedToScreen(EditorContext& ec, Node& parent) {}

  //-----------CONNECTIONS-----------//
  // Called once when a new connection is added
  virtual void onConnectionAdded(EditorContext& ec, const Connection& con) {}
  // Called once when an existing connection is removed
  virtual void onConnectionRemoved(EditorContext& ec, const Connection& con) {}
The interface is quite expansive and abstract allowing an implementation to react to a multitude of events.
Loading and saving its state is made easy through a supplied symmetric save format.
Just call the io_save which supports int, float, string and raw data(future).
This is how you save and retrieve a string:
void TextInputField::save(FILE* file) {
cxstructs::io_save(file, buffer.c_str());
//More possible member variables:
//cxstructs::io_save(file, myFloat);
//cxstructs::io_save(file, myInt);
//cxstructs::io_save(file, myAllocatedDataPtr, mySize);
}
void TextInputField::load(FILE* file) {
cxstructs::io_load(file, buffer);
//More possible member variables
//cxstructs::io_load(file, myFloat);
//cxstructs::io_load(file, myInt);
//cxstructs::io_load(file, myAllocatedDataPtr, mySize);
}
Whenever you want to make custom components or nodes you will need to make your own plugin. raynodes provides an
easy-to-use plugin interface that allows defining custom components and building nodes out of them.
When creating your plugin you have to link against the base editor (statically) and against raylib (shared).
struct RaynodesPluginI {
  virtual ~RaynodesPluginI() = default;
  // Called once after its been loaded
  virtual void onLoad(EditorContext& ec) {}
  // Called once at the correct time to register its components
  virtual void registerComponents(ComponentRegister& cr) {}
  // Called once at the correct time to register its nodes
  virtual void registerNodes(NodeRegister& nr) {}
};

extern "C" EXPORT RaynodesPluginI* CreatePlugin() {
  return new MyPlugin();
}
Implement this interface and add the exported function to create an instance.
Components are easily registered by providing a name and its type. This works cause all Components have a similar constructor. After you implemented a new Component by creating a derived class in your plugin files just include its header and register it in your plugin.
NOTE: Components are uniquely identified by this name (naming collision will be shown when loading). This means it's advised to pick a namespace for your plugin (small prefix).
Syntax: registerComponent<ComponentType>("<Component-Identifier>")
void BuiltIns::registerComponents(ComponentRegister& cr) {
  cr.registerComponent<MathC>("BI_MathOp");
  cr.registerComponent<DisplayC>("BI_Display");
  cr.registerComponent<SeparateXYZC>("BI_SeparateXYZ");
  cr.registerComponent<Vec3OutC>("BI_Vec3Out");
}
A node is then just a container for components. The register process allows to set custom labels for each component which helps to reference a specific component later on:
Syntax: registerNode("<NodeName>", { {<CustomLabel>,<Component-Identifier>}, ... }
void BuiltIns::registerNodes(NodeRegister& nr) {
  nr.registerNode("MathOp", {{"Operation", "BI_MathOp"}});
  nr.registerNode("TextField", {{"TextField", "BI_TextOut"}});
  nr.registerNode("NumberField", {{"Number", "BI_NumberOut"}});
  nr.registerNode("SeparateXYZ", {{"Vector", "BI_SeparateXYZ"}});
  nr.registerNode("Vector 3", {{"Vector3", "BI_Vec3Out"}});
}
Plugins will be loaded from the ./plugins folder relative to the executable
The node interface is entirely optional but can be used to gain another level of control to implement functionality. It's mostly there to orchestrate existing components by allowing to specify an update and render tasks that runs after all components.
//-----------CORE-----------//
// Guaranteed to be called each tick and AFTER all components have been updated
virtual void update(EditorContext& ec) {}
// Called only when the node bounds are (partially) within the screen
virtual void draw(EditorContext& ec) {}
// Called at save time - allows you to save arbitrary, unrelated additional state data
virtual void saveState(FILE* file) const {}
// Called at load time - should be the exact same statements and order as in saveState();
virtual void loadState(FILE* file) {}

//-----------LIFE CYCLE-----------//
// Called once when the node is created and AFTER all components
virtual void onCreation(EditorContext& ec) {}
This interface is still quite young and will be expanded.
EditorContext - DataBackend
NodeEditor - Logic
The main inspiration was to create an editor that just provides a basic interface that can be used to create anything node based like:
raynodes is a component-centric editor meaning that most things happen in and around components. However, with the
addition custom nodes which allows for even more control you could almost call it a hybrid.
This choice of having components was made due to a number of reasons:
However, this also has some drawbacks:
Pretty much all the drawbacks of some earlier approaches are solved by introducing custom nodes, although this adds more complexity and needs proper implementation of inter-component data transfer.
more like this
SCYTHE is a lightweight, C#-based game engine focused on modifiability and rapid iteration using Raylib.
.Net 10 (.Net 8+) webassembly starter project using raylib-cs nuget 7.0.2 and raylib 5.5
search projects, people, and tags