nook-dashboard
Simple To Do list / Home Assistant Dashboard for Nook E-Ink display
 greghare
git clone https://github.com/greghare/nook-dashboard.gitgreghare/nook-dashboardnook-dashboard
This repository contains the files necessary for creating a simple web-based dashboard, optimized for a Nook Simple Touch E-Ink display.

Requirements
- Nook Simple Touch E-Ink tablet (rooted to access Android, with Electric Sign app installed: https://play.google.com/store/apps/details?id=com.sugoi.electricsign)
- Note: You can run this without a Nook. It has just been optimized for an 800x600 pixel E-Ink display.
- Linux system such as a Raspberry Pi or Ubuntu system capable of running Python 3. I run this directly on my Ubuntu Home Assistant server.
- Some basic knowledge of Python programming
Installation and Setup
1. Clone the repository
Note: The application expects to be installed in /opt/nook-dashboard
$ cd /opt
$ git clone https://github.com/greghare/nook-dashboard.git
$ pip install requirements.txt
2. Install the service
$ cd /opt/nook-dashboard
$ sudo cp nook-dashboard.service /etc/systemd/system/nook-dashboard.service
$ sudo systemctl daemon-reload
3. Configure the application
$ cd /opt/nook-dashboard
$ cp app.json.example app.json
Open app.json in your favorite text editor, and configure the required items. At a minimum you must have
- ha_url: Complete path to your Home Assistant instance, including the port. Use your local Home Assistant IP address and port
- ha_access_token: To get an access token, follow the steps below
- Click your profile icon in the bottom left of the Home Assistant sidebar
- Click on "Security" at the top
- At the bottom of the page, under "Long-lived access tokens" click on "Create token"
- Name the token, and then click the copy button
- Replace <LONG_LIVED_ACCESS_TOKEN> with your new access token
Example configuration file
{
  "ha_url": "https://<HOME_ASSISTANT_IP>:8123",
  "ha_access_token": "<LONG_LIVED_ACCESS_TOKEN>",
  "timezone": "America/New_York",
  "calendar": "calendar.example_gmail_com",
  "weather": "weather.forecast_home",
  "featured_entity": {
    "id": "climate.downstairs",
    "attribute": "current_temperature",
    "icon": "information"
  },
  "entities": [
    { "id": "input_boolean.kitchen_motion", "property": "state", "icon": "motion-sensor" },
    { "id": "light.under_cabinet_1", "property": "state", "icon": "lightbulb" },
    { "id": "light.under_cabinet_2", "property": "state", "icon": "lightbulb" },
    { "id": "sensor.pi_hole_ads_blocked_today", "property": "state", "icon": "lightbulb" },
    { "id": "sun.sun", "property": "state", "icon": "weather-sunny" }
  ],
  "display": {
    "show_todo": true,
    "show_today_events": true,
    "show_tomorrow_events": true,
    "show_weather": true,
    "show_featured_entity": true,
    "show_entity_table": true
  }
}
Note: If you hide all of the items in the right column (for example, weather, featured_entity, and the entity table), it should adjust the calendar to the width of the screen. The same will occur if you hide all of the items in the left (todo, today_events, and tomorrow_events)
4. Start the Service
$ sudo service nook-dashboard start
Usage
1. Load the main page
In a browser go to: http://<ip_address_of_host>:8888 You should see the following:
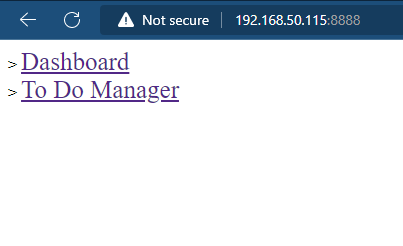
If you click on "Dashboard" you should get this. If you don't see this screen, and instead see a 500 Internal Server error, it's probably because the server.py code is trying to load a Home Assistant entity which you don't have setup. If this is the case, ensure you have all of the same entities, or delete any sensors you don't have.

And if you click on To Do Manager you'll see something like this:

You can bookmark http://<ip_address_of_host>:8888/todo on your phone to easily add new items within your home network. Eventually I'd like to switch this to use the Todoist integration from Home Assistant. If anyone feels ambitious and wants to jump on that, feel free to submit a pull request!
Clicking a checkbox next to an item will remove it from the to do list
** Disclaimer: This code could use some work. Feel free to put in a pull request and we can improve it together
more like this
todo-swipe-card
A specialized swipe card for todo lists in Home Assistant with custom styling
esphome_modbus_bridge
ESPHome Modbus TCP↔RTU Bridge – Transparent bridge for ESP8266/ESP32 that lets multiple Modbus TCP clients communicate…
ESPGeiger
☢️ ESP8266 / ESP32 Firmware for collecting and reporting statistics from Geiger counters