Pixoo64-Advanced-Tools
A Python utility for the Divoom Pixoo 64, allowing for advanced control, customization, and interaction via its API.
Python★ 54
Autonomous mobile robots (2WD, 4WD, Mecanum Drive)
 linorobot
git clone https://github.com/linorobot/linorobot2.gitlinorobot/linorobot2Documentation: https://linorobot.github.io/linorobot2
| ROS 2 Distro | Branch | Build status |
|---|---|---|
| Jazzy | jazzy |
 |
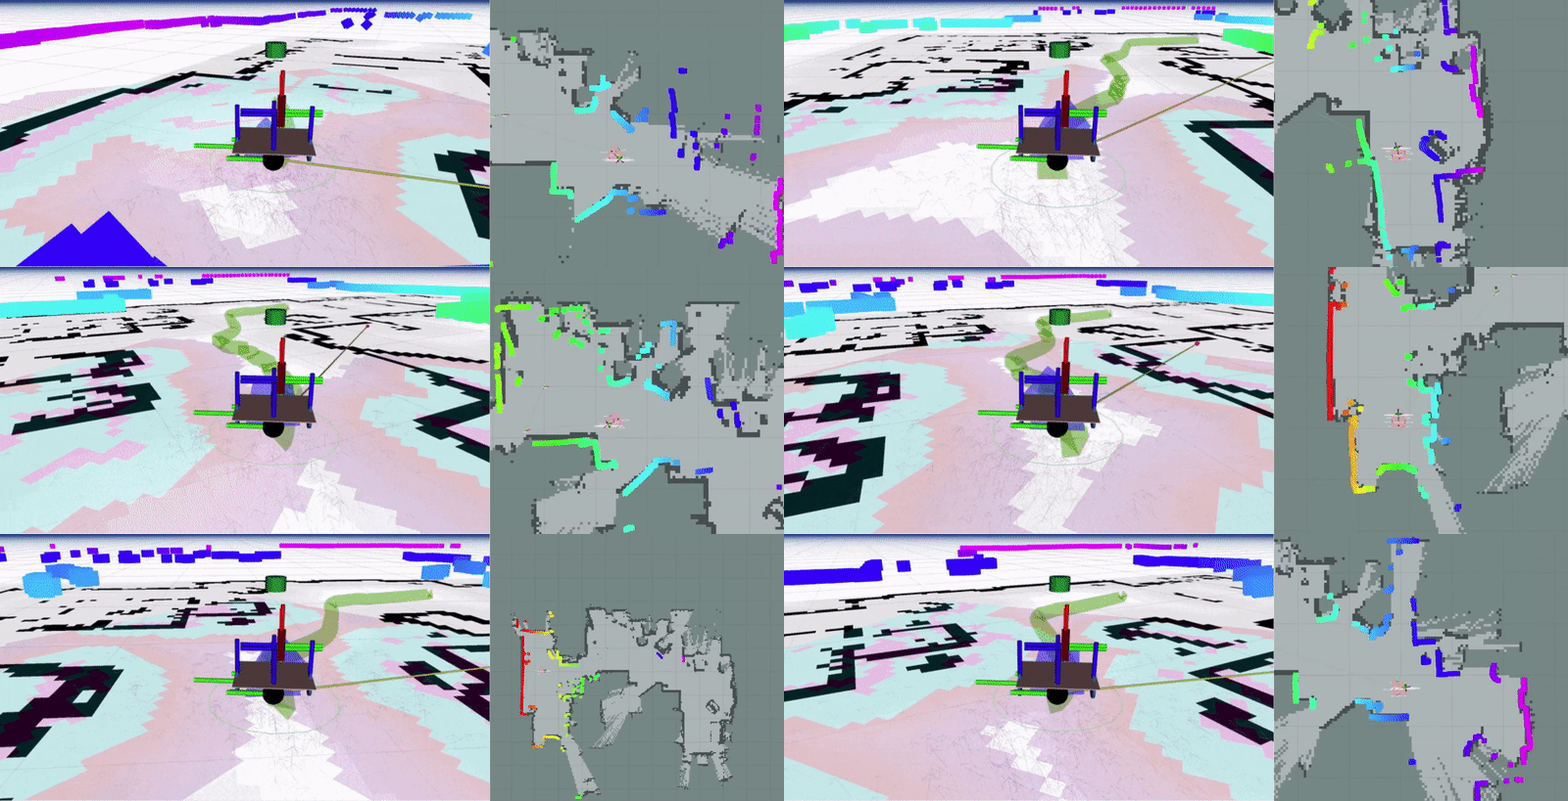
linorobot2 is a ROS2 package that takes your robot from bare hardware to fully autonomous navigation. Whether you're building a physical robot from accessible parts, simulating in Gazebo, learning Nav2, or prototyping new hardware, linorobot2 gives you a complete, working foundation with Nav2, SLAM Toolbox, and robot_localization already wired together.
Supported base configurations: 2WD, 4WD, and Mecanum drive.
linorobot2 ships with working configurations for the full ROS2 autonomous navigation stack. Nav2, SLAM Toolbox, and the robot_localization EKF are configured and ready to go. The same YAML files are used by both the physical robot and the Gazebo simulation, so tuning in simulation transfers directly to hardware.
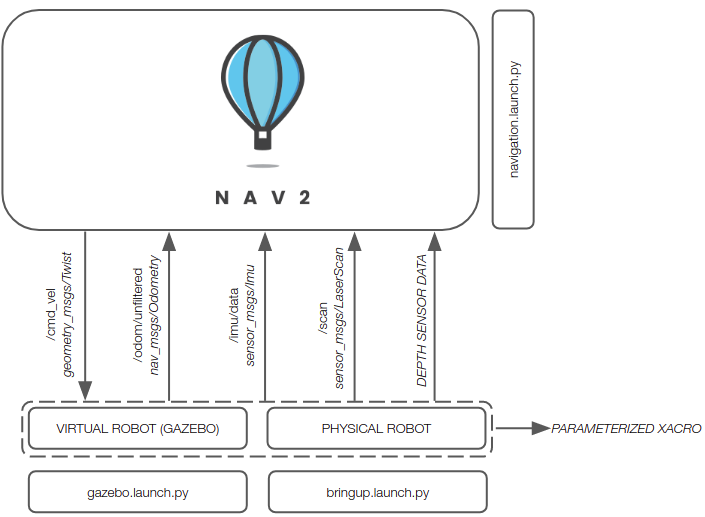
The robot URDF is templated with a 2D lidar, an RGBD depth camera, and an IMU already included and positioned. Changing the robot's dimensions or sensor mounting positions is a matter of editing one properties file. The URDF is also a solid starting point for building a more detailed model: add your CAD meshes and the rest of the stack continues to work.
Two tools in linorobot2_gazebo let you bring your physical environment into Gazebo:
image_to_gazebo: a GUI tool that takes any floor plan image (PNG, JPG, BMP, etc.), lets you calibrate its real-world scale and set the coordinate origin interactively, then generates a complete Gazebo world: 3D wall mesh, model SDF, and world SDF.create_worlds_from_maps: a batch CLI tool that converts all SLAM maps in linorobot2_navigation/maps/ into Gazebo worlds in one command.Both tools produce a Gazebo world that matches the geometry your lidar sees in the real environment. You can develop and test your Nav2 application in simulation with full confidence that the obstacle layout is accurate, then deploy to the physical robot without surprises.
linorobot2 supports a broad range of 2D lidars and RGBD depth cameras out of the box. The install script sets up the correct driver and topic remappings automatically. For a full list, see the Sensors documentation.
Selected supported lidars: RPLIDAR A1/A2/A3/S1/S2/S3/C1, LD06, LD19, STL27L, YDLIDAR, XV11, Intel RealSense (as lidar), ZED (as lidar)
Supported depth cameras: Intel RealSense D435/D435i, ZED/ZED2/ZED2i/ZED Mini, OAK-D/OAK-D Lite/OAK-D Pro
Detailed hardware documentation covering motor driver configuration and micro-ROS firmware for Teensy and compatible boards is at linorobot2_hardware. The firmware publishes odometry and IMU data over micro-ROS so the microcontroller integrates seamlessly as a ROS2 node.
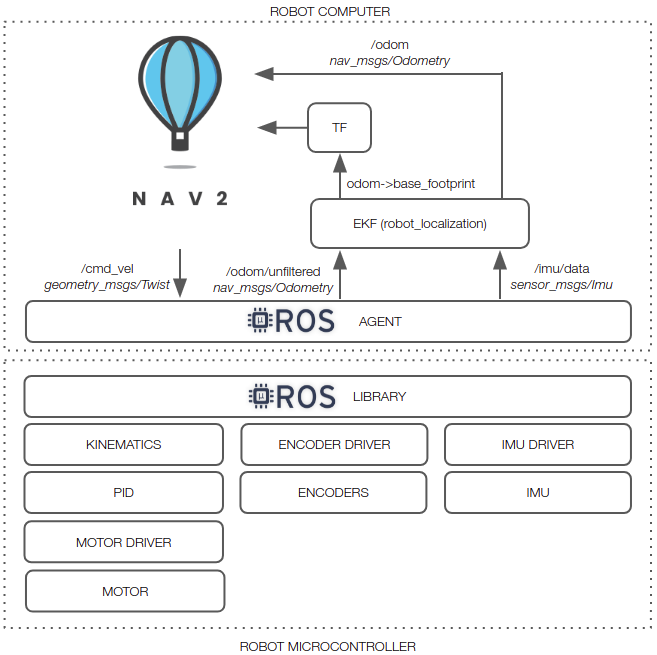
All commands below run on the robot computer unless noted. SLAM and navigation launch files are identical for physical and simulated robots.
Terminal 1:Boot the robot:
ros2 launch linorobot2_bringup bringup.launch.py
Wait for the micro-ROS agent to print session established before continuing.
Terminal 2:Create a map:
ros2 launch linorobot2_navigation slam.launch.py
Terminal 3:Drive to map the area:
ros2 run teleop_twist_keyboard teleop_twist_keyboard
Save the map:
cd linorobot2/linorobot2_navigation/maps
ros2 run nav2_map_server map_saver_cli -f <map_name> --ros-args -p save_map_timeout:=10000.
Terminal 2:Navigate autonomously:
ros2 launch linorobot2_navigation navigation.launch.py map:=<path_to_map>/<map_name>.yaml
Visualize from your host machine at any point:
ros2 launch linorobot2_viz slam.launch.py        # during mapping
ros2 launch linorobot2_viz navigation.launch.py  # during navigation
Terminal 1:Start Gazebo:
ros2 launch linorobot2_gazebo gazebo.launch.py
Terminal 2:Run SLAM or navigation (same commands as physical robot, add sim:=true):
ros2 launch linorobot2_navigation slam.launch.py sim:=true
# or
ros2 launch linorobot2_navigation navigation.launch.py map:=<path_to_map>/<map_name>.yaml sim:=true
Convert any floor plan or building layout image into a Gazebo world with a GUI:
ros2 run linorobot2_gazebo image_to_gazebo
Load your image, calibrate the scale by clicking two known points, set the coordinate origin, and click Generate. The tool writes the STL mesh, model SDF, and world SDF to the package's models/ and worlds/ directories. Launch the generated world with:
ros2 launch linorobot2_gazebo gazebo.launch.py world_name:=<world_name>
Batch-convert all saved SLAM maps to Gazebo worlds in one command:
ros2 run linorobot2_gazebo create_worlds_from_maps
This reads every YAML file in linorobot2_navigation/maps/, extrudes the occupancy grid into a 3D wall mesh, and writes a Gazebo world for each map. Useful for keeping simulation worlds in sync after a mapping session.
Full documentation covering installation, base controller, odometry, sensors, transforms, mapping, navigation and more is in the linorobot2 documentation website
Documentation is stored in the docs/ directory and its subdirectories as a set of markdown files which are published to
the linorobot2 documentation website (implemented using GitHub Pages).
This happens automatically on every push to the current actively maintained main branch (e.g. jazzy).
You can browse the docs locally and review your updates prior to committing and publishing:
sudo apt install mkdocs-material
mkdocs serve
Then open http://127.0.0.1:8000 in your browser.
See the Installation page of the linorobot2 documentation website for full installation instructions covering the Workstation, Robot Computer, Microcontroller, and Docker.
more like this
A Python utility for the Divoom Pixoo 64, allowing for advanced control, customization, and interaction via its API.
search projects, people, and tags